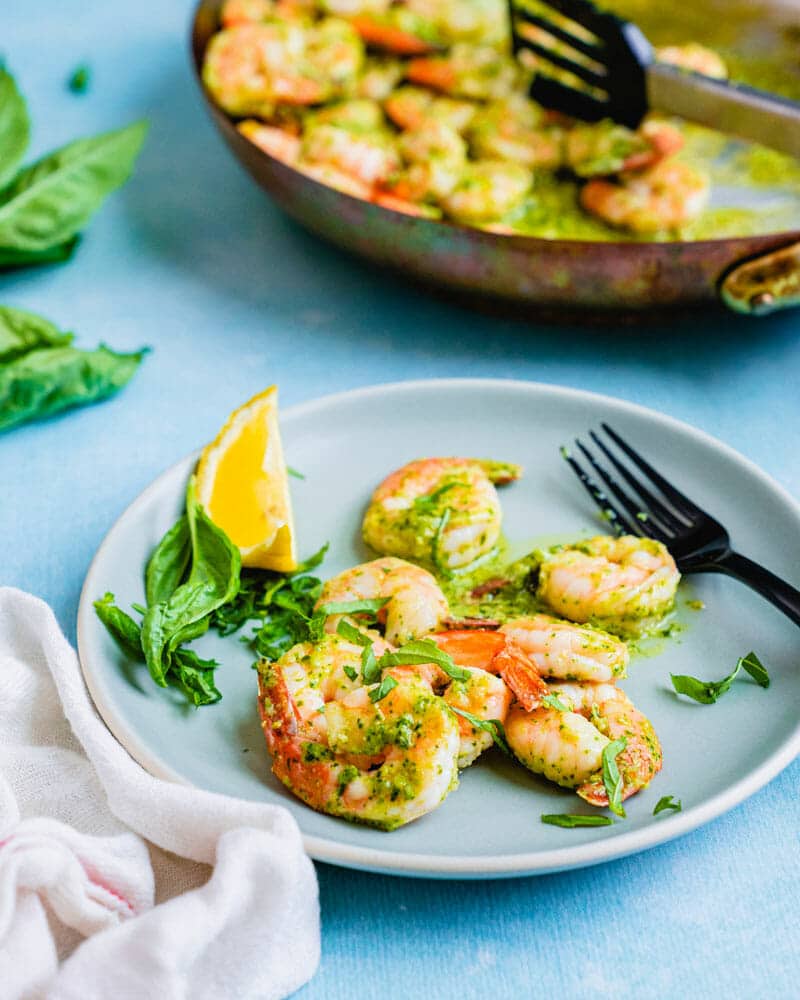
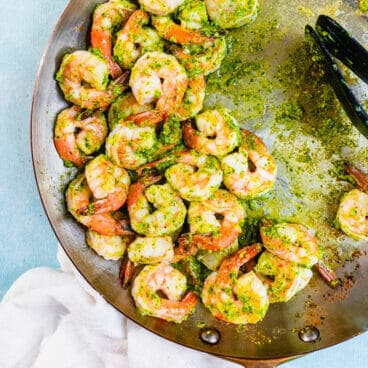
This delicious pesto shrimp comes together in 5 minutes for an easy weeknight dinner! The juicy shrimp is coated in vibrant basil pesto for a simple meal that’s full of flavor.
Here’s an idea that has easy weeknight meal written all over it: pesto shrimp! This bright green, garlicky sauce is the perfect pairing for succulent shellfish. The two flavors go hand-in-hand.
I was inspired to make this recipe because of the bushy basil plant in our backyard. There’s no better use for a big patch of pesto than a pile of juicy shrimp! It’s also great using high quality purchased pesto.
5 Star Reader Reviews
“This recipe is outstanding with wonderful flavor. We had pesto we had made a few days ago. Enjoyed it with a salad and homemade miso dressing. YUMMY!” -Aileen
“Amazing! It was the easiest recipe we’ve made and definitely a weeknight dinner meal. It will be a weeknight staple at my house.” -Jorge
How to Make Pesto Shrimp in 5 Minutes
This is one of those 5-minute easy dinner ideas that saves me so much time on busy weeknights. Now and then, I like to eat healthy seafood like shrimp or salmon. What I love about shrimp is that it cooks so quickly! All you need is just a few minutes in a skillet, and you’ve got dinner. Here are the basic steps for making pesto shrimp:
Pat the shrimp dry. This is key before you start cooking, so there’s not too much extra liquid.
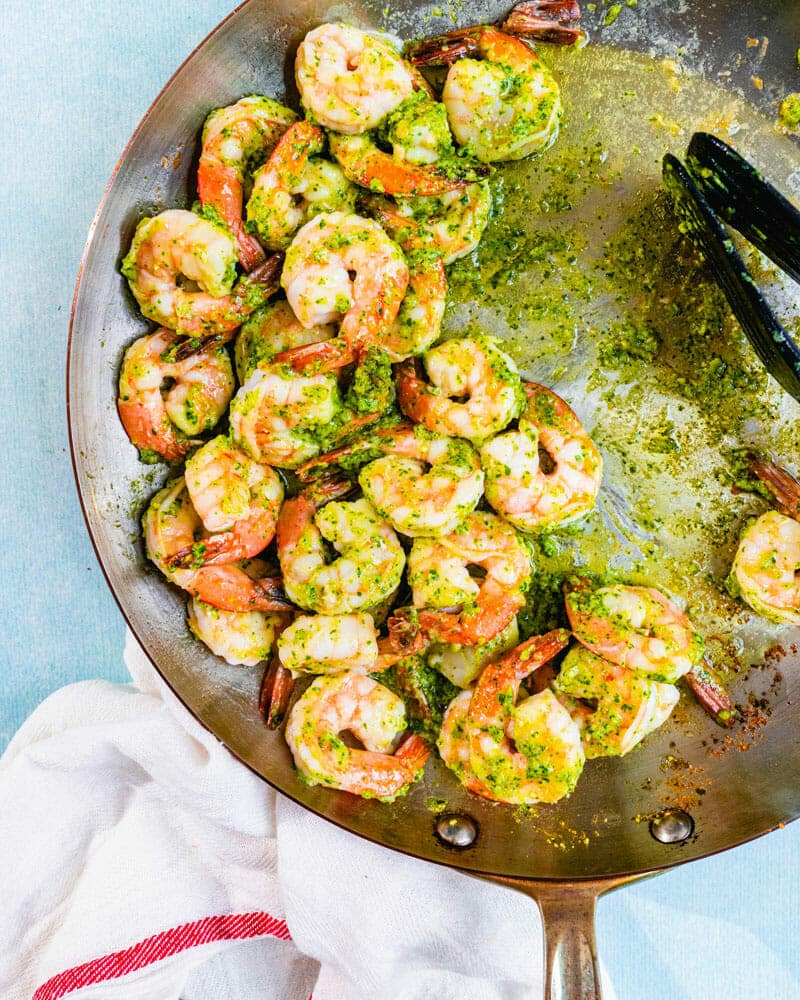
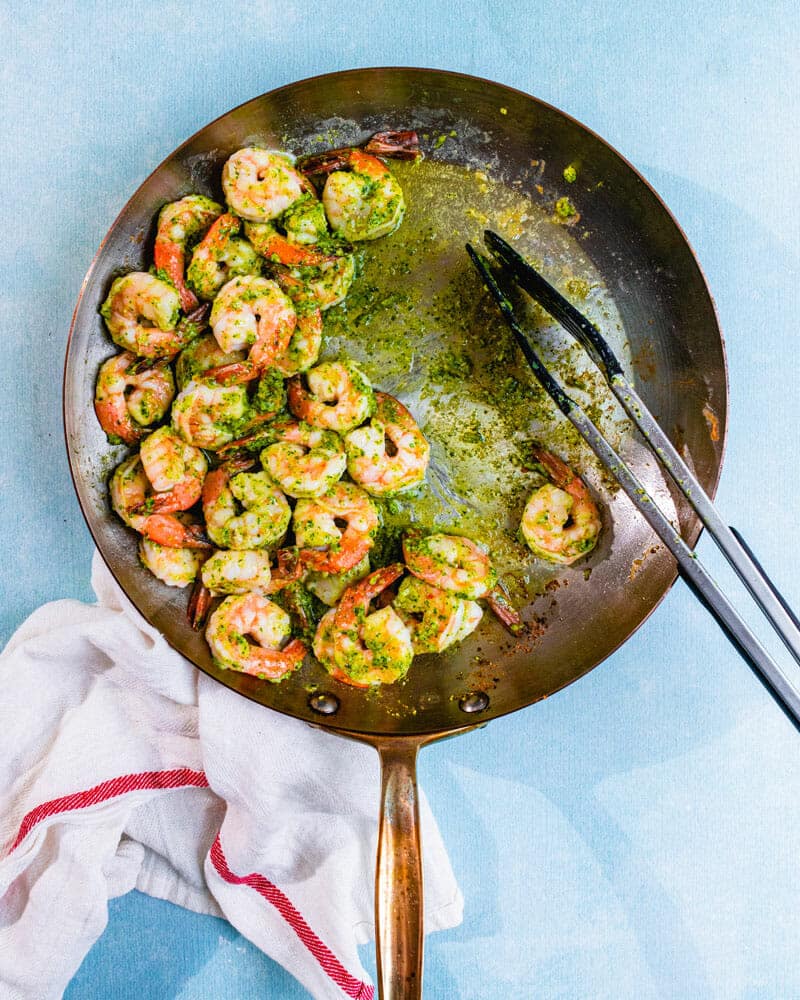
Sauté the shrimp 1 to 2 minutes per side. Heat the olive oil, pop in the shrimp, and cook for 1 to 2 minutes per side.
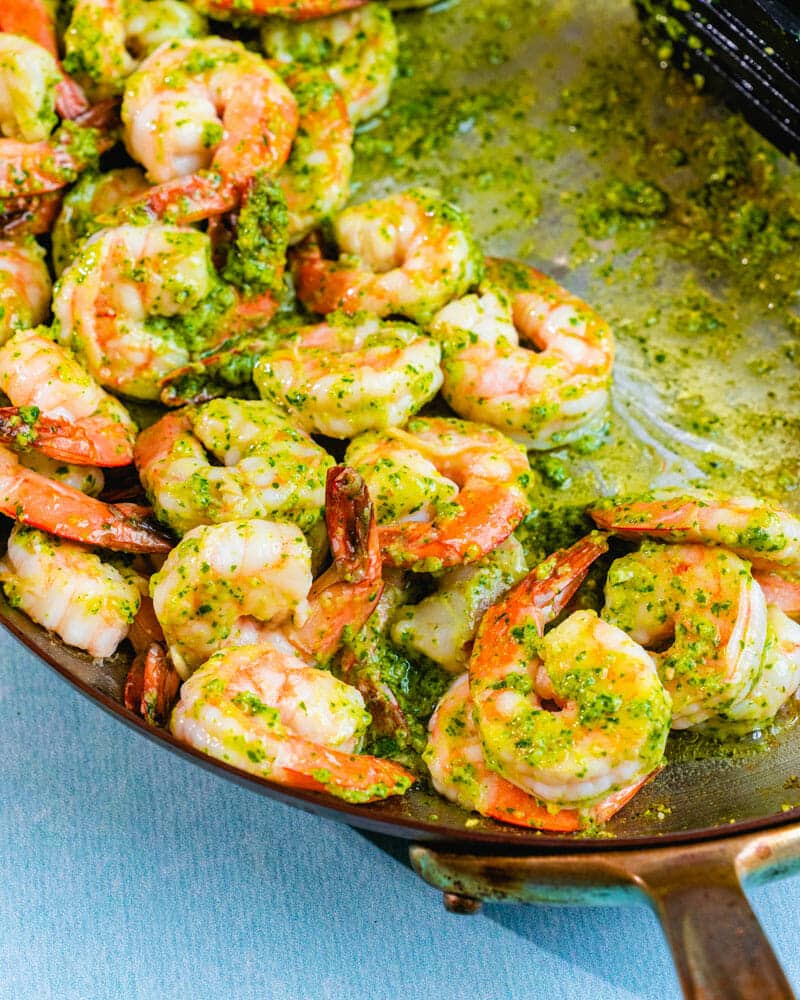
Add pesto for 30 seconds! Coat the shrimp in this sauce for a beautifully bright green visual and an even better flavor. Do not cook any longer than that, or the pesto will darken and turn brown.
Use the Best Quality Pesto
It’s important to use the best quality pesto for this shrimp dish. The best, of course, is homemade. But this requires fresh basil, which is not always available.
If you can’t make homemade pesto, use the best quality brand you can find. The quality varies a lot between brands, so you may need some trial and error before you find your favorite pesto.
Try refrigerated fresh pesto, which can be found in the produce section. In my taste tests, I’ve found this type of pesto tends to have a better flavor than pesto in jars. It’s often sold in tubes.
Tips for Thawing Frozen Shrimp
You can use either fresh or frozen shrimp for this recipe. Frozen shrimp can be just as fresh as shrimp from the fish counter at the grocery store! If you can, try to find wild-caught shrimp, as it’s usually a sustainable option. If you use frozen shrimp, you’ll need to think ahead to thaw the shrimp before making the recipe. Here’s what to do:
Day before: If you think ahead, simply place the frozen shrimp in the refrigerator overnight.
Day of: Place the shrimp in a large bowl of cold water for 15 minutes. Stir every 5 minutes to break up clumps that freeze together. The shrimp should defrost in about 15 to 20 minutes.
What Sides to Serve
Of course, this pesto shrimp isn’t a complete meal in 5 minutes. But it gets you much closer to dinner! Here’s what I suggest serving with to create a full meal:
Pesto shrimp is best served immediately while the sauce is bright green and the shrimp are tender. However, you can store leftovers refrigerated for up to 3 days. The pesto color will darken during storage but it will still taste delicious.
Reheat leftovers in a skillet over low heat for a minute or two until warmed through. I like to add a splash of water or more pesto to refresh the sauce, since it becomes thicker during storage.
Dietary Notes
This pesto shrimp recipe is dairy-free, gluten-free, and pescatarian.
Frequently Asked Questions
Can I use frozen shrimp for this recipe?
Most shrimp are flash-frozen right after they’re caught, so frozen is often very fresh. Just make sure to thaw them completely before cooking: either overnight in the fridge or in a bowl of cold water for 15 minutes. The most important step is patting them completely dry before they hit the pan. Here’s how to thaw shrimp.
Why did my pesto turn brown?
This happens when pesto is cooked too long or at too high a temperature. Basil is delicate and oxidizes quickly when exposed to heat, which causes a brown color. The trick is to add your pesto only in the last 30 seconds of cooking and keep it moving in the pan.
What’s the best pesto to use for this recipe?
I’ve tested this recipe with both homemade and store-bought pesto. If you have fresh basil growing in your garden, making your own basil pesto will give you the brightest flavor and color.
When I’m buying pesto, I like to use the refrigerated kind in tubes (usually found in the produce section) rather than jarred pesto. These tend to have better color, fresher flavor, and don’t taste as salty. Brands like Rana or Buitoni are my go-to picks.
This delicious pesto shrimp comes together in 5 minutes for an easy weeknight dinner! The juicy shrimp is coated in vibrant basil pesto for a simple meal that’s full of flavor.
In a large skillet, heat the olive oil on medium-high heat. Add the shrimp and salt. Cook the shrimp for 1 to 2 minutes per side until almost opaque, turning them with tongs.
Just before the shrimp are fully cooked, add the ¼ cup pesto and continue cooking for 30 seconds, stirring continuously.
Serve immediately. If using store-bought pesto, adjust lemon and or salt accordingly.
Notes
Pesto quality matters: Use the best quality pesto you can find or make your own. Refrigerated pesto (sold in tubes) typically has better flavor than jarred versions.
Don’t overcook the pesto: Add it at the very end and cook for no more than 30 seconds, or it will turn brown and lose its color.
Make it dairy-free: Use a vegan pesto or cashew-based pesto for a dairy-free version.
Flavor boosters: Add a pinch of red pepper flakes for heat, or extra garlic for more punch.
Leftover storage: This dish is best served immediately. Leftovers refrigerated for up to 3 days. The pesto color will darken during storage. Reheat leftovers in a skillet over low heat for a minute or two until warmed through, with a splash of water or more pesto to refresh the sauce.
More Easy Shrimp Recipes to Try
There are so many easy shrimp recipes that make for a fast dinner! Here are some of my favorites to try:
These healthy dips star nutrient-rich ingredients that taste incredible! From savory appetizer or veggie dips to sweet fruit dips, here are lighter versions of favorites that everyone will love.
In the past, to me “healthy dip” meant something bland and tasteless. Then, I started experimenting with ingredients and found that Greek yogurt, protein-rich beans, and spices make dips taste even better!
As a professional recipe developer, I can’t tell you how many times I’ve served cottage cheese ranch or Greek yogurt fruit dip at a party and everyone raves! I’ve tested each one of these recipes multiple times so they have that perfect balance between wholesome and delicious. In honor of the Super Bowl coming up, I’ve made a list of my top party-favorite healthy dips that people legitimately love!
My lightened-up spin on the classic uses a few tricks instead of cream cheese, sour cream, or mozzarella cheese. I've served this at parties where no one believed it was the "healthy version" until I told them. Everyone just stands around the pan dipping!
This protein-packed appetizer has all the tangy buffalo flavor of the classic, but with chickpeas instead! Artichoke hearts also make a convincing stand in for the texture of chicken. The dip is light and creamy, great for dipping pita triangles or celery sticks.
A few simple ingredients turn peanut butter into the most addictive dip that tastes like frosting! I love dipping apples, pretzels, or graham crackers. I make this constantly for my kids because it's ready in 2 minutes and they can't get enough of it!
Here classic hummus gets dressed up with toppings like tomatoes, cucumbers, olives, and feta for a stunning presentation. I love how this transforms basic hummus into something special for parties, and it's great for dipping with pita bread or fresh vegetables.
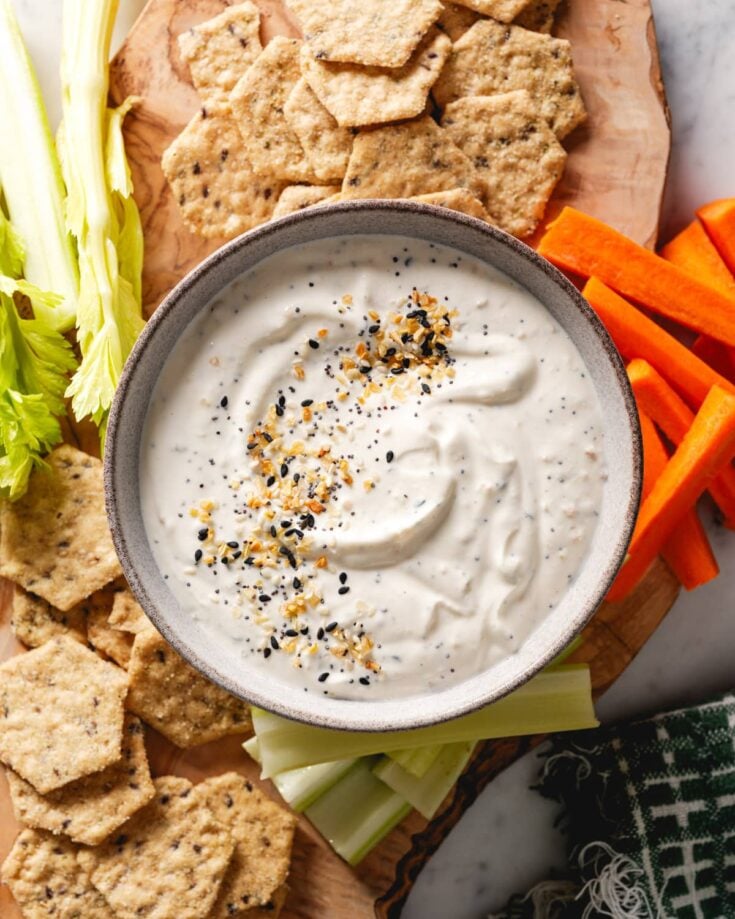
Here Everything Bagel seasoning makes Greek yogurt into an irresistible savory dip that's perfect for dipping veggies! I've brought this to parties where it disappeared faster than any of the traditional dips. I like it with crackers, carrots, celery or red pepper strips.
This genius dessert dip uses chickpeas as the base: it tastes like brownie batter but packs in protein and fiber! Every time I serve this at parties, people rave: and it tastes great with strawberries or pretzels.
This simple dip has a secret: no cheese! It uses just refried beans, green chilis, and spices. The green chilis add a subtle kick to the flavor, and it's my go-to healthy dip for tortilla or plaintain chips.
I've been making this ranch dip for years and it's transformed into our household's standard veggie dip! Greek yogurt and herbs make a ranch dip that's tangier and more flavorful than the packet mix version.
This quick fruit dip comes together with just a few ingredients for the perfect balance of sweet and tangy. It's surprising how these ingredients make a healthy version of caramel that's also totally plant-based.
This creamy cottage cheese dip tastes like ranch but is protein-packed and takes only 5 minutes to make with pantry spices! It’s perfect for parties, snacking, or healthy lunch ideas.
This easy Mexican street corn dip makes the classic flavors of elote into an irresistible appetizer ready in just 10 minutes, with sweet corn, tangy lime, and Greek yogurt! It’s always a favorite at parties.
This creamy French onion dip recipe is fast and full of rich flavor! It’s easy and tastier than store-bought: it comes together quickly and you can make it with Greek yogurt for a healthy spin.
This crowd-pleasing tomato dip has earned a “famous” status at countless parties and gatherings. Made with just 5 simple ingredients, this quick appetizer transforms fire-roasted tomatoes and almonds into a uniquely delicious dip that’s perfect with bread, crackers, or vegetables.
This vegan nacho cheese sauce is easy to make and tastes unbelievably like the real thing! Essentially a plant based queso, it’s creamy and packed with favor with cashews and green chiles.
Turns out, there's no need to buy fruit dip! This lightly sweetened dip made with Greek yogurt and honey or maple syrup makes any fruit platter more fun. People rave every time I serve this one and it takes just 2 minutes to whip up.
Serving Suggestions for Healthy Dips
The right dippers make all the difference with these healthy dips. I’ve found that variety is key when it comes to dippers. For savory dips like the everything bagel, spinach artichoke, and buffalo chicken varieties, try serving with:
Fresh vegetable sticks (carrots, celery, bell peppers, cucumber)
Apple slices (you can toss them with a little lemon juice to prevent browning)
Strawberries, grapes, and pineapple chunks
Pretzels for sweet-salty contrast
Banana slices
Make-Ahead Tips & Storage
Many of these dips taste better made in advance and refrigerated, which makes them perfect for meal prep or party planning. The spinach artichoke dip and buffalo chicken dip can both be made in advance and baked the day of.
I typically make savory dips 1 day ahead and store in airtight containers. The ranch dip and everything bagel dip stay fresh for up to 1 week, and bean-based dips like the hummus and refried bean versions keep well for up to 4 days. For the sweet dips, the fruit dip and apple dip both hold up well for 3-4 days.
from A Couple Cooks https://ift.tt/YxyUwTB
This classic Tom Collins recipe is light, refreshing, and perfectly balanced with gin, lemon, simple syrup, and soda. Perfect for a nightcap or brunch.
The Tom Collins is one of those timeless classic cocktails people keep coming back to: not because it’s trendy, but because it’s actually that good. The first time I ordered one was at a neighborhood bar down the street (that actually opened in the 1930’s). I felt so sophisticated ordering one: and it was just as delicious as I expected!
A cousin of the Gin Fizz, it’s refreshing and complex, with zingy bright lemon juice, botanical gin, a hint of simple syrup, and a load of effervescent bubbles. Once you nail this classic Tom Collins recipe, you’ll understand why it’s endured for over 150 years!
Why You’ll Love This Tom Collins Recipe
This is one of those cocktail recipes that checks every box:
Sweet tart, balancedflavor: The sweet-tart ratio is dialed in so it’s not too sweet
Year-round crowd pleaser: It’s refreshing in summer and uplifting in winter: and it goes over well with just about anyone!
Beginner-friendly: It’s got just four ingredients and basic techniques
Ingredients Needed
Dry Gin: I like to use a London dry gin like Beefeater or Tanqueray for their clean, straightforward profile. (I stay away from very floral gins here.) The original recipe called for Old Tom gin, a slightly sweeter style that’s hard to find these days.
Lemon Juice: Always squeeze your lemons fresh (this is non-negotiable).
Simple Syrup: This classic cocktail sweetener is simple to make in 5 minutes (equal parts sugar and water, heated until dissolved). You can substitute with pure maple syrup for a subtle caramel flavor.
Club Soda: Soda water, sparkling water, or club soda all work: just make sure it’s cold and bubbly.
Garnish: A maraschino cherry and lemon wheel are part of the traditional look of this drink.
Tip: Make Clear Ice
One way to step up this Tom Collins cocktail: make it with clear ice! Clear ice is artisanal ice used in cocktails because of its crystal clear look and organic shapes. It melts slower than regular cloudy ice, keeping the drink cold without diluting it too much.
You can make clear ice at home: all you need is a small cooler and 24 hours. Here’s my full guide on how to make clear ice.
How to Make a Tom Collins
Making a Tom Collins cocktail follows a simple shake-and-build technique:
Combine and shake: Take gin, lemon juice, and simple syrup and shake it together in a cocktail shaker with 4 ice cubes. Shake vigorously for about 15 seconds until the shaker is frosty cold.
Strain and fill: Strain the drink into a glass with ice cubes. Then top it off with soda water.
Garnish: The garnish is what makes the signature Tom Collins. Add a maraschino cherry for the full effect! You can also add a lemon wheel if you’d like.
No Cocktail Shaker? Use a mason jar with a tight lid and a separate strainer.
Flavor Variations & Adjustments
Here are a few adjustments for the flavor of this Tom Collins recipe:
Sweeter Tom Collins: Start with 1 ounce of simple syrup instead of ¾ ounce.
Tarter Version: Stick with ¾ ounce simple syrup. Add an extra lemon slice for visual appeal and squeeze it in before serving.
Vodka or Whiskey: Make a Vodka Collins by substituting vodka for gin (it’s smoother and less botanical), or a John Collins with whiskey.
Maple Sweetener: Replace the simple syrup with pure maple syrup for subtle caramel flavor notes.
How to Serve It
A Tom Collins is nostalgic and classy, perfect for parties and entertaining, or happy hour. It’s great as a:
Do you need a cocktail shaker to make a Tom Collins?
No! While a cocktail shaker is the traditional tool, you can absolutely make a Tom Collins without one. Use a mason jar with a tight-fitting lid to shake the gin, lemon juice, and simple syrup with ice, then strain the mixture through a fine-mesh strainer into your glass.
Can you make a Tom Collins with vodka or another spirit instead of gin?
Yes, the Tom Collins template works well with other spirits. Vodka creates a Vodka Collins that’s smoother and less botanical. Whiskey makes a John Collins with warmer flavors. You can even use tequila for a Mexican-inspired variation.
What’s the difference between a Tom Collins and a John Collins?
These two drinks are almost exactly alike. Technically, the Tom Collins is made with Old Tom Gin, a specific type of gin. The John Collins is the original name of the drink, and sometimes refers to this drink made with any type of gin. However, the modern definition of a John Collins is a Tom Collins made with whiskey. You can also make a Tom Collins with vodka, called the Vodka Collins.
This classic Tom Collins recipe is light, refreshing, and perfectly balanced with gin, lemon, simple syrup, and soda. Perfect for a nightcap or brunch.
This Moroccan chickpea stew is a hearty dinner packed with sweet potatoes, warming spices, and nutritious vegetables. It’s the perfect plant-based comfort food for busy weeknights!
Here’s a healthy dinner idea that’s so hearty and satisfying, it will please everyone around the table: this Moroccan Chickpea Stew! It’s ultra flavorful: the sweet potatoes get tender and creamy, the chickpeas soak up all those gorgeous spices, and everything comes together in one pot.
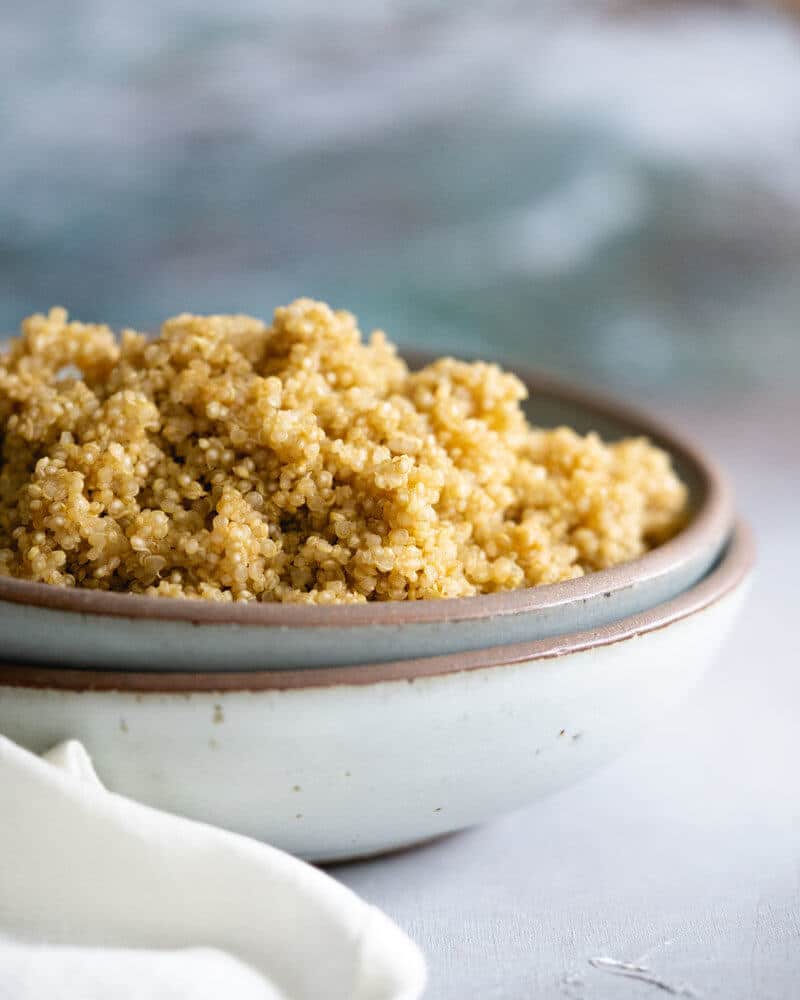
I love serving this stew with quinoa for a tasty plant based dinner that’s also gluten free. If you like, a dollop of Greek yogurt: and most definitely a squeeze of lemon to brighten the flavors!
Why You’ll Love This Recipe
This Moroccan chickpea stew has become a reader favorite, and I hope you’ll love it for these reasons:
Cozy, comforting flavor: The warm blend of cumin, coriander, turmeric, and cinnamon is so satisfying
Packed with nutrients: Every bowl delivers protein from chickpeas, fiber from sweet potatoes, and vitamins from fresh spinach
Simple, one-pot meal: Everything simmers in a single pot, and it’s ideal for meal prep and weekday lunches
5 Star Reader Reviews
“I made this delicious Moroccan Chickpea Stew for dinner tonight. WOW!!!! The flavors are fantastic! My husband and I both had seconds and agreed this is a keeper!” -Carolyn
“This was absolutely delicious! I will definitely be adding this to my weekly rotation of recipes. I used white beans instead of chickpeas and tricolor quinoa. Really yummy!” -Grace
Ingredients You’ll Need
This Moroccan chickpea stew plays on flavors from Moroccan cuisine that make it taste complex and fresh: it’s full of cumin, ginger, a bit of cinnamon, and topped with fresh cilantro, a squeeze of lemon and a touch of Greek yogurt. Here are the major ingredients in the base stew:
Onion and garlic: Aromatics that build the foundation of flavor
Sweet potatoes: Look for firm, unblemished potatoes, which create natural sweetness: no need to peel! Butternut squash also works.
Canned tomatoes: Fire-roasted tomatoes add extra depth if you have them.
Chickpeas: I like using canned chickpeas for convenience, but 1 ½ cups cooked chickpeas also works.
Spinach: Fresh spinach wilts into the stew at the end, adding color and nutrients.
Olive oil: Hearty-healthy oil used for sauteing.
Vegetable broth: I always use regular sodium broth; you can also make homemade vegetable broth.
Moroccan spice blend: A blend of savory and sweet spices: paprika, cumin, coriander and turmeric on the savory side, and ginger and cinnamon on the sweet side. Cinnamon in particular is traditionally used in Moroccan savory stews.
I also like to add a squeeze of lemon and a handful of fresh herbs at the end as a garnish. The acid brings a brightness to the dish that’s the perfect counterpoint to the darker, savory flavors in this chickpea stew.
How to Make Moroccan Chickpea Stew
This Moroccan chickpea stew is very simple to put together and a hearty vegan sweet potato recipe everyone will love. The ingredient may seem long, but that’s mainly due to the spices, most of which are probably already on hand in your pantry. The process is ultra simple: sauté the veggies, add spices and broth, then simmer until the potatoes are tender and your kitchen smells amazing.
This chickpea stew recipe is a fan-favorite that’s been a hit with readers for years; we even put a version in our cookbook! It’s vegetarian, vegan, and gluten free, so hits many diet requirements. Serve it anytime you need a cozy, plant-packed meal!
Serving Suggestions
This Moroccan chickpea stew tastes fantastic as is, but serve it with a whole grain to make it even more filling! Here are a few options:
Quinoa:Quinoa makes a filling counterpoint to this stew: and it’s also gluten-free! It’s not traditionally served in Moroccan cuisine so use couscous to be more true to the cuisine.
Couscous:Couscous is tiny pasta, and it’s a great fit with a Moroccan stew! It also is very quick to cook. Since it’s made with wheat, it’s not suitable for gluten-free diets.
Bulgur wheat:Bulgur wheat is traditional in Middle Eastern cuisine and is a great fit with this stew.
Rice: Rice is another easy grain to serve with this stew! Use long grain white rice or brown rice.
Storage and Reheating
One of the best things about this chickpea stew is how well it keeps. You can store leftovers in an airtight container in the refrigerator for up to 5 days.
To reheat, warm the stew gently on the stovetop over medium-low heat, adding a splash of vegetable broth or water if it has become very thick.
This stew also freezes well for up to 3 months. Thaw overnight in the refrigerator before reheating. The texture of the sweet potatoes becomes slightly softer after freezing, but it still tastes delicious!
Dietary Notes
This Moroccan chickpea stew recipe is vegetarian, vegan, plant based, dairy-free, gluten-free (with quinoa), and refined sugar free. Keep in mind, couscous is not suitable for gluten-free diets.
This Moroccan chickpea stew is a hearty dinner packed with sweet potatoes, warming spices, and nutritious vegetables. It’s the perfect plant-based comfort food for busy weeknights!
In a large pot, heat the olive oil. Sauté the onion for about 5 minutes. Add the minced garlic and sauté about 1 minute.
Stir in the paprika, cumin, coriander, turmeric, ginger, cinnamon, kosher salt, black pepper, and cayenne pepper. Stir about 30 seconds, then add diced tomatoes and broth.
Bring to a boil, then add sweet potatoes and drained and rinsed chickpeas. Simmer 25 to 30 minutes until the potatoes are tender. Stir in the spinach in the last 2 minutes.
Serve over the quinoa, garnished with chopped cilantro, fresh squeezed lemon juice, and a dollop of Greek yogurt.
Notes
*Serve with rice, couscous, or bulgur wheat (couscous and bulgur are not suitable for gluten-free diets).
More Healthy Dinner Recipes
This stew is one of our fan-favorite plant-based dinner recipes that readers come to again and again! Here are a few more tasty ways to eat dinners packed with plants: