Here’s my air fryer dinner recipes cheat sheet: five proteins ready in 15 minutes or less! Pair any protein with my salads and whole grains for a weeknight dinner that practically makes itself.
A Couple Cooks · Weeknight Playbook
The Air Fryer Dinner Cheat Sheet
Five proteins. 5–15 minutes each. One formula that makes dinner easy every single night of the week.
Hi there! As a working mom of two and busy person in general, I’m constantly looking for easy dinner ideas.
My husband Alex and I are cookbook authors, so we’re always coming up with new ideas. But we’ve found that on the regular, we keep landing on the same formula for healthy dinners that feel low effort. What’s the secret? I’m sharing it with you today.
My Go-To Easy Dinner Formula
I’ve landed on a simple structure that makes weeknight dinner almost automatic: air fryer protein over a big salad, with a scoop of whole grains on the side if I want something more substantial. It covers everything: protein, vegetables, fiber, healthy fats, without any complicated planning.
Air Fryer Protein + Big Salad + Whole Grain (optional)
Everything cooks at 400°F: that’s the only temperature you need to remember! While the protein runs, make a salad or whole grain to go alongside: or have it prepped the night before.
Why air fryer? Well, I’ve found it makes everything quick and simple, with minimal clean up and feels super doable for weeknights.
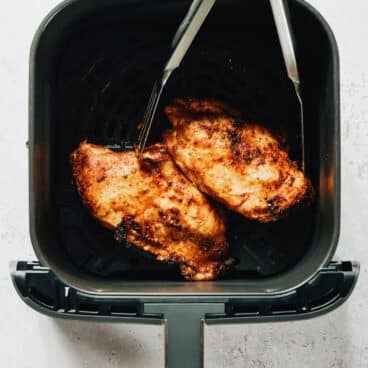
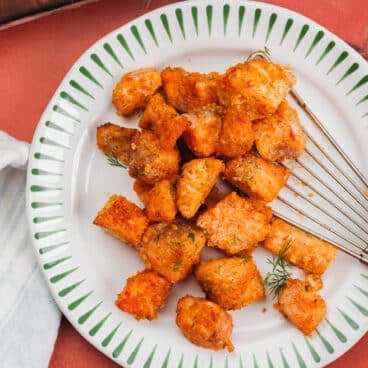
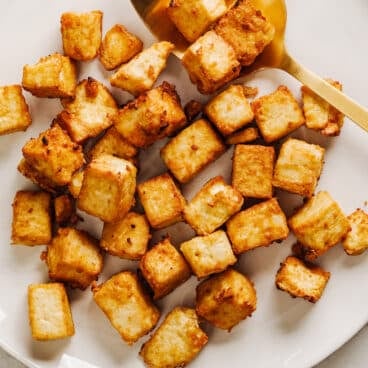
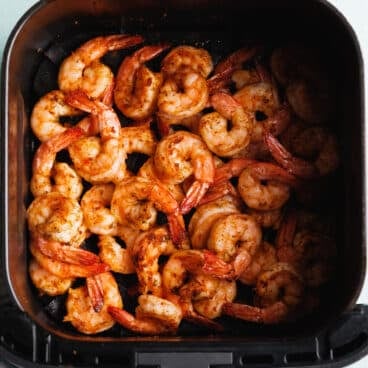
5 Air Fryer Protein Recipes: Cheat Sheet!
All recipes serve 4. Preheat the air fryer first: it makes a real difference for browning.
I was an air fryer skeptic for a long time. But after cooking these proteins on repeat, I now can’t imagine weeknight dinners without it! Here’s what I like about the air fryer
No babysitting
Unlike a skillet on the stove, the air fryer does its thing without you watching! You can use this time to do other meal prep.
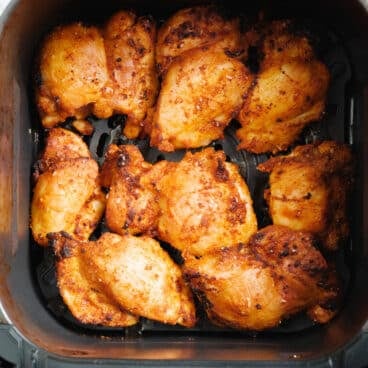
Faster than the oven No 15-minute preheat, and it’s so fast: chicken thighs are done in 13 minutes, shrimp in 5.
Better texture The hot circulating air creates a lightly crispy exterior that you really can’t replicate in a regular oven or pan.
Barely any cleanup No oil splatters, no crusted sheet pan. The basket washes clean quickly.
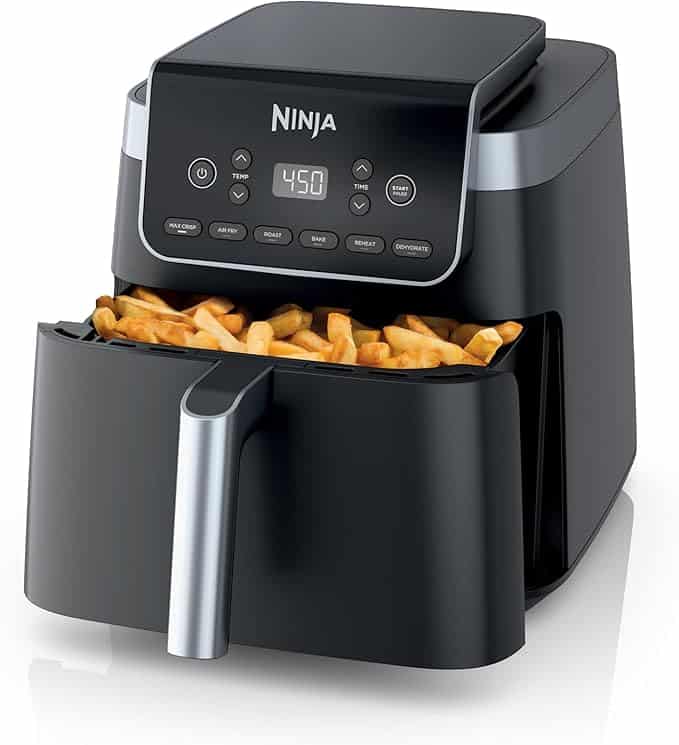
The air fryer I use
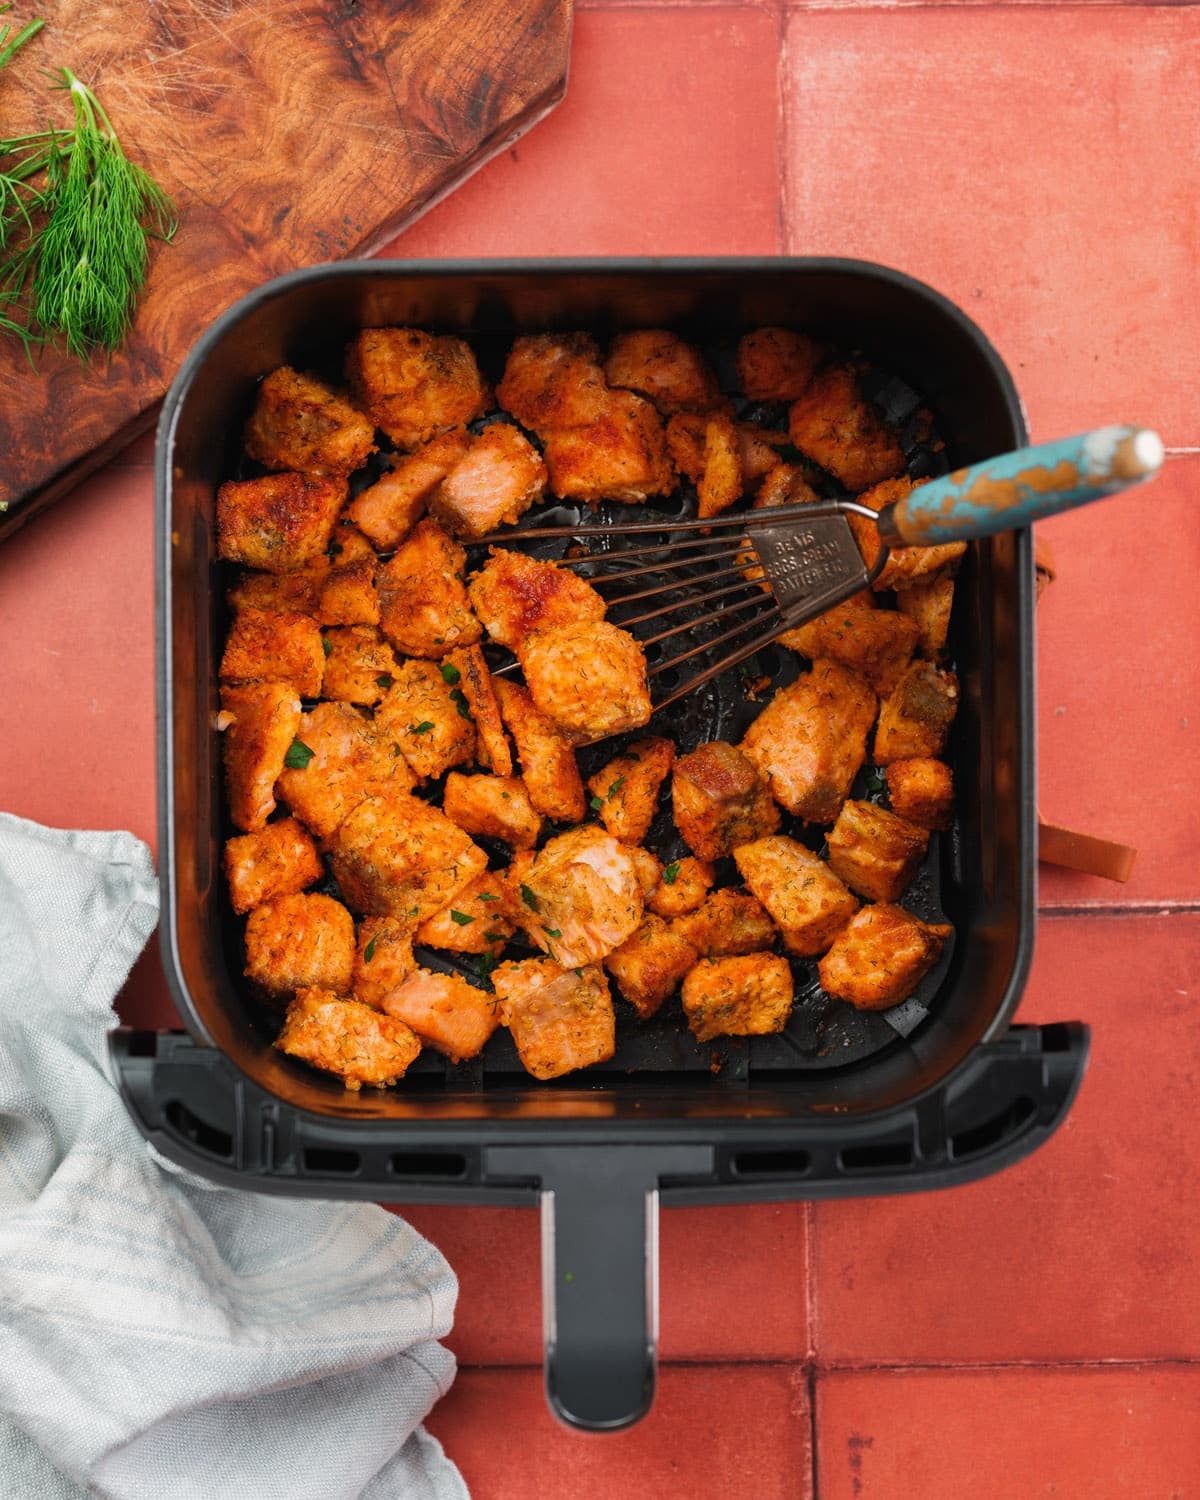
I cook with this large-basket air fryer (at least 6.5 qt capacity), which fits all 8 chicken thighs or 1½ lbs of salmon in a single layer. If your basket is smaller, just plan to cook in two batches.
Oven with air fryer mode
I also have an oven with an air fryer mode and basket: this works the same way for all these recipes! It gives you even more room to add vegetables alongside the protein at the same time.
Tip: Parchment with holes (air fryer liners) can be used for salmon bites and shrimp to minimize cleanup even further.
10 Salads to Pair With Air Fryer Proteins
The protein goes straight from the basket over the salad. Warm, crispy protein plus lots of veggies is the combination I come back to every week.
On nights when I want something more substantial, I add a whole grain alongside. You can batch-cook a big pot to use all week.
Farro — nutty and chewy, my personal favorite. It holds up well and is super filling.
Brown rice — the easy, reliable base. Works with every protein and every sauce.
Quinoa — quick-cooking (15 minutes), high protein, and lighter than rice.
Couscous — technically a pasta, but it functions like a grain and cooks in 5 minutes. Great for if you’re in a rush.
Bulgur — tender, nutty, and cooks in minutes. A staple of Mediterranean cooking with a pleasantly light texture.
from A Couple Cooks https://ift.tt/zyoY70L
These easy grilled portobello mushrooms are juicy, smoky, and ready in 20 minutes: no marinating required! Toss them on the grill as a side dish or serve on a bun as a plant-based burger.
Ready to up your grilling game? Try these incredible grilled portobello mushrooms! They’re juicy and bursting with big, meaty umami. My method for grilling them is fast and easy: unlike most recipes, there’s no marinading time required.
Just sprinkle with olive oil and balsamic vinegar, and pop them on the grill. I use this method all the time and it make for the most tender, juicy and irresistible mushroom caps. Here’s how to do it!
Why You’ll Love This Recipe
No marinating required. Just drizzle, season while you’re preheating, and grill: no planning ahead needed!
Cooks in 15 minutes. A quick and easy summer side.
Vegan and gluten-free. Works for nearly every guest at the table.
Ingredients You Need
Portobello mushrooms are what convinced me to stop hating this vegetable (or really, fungus). The meaty flavor you can get when you cook them is unreal! The grill is really the best cooking method for portobello mushrooms because it infuses that smoky flavor, too. All you’ll need is a few ingredients to get massive flavor:
Portobello mushroom caps: Look for large, firm caps without bruising or soft spots. The bigger the cap, the meatier the result.
Olive oil: Helps the mushrooms cook evenly and prevents sticking on the grill grates.
Balsamic vinegar: The flavor secret: it adds a tang and a hint of sweetness. If you love the flavor, you can also try finishing them with a drizzle of balsamic glaze.
Salt and pepper: Of course; to draw out the flavors even more.
How to Grill Portobello Mushrooms
Here’s my master technique for grilled portobello mushrooms! One thing to note is that they give off quite a bit of liquid as you grill them. That’s why it’s important to grill portobellos with the gill side up first. The liquid will pool in the cap, and then you can flip it to drain the liquid through the grates. Here’s how to do it (or jump to the recipe):
Preheat a grill to medium high heat: that’s 375 to 450 degrees.
Prep the mushrooms: Remove the stems and drizzle with olive oil, balsamic vinegar (quantities below).
Grill: Place on the grill gill side up, and 10 to 14 minutes, then flip and grill 2 to 3 minutes until juicy and browned.
Serving Them As a Portobello Burger
The nice thing about grilled portobello mushrooms: you can serve them as a side dish or as a main dish! Eat them on a bun and they become “portobello burgers.” But make sure to add a source of protein to the sandwich: like cheese! Or serve them with a hearty side filled with plant-based protein. Mushrooms don’t have much protein on their own, so they’re not as filling as a normal burger would be. Here are some ideas on how to serve them:
Classic Burger: Try our juicy Classic Portobello Burger topped with special sauce (like Big Mac sauce).
Naturally, grilled portobello mushrooms are perfect as a side dish! Alex and I often grill up a whole tray of veggies including portobellos. Or here are some main dishes that become a meal with grilled mushrooms:
Let me know if you make these grilled portobello mushrooms: they’re one of our favorite treats to go with summer grilled meals.
Storage Instructions
Grilled portobello mushrooms are best eaten fresh off the grill, but you can also store leftovers for up to 3 days refrigerated. Reheat them in a skillet over medium heat or in a 375°F oven. Leftovers work well in sandwiches, wraps, or layered into a grain bowl.
Dietary Notes
This grilled portobello mushrooms recipe is vegetarian, vegan, plant-based, dairy-free, and gluten-free.
Frequently Asked Questions
Do I need to marinate portobello mushrooms before grilling?
Nope! Olive oil and balsamic vinegar applied while the grill is preheating bring big flavor without any wait time.
Should I remove the gills before grilling?
You don’t have to. The gills are edible and actually help hold the olive oil and balsamic in place during grilling. If you prefer to remove them for visual reasons, use a spoon to scrape them out gently before seasoning.
Can I make these without a grill?
Yes. Roast them in a 450°F oven on a baking sheet for about 15 minutes until tender. See my Stuffed Portobello Mushrooms recipe. Drain off any excess liquid before serving.
What can I make with leftover grilled portobello mushrooms?
These easy grilled portobello mushrooms are juicy, smoky, and ready in 20 minutes: no marinating required! Toss them on the grill as a side dish or serve on a bun as a plant-based burger.
Preheat a grill to medium-high heat (375 to 450 degrees Fahrenheit).
Clean the portobello mushrooms and remove the stems. Drizzle the gill sides with the olive oil and use your hands to rub all over the mushrooms, including the bottoms. Then drizzle the gill sides with balsamic vinegar, sprinkle with kosher salt, and add several grinds of black pepper.
Place the mushrooms directly on the grill grates gill side up and grill 10 to 14 minutes until tender and juicy. Liquid will pool in the cap. Flip the mushrooms (this drains the liquid into the grates) and cook for an additional 2 to 3 minutes until browned.
More Grilled Veggies To Try
Grilled vegetables are our favorites! Here are some of the best veggies to throw on the grill:
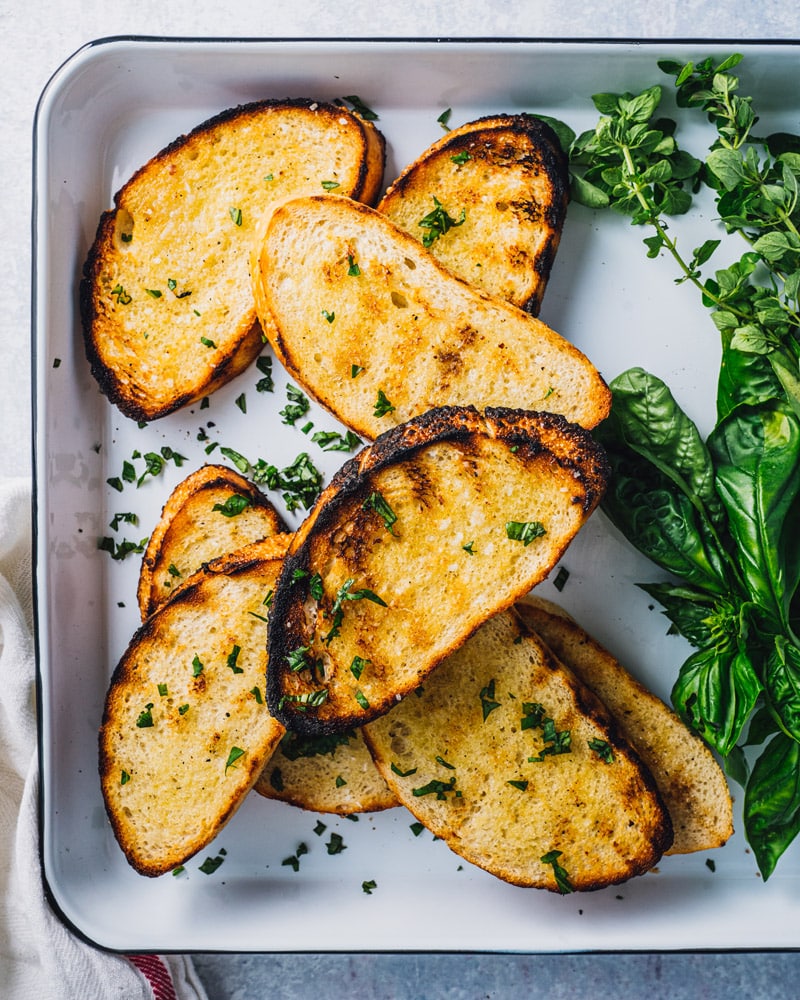
This grilled bread comes out crispy with a perfect char in just 10 minutes! Use it as a base for appetizers or make grilled garlic bread as a stunning summer side dish.
Need an amazing appetizer or side dish? Enter: grilled bread! In my opinion, there’s nothing quite like bread for soaking up the charred, smoky flavor of the grill.
This recipe works two different ways: first, you can use it as a base for a summertime bruschetta or fancy toast. Or, make it as grilled garlic bread: a delicious side dish that’s fantastic for any summer meal!
Ingredients You Need
Grilled bread is delicious for appetizers, but honestly we love it as grilled garlic bread the most! Either way, you don’t need many ingredients for this recipe. Here’s what you’ll need:
Bread: any type of rustic artisan loaf will do! A good ciabatta is nice, but anything works
Olive oil: for brushing
Kosher salt: for sprinkling
If you’re going the garlic bread route, you’ll need garlic as well. You can finish the bread with olive oil or butter, but it’s not required. All you need to know: brush the slices with olive oil before throwing it onto the grill.
How to Grill Bread: Temperature and Timing
All you need to know about how to grill bread? The grill temperature and the timing. Once you’ve mastered that, just memorize it and make this bread on repeat. Here’s what to know:
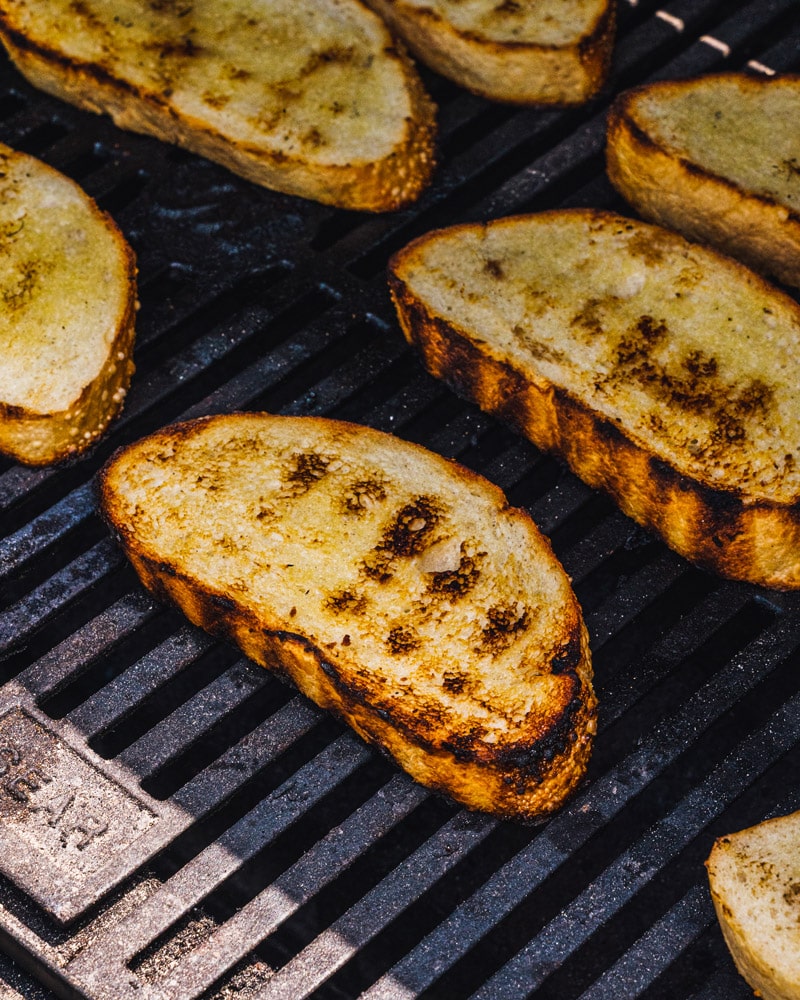
Preheat the grill to medium high: that’s 375°F to 450°F.
Cook on the grates 1 to 2 minutes per side. That’s it! You’ll want to be just started to get charred at the edges.
How to Make Grilled Garlic Bread
Want grilled garlic bread? This recipe works for it too. The trick? Rubbing garlic on the bread. It sounds odd, but it really works! This is the method used in the Spanish tapas recipe, pan con tomate and it works like a charm.
Rub the cut side of a peeled garlic clove on the bread. This infuses massive garlic flavor into each toast! It doesn’t look like anything, but trust us! Take one bite and it’s perfectly garlicky.
Or, make garlic butter and brush it on after grilling. Follow the instructions in our Garlic Bread recipe.
Topping Ideas: Build an Appetizer
Another way to use grilled bread? For summery appetizers and fancy toast! Here are some great ideas for ways to top this crunchy toast:
Classic bruschetta: Chop tomatoes, garlic, and basil to make a tangy classic Italian topping, adding Balsamic Reduction if you like.
Whipped feta and honey: Top with Whipped Feta Dip, a drizzle of honey, and a crack of black pepper.
Goat cheese and mushrooms: Spread on goat cheese, sauteed mushrooms, and fresh oregano.
Grilled bread is best eaten immediately while it’s warm. If you have leftovers, store them in a bread bag or wrapped in a towel use within a day. You can re-crisp slices in a 375°F oven for a few minutes if you’d like, or even pop them in the toaster.
Dietary Notes
This grilled garlic bread recipe is vegetarian, vegan, plant-based and dairy-free.
This grilled bread comes out crispy with a perfect char in just 10 minutes! Use it as a base for appetizers or make grilled garlic bread as a stunning summer side dish.
1 garlic clove, peeled and sliced in half (optional)
Butter (optional)
Instructions
Preheat: Preheat a grill to medium-high heat (375 to 450 degrees).
Grill: Brush each side of the bread lightly with olive oil. Place the slices on a baking sheet and sprinkle with 1 pinch of salt on top of each. Grill 1 to 2 minutes per side, until crispy and just starting to char on the edges.
Serve: Remove from the heat. If desired, rub each slice with the cut side of the garlic and a bit of butter or additional olive oil (we rubbed on a small pat of butter between all the slices). Add another sprinkle of kosher salt if serving plain as garlic bread, and top with chopped herbs if desired.
More Grill Recipes to Try
There are so many ways to grill up delicious treats in the summer! Here are some of our top grilled recipes:
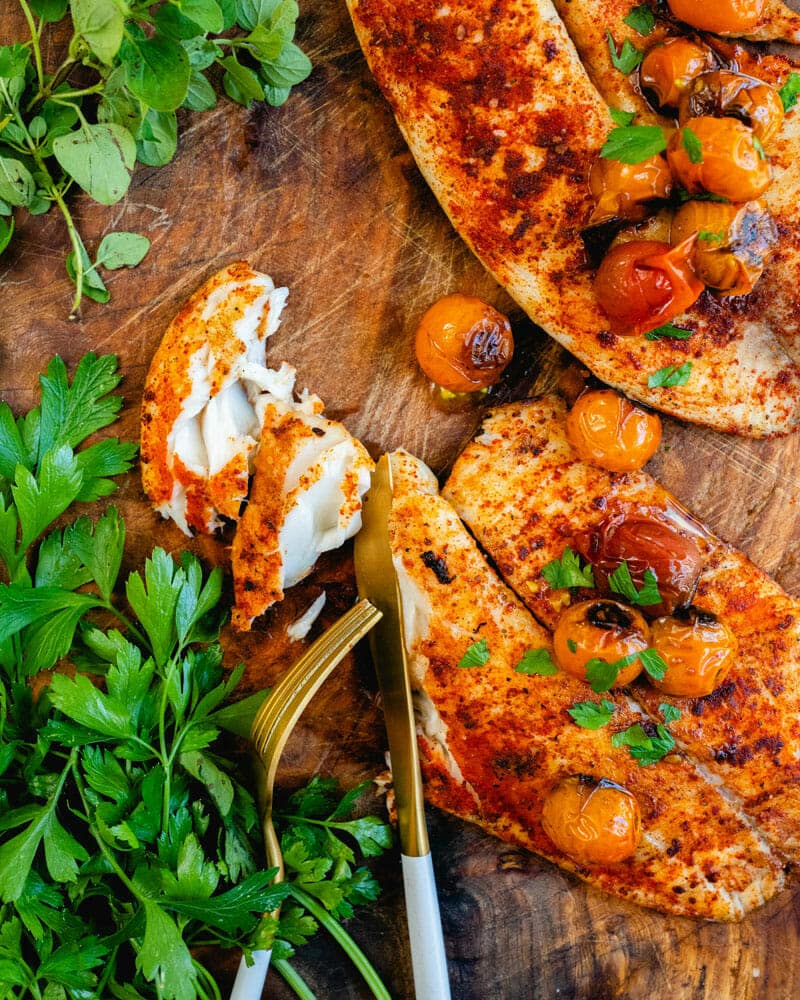
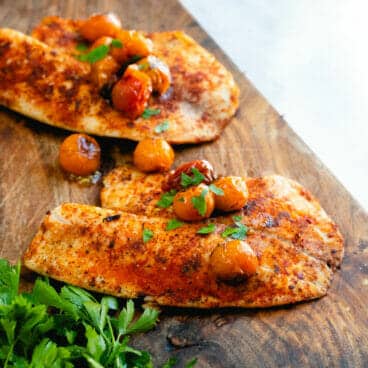
This grilled tilapia is perfectly seasoned and easy to make! It’s a light and flaky fish that’s full of flavor for a simple, healthy dinner recipe.
Here’s a recipe that’s impressive with little effort: grilled tilapia! This flaky white fish has nudged its way into my heart. I eat the Mediterranean diet, and this is where I often turn when I’m looking for a delicious seafood dinner.
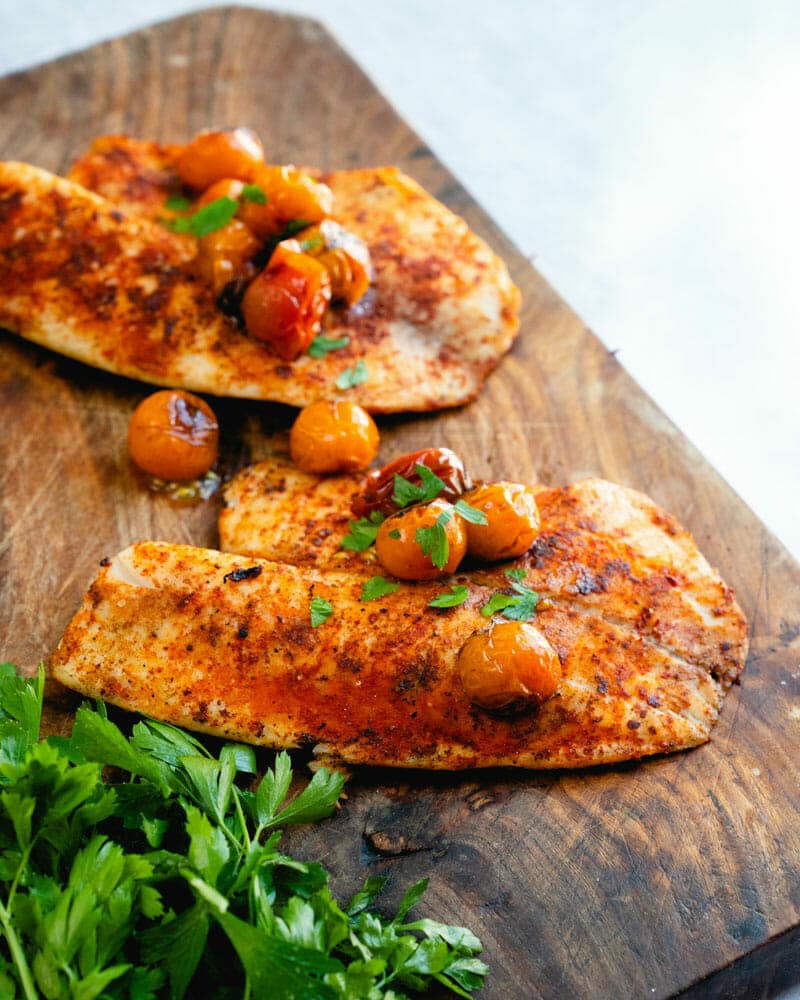
If you’re looking for a fun grilled fish recipe, this flaky tilapia is bursting with savory, smoky flavor. Topped with sweet and tender blistered cherry tomatoes, it looks stunning and they add pops of sweet flavor. It’s the ideal summer meal for entertaining or even a weeknight. (Plus, my kids love this one: double score.)
Ingredients For Grilled Tilapia
This grilled tilapia recipe is one of those back-pocket recipes that every home cook needs. Once you’ve made it once, memorize it and make it on repeat! Here’s what you’ll need for this easy, healthy recipe:
Tilapia fillets: Tilapia is a mild, flaky white fish that’s a relatively affordable choice. You can use fresh or frozen here. (Most tilapia is farm-raised; keep reading for choosing sustainable options.)
Olive oil: This heart-healthy oil is great for grilling.
Spices: My homemade spice blend includes smoked paprika, garlic powder, onion powder, and celery seed.
How to Grill Tilapia: Step by Step
Just throw those beautiful fish fillets right onto those grill grates. There’s no need for any monkey business with foil! The best grilled fish is made right on the hot grill. You can use this method for other white fish, like grilled cod or grilled salmon.
Here’s what you need to know about the heat level and grill time:
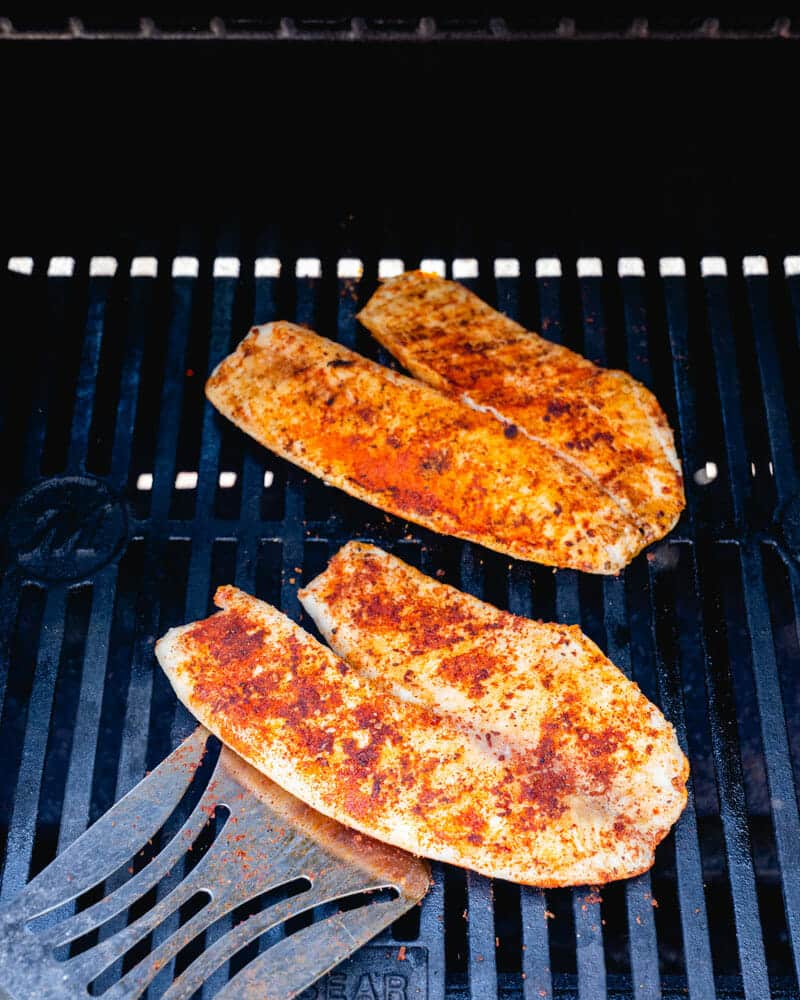
Step 1: Preheat a grill to medium-high heat (375 to 450°F). Pat the tilapia dry with a clean towel. Rub it with olive oil and sprinkle with kosher salt. Mix 2 tsp smoked paprika, ½ tsp garlic powder, ½ tsp onion powder, and ⅛ tsp celery seed in a small bowl, then pat it onto the fish.
Step 2: Grill the tilapia skin side down for 3 to 4 minutes until grill marks appear and it releases from the grates. Flip and cook another 3 to 4 minutes, depending on the thickness, until flaky and the internal temperature is 130°F.
Step 3: Remove from the grill to a baking sheet and allow to rest for a few minutes, then serve.
Pro Tip For When To Flip
You don’t even need to oil the grates to keep fish from sticking on the grill. Here’s the secret: don’t turn your fish too soon! Wait until the fish is cooked enough that it releases from the grates, then flip it.
Buying Tilapia
Most of the tilapia available to buy is farm-raised, so you’ll want to look for responsibly farmed tilapia. You can use the recommendations from Monterey Bay Aquarium Seafood Watch when looking for sustainable tilapia.
Seasoning For Grilled Tilapia
The spice blend I love for grilled tilapia is a spin on my popular “magic” seafood seasoning, but simplified! Here are a few notes on the ingredients:
Smoked paprika: This Spanish version of paprika infuses a smoky essence to foods, and it’s one of my secret weapons! Find it in your local grocery store labeled as pimentón, Spanish smoked paprika, or sweet smoked paprika. I recommend seeking it out if at all possible for that smoky flavor, though standard paprika works as a substitute.
Garlic powder and onion powder: These bring big savory notes to this spice blend.
Celery seed: This spice is absolutely worth stocking, and it brings a nuance that’s evocative of Old Bay. You can also use it again in other recipes like my fan-favorite chickpea salad sandwich or chicken tacos.
Here’s a way to dress up grilled tilapia: top it with blistered cherry tomatoes! These blistered tomatoes are cooked in a hot pan for a few minutes until charred and tender. The pop of sweet is the perfect complement to the flaky savory fish! Follow these basic steps:
Heat a generous drizzle of olive oil in a large skillet or cast iron pan.
Add a handful or two of cherry tomatoes. Cook for 1 minute without touching the pan, then 2 to 3 more minutes until blistered, shaking the pan several times to rotate the tomatoes.
Turn off the heat and drizzle with the balsamic vinegar, gently shaking a few times. Add 2 pinches kosher salt and black pepper to taste.
This grilled tilapia makes a stunning, healthy dinner recipe! It’s one of those meals that works for a dinner party or a weeknight meal, which is my kind of cooking! (You know, pretty simple.) Here are some sides that make this a tasty Mediterranean-style meal:
This grilled tilapia recipe is gluten-free, dairy-free and pescatarian.
Frequently Asked Questions
Is tilapia a good fish for grilling?
Yes! Tilapia’s mild flavor and delicate texture make it a fantastic choice for grilling. Just be mindful of overcooking as it can become dry.
How do you keep tilapia from falling apart on the grill?
Here are a few tips: Use medium highheat: This helps sear the fish and create a crust for easier flipping. Wait for the fish to release from the grates before flipping. This takes about 3 to 4 minutes with tilapia. Handle with care: Use a wide spatula to avoid breaking the fillets.
What’s the best way to season tilapia for grilling?
Tilapia’s mild flavor welcomes a variety of seasonings! Here are some ideas: Simple: Salt, pepper, lemon, garlic powder Citrusy: Lime juice, zest, chili powder, cumin Herby: Fresh dill, parsley, a touch of thyme Cajun: Blackened seasoning
How long should I grill tilapia?
Grill tilapia for about 3-4 minutes per side, or until it’s cooked through and flakes easily with a fork. The internal temperature should reach 130 to 140°F (54 to 60°C).
What are some delicious sides to serve with grilled tilapia?
Grilled tilapia pairs wonderfully with: Rice or quinoa: To soak up the flavorful juices Grilled vegetables: Asparagus, zucchini, bell peppers Tropical salsa: Mango, pineapple, avocado Simple salad: A light side salad to balance the meal
Preheat a grill to medium-high heat (375 to 450°F).
Bring the tilapia to room temperature for about 15 minutes.
Pat the tilapia dry with a clean towel. Rub it with the olive oil and sprinkle it with the kosher salt and fresh ground pepper. Mix the smoked paprika, garlic powder, onion powder, and celery seed in a small bowl, then pat it on to the fish.
Grill the tilapia skin side down over indirect heat for 3 to 4 minutes, until it releases from the grates. Flip and cook another 3 to 4 minutes, until the fish is tender and just cooked through (internal temperature is 130 to 140°F or 54 to 60°C). Allow to rest for a few minutes, then serve, topping with blistered tomatoes if desired. Store leftovers for up to 3 days refrigerated in an airtight container.
Notes
*If you can’t find it, you can use sweet paprika. But smoked paprika brings the best flavor with a hint of smokiness.