Pakistani dishes in Usa
  • Home
  • About us
  • New
  • Featured
    • Lifestyle
    • Sports Group
      • Category 1
      • Category 2
      • Category 3
      • Category 4
      • Category 5
    • Sub Menu 3
    • Sub Menu 4
  • Contact Us

This blue margarita recipe uses Blue Curaçao liqueur for a bright spin on this classic cocktail with sweet-tart citrus flavor! It’s stunning, simple, and ready in 5 minutes.

Blue margarita

Here’s a bright-colored margarita that I’m personally enamored with: the Blue Margarita. As a certified mixologist and unabashed fan of blue drinks, this spin on the classic is one of my favorites!

This margarita looks like the Caribbean because of Blue Curacao liqueur, an orange liqueur that’s been manufactured on the island of Curacao since 1896. It gives this drink an infusion of citrusy flavor that pairs perfectly with tequila and lime, in my opinion.

Ingredients in a Blue Margarita

The margarita is one of the most popular classic cocktails in history. It was invented in Mexico in the 1930’s and has stood the test of time. For my classic margarita I use the International Bartender Association’s IBA official cocktails definition: just tequila, Cointreau (or Triple Sec) and lime juice. The blue margarita just swaps out the orange liqueur for Blue curaçao. The ingredients you’ll need are:

  • Tequila (reposado or blanco)
  • Blue Curaçao
  • Lime juice

A Blue Margarita tastes like a margarita, but with a slightly sweeter, more citrusy profile than the classic made with Triple Sec or Cointreau. The Blue Curaçao brings a little more bittersweet citrus depth to balance the zesty lime and the tequila backbone.

Blue curacao

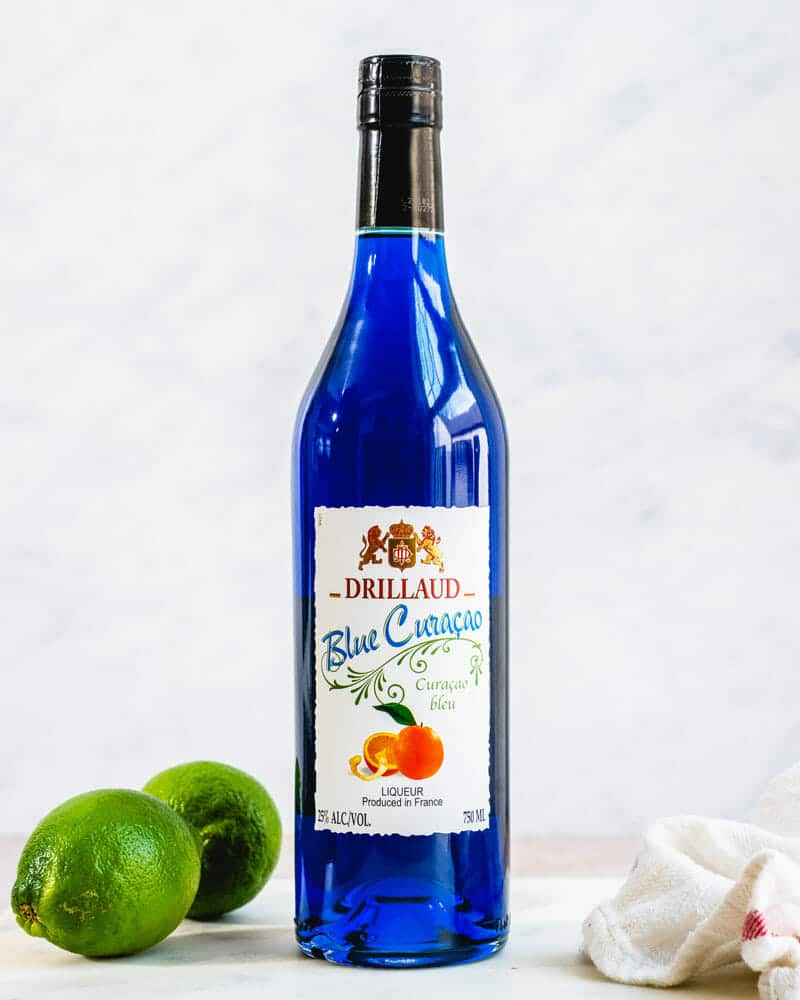
All About Blue Curaçao

What is blue curacao? This orange liqueur is what makes the blue margarita: you absolutely cannot get away with not buying a bottle! Here’s more about this popular liqueur:

  • Blue curacao is an artificially-colored orange liqueur invented in the 19th century by Dutch settlers on the island of Curaçao. There are several colors of Curaçao: the most popular today are clear and blue. Blue curacao is flavored with the Laraha orange peel, a type of orange that grows on the island.
  • How to pronounce Curaçao? Say it Cure-ah-souw.
  • Curaçao is actually one of two types of orange liqueurs: Curaçao and Triple Sec. Curaçao is the original orange liqueur and is typically sweeter than a Triple Sec, a dryer style of orange liqueur and what’s typically used in a margarita.
  • What does blue curacao taste like? It has a sweet orange peel flavor, with subtle bitter finish.
  • How much does it cost? Blue curacao is inexpensive; a 750 ml bottle costs about $10. Try to buy a mid-range bottle; we like Drillaud brand (avoid DeKuyper). Steer away from blue curacao syrup, which is another product altogether.
  • What other cocktails can you make with it? Try the Blue Hawaii, Blue Lagoon, or Blue Long Island.

Which Tequila Works Best?

What’s the best tequila for this blue curacao margarita? I like using tequila resposado, which means “rested”. This means that it’s been aged for 2 to 12 months, which gives it a nuanced, more interesting flavor. But you can use tequila blanco if it’s all you have! Here are a few notes on the flavor differences between the two:

  • Tequila reposado: Aged from 2 to 12 months. It has a complex flavor, with notes of oak and vanilla.
  • Tequila blanco: Unaged tequila. It is agave forward, with notes of pepper and citrus with a spicy finish.
Blue margarita

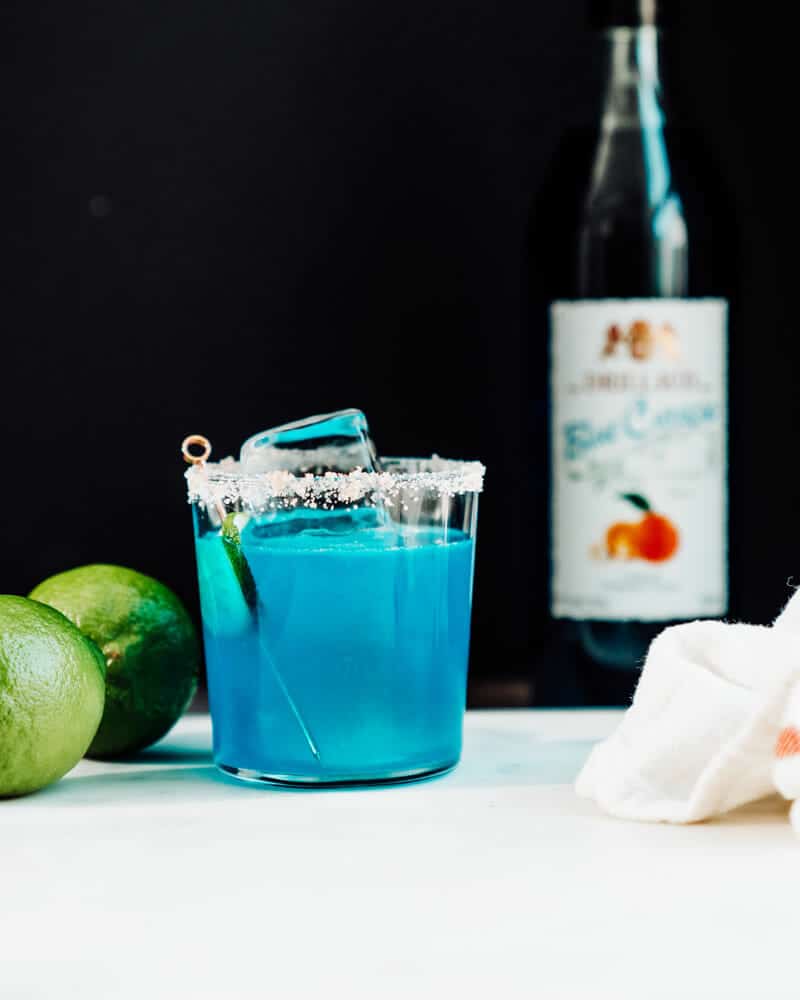
How to Make a Blue Margarita

Got your blue curaco and tequila? Let’s get mixing! The blue margarita is a standard shaken cocktail: just shake it in a cocktail shaker! If you’re serving lots of people at once, make a pitcher (see below).

  • Make the salt rim. The best salt to use is kosher salt or flaky sea salt: it has the best texture. Place it in a single layer on a plate. Cut a notch in a lime wedge, then run it around the glass. Dip the outside rim of the glass in the salt.
  • Shake up the ingredients. Place the tequila, blue curacao and lime in a shaker with 2 handfuls of ice and shake!
  • Strain and garnish. Strain it into the glass and garnish with a lime wedge. To take it over the top, try clear ice! It’s crystal clear artisan style ice that looks just like a fancy bar.

Make It a Pitcher

Serving lots of blue margarita drinks at once? Make a pitcher instead! Combine the ingredients as noted below, making sure to add the specific amount of ice to help dilute the drink like a shaker would. Here’s how to make a blue margarita pitcher that makes 8 servings:

  • 2 cups tequila
  • 1 cup blue curacao
  • 1 cup lime juice
  • 3 handfuls ice

Add the ice and stir until cold. That’s it!

Blue margarita

Serving Suggestions

A blue margarita works for a casual Taco Tuesday or a full-on party spread. Here are some ideas:

  • Taco night: it pairs perfectly with Mexican and Tex Mex food
  • Summer cookouts: make the pitcher version and set up a self-serve station
  • Themed parties: The bright color is great for tropical, ocean, or Cinco de Mayo themes
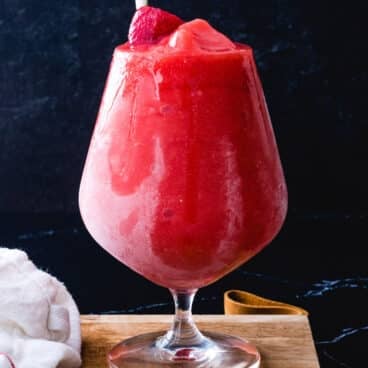
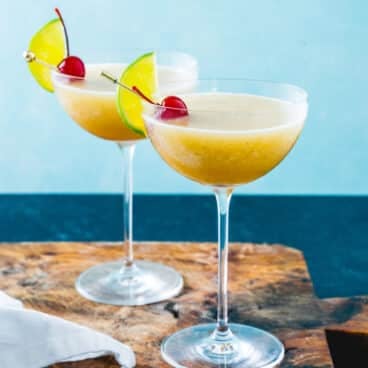
  • With other fruity margaritas: serve a tray with this, a strawberry margarita, and a pineapple margarita for a colorful spread
Print

Perfect Blue Margarita

Blue margarita
Pin Recipe
Print Recipe

5 Stars 4 Stars 3 Stars 2 Stars 1 Star

No reviews

This blue margarita recipe uses Blue Curaçao liqueur for a bright spin on this classic cocktail with sweet-tart citrus flavor! It’s stunning, simple, and ready in 5 minutes.

  • Author: Sonja Overhiser
  • Prep Time: 5 minutes
  • Cook Time: 0 minutes
  • Total Time: 5 minutes
  • Yield: 1 drink 1x
  • Category: Drink
  • Method: Shaken
  • Cuisine: Cocktails
  • Diet: Vegan

Ingredients

  • 2 ounces* tequila reposado (or substitute tequila blanco)*
  • 1 ounce blue curacao
  • 1 ounce fresh lime juice
  • Kosher salt or flaky sea salt, for the rim
  • Ice, for serving (try clear ice)
  • For the garnish: Lime wedge

Instructions

  1. Cut a notch in a lime wedge, then run the lime around the rim of a glass. Dip the edge of the rim into a plate of salt (or for a festive look, use our Margarita Salt).
  2. Place all ingredients in a cocktail shaker and add 4 ice cubes. Shake until cold.
  3. Strain the margarita into the glass with the salted rim. Fill the glass with ice and serve.

Notes

*For converting to tablespoons, 1 ounce = 2 tablespoons.

**To make a blue margarita pitcher that serves 8, mix together in a pitcher: 2 cups tequila, 1 cup blue curacao and 1 cup lime juice. Add 3 handfuls of ice and stir until cold. Pour into glasses and serve!

Did you love this recipe?

Get our free newsletter with all of our best recipes!

More Margarita Recipes to Try

Here are more of my favorite margarita recipes:

  • Simple Margarita
  • Cointreau Margarita
  • Skinny Margarita
  • Virgin Margarita
  • Frozen Margarita
  • Cadillac Margarita
  • Mango Margarita
  • Jalapeno Margarita
  • Coconut Margarita


from A Couple Cooks https://ift.tt/OynxvAd

This homemade chive cream cheese is ready in just 5 minutes and so much tastier than anything you’ll find at the store! Mix up a batch to schmear on bagels or sandwiches, or as a dip for crackers and veggies.

Chive cream cheese

To me, there’s nothing more satisfying than sinking your teeth into a soft, chewy bagel topped with a luscious cream cheese schmear. So here’s a fun way to enjoy try this homemade chive cream cheese!

This recipe brings the intense freshness of this bright green herb to the forefront, pairing it with garlic and onion for a super savory spread. I love it for lunches throughout the week, or it’s so much fun to use as on a bagel brunch board for a party. Here’s what to do!

Why You’ll Love This Recipe

  • Ready in 5 minutes with just a few simple ingredients
  • Fresh, vibrant flavor: using real chives brings a flavor store-bought can’t match
  • So versatile: use it on bagels, sandwiches, dips, and more

Key Ingredients You’ll Need

What does chive cream cheese taste like? The flavor is savory, tangy, and mildly oniony. The garlic and onion powder intensify the flavor but don’t overpower it. To me it tastes creamy and rich, like a really good New York deli spread, but made in your own kitchen. Here’s what goes into this recipe:

  • Cream cheese: Full-fat works best for flavor and creamy texture, but reduced-fat works in a pinch.
  • Fresh chives: The star! Find them in the refrigerated herb section or grab them from your garden or herb pot.
  • Onion powder and garlic powder: Adds savory depth.
  • Greek yogurt or milk (optional): If your cream cheese is stiff, a tablespoon of Greek yogurt or half a tablespoon of milk loosens it up.

How to Make Chive Cream Cheese

Chive cream cheese is fast and easy to make at home: and so much tastier than the store-bought kind! Purchased cream cheese can have a vaguely artificial aftertaste. But make it at home and it’s beautifully fresh and savory! Here are a few tips for whipping up a batch (or jump to the recipe below):

  • Step 1: Soften the cream cheese. This is important for getting the correct fluffy texture. Leave it out at room temperature for an hour, or zap a few minutes in a microwave.
  • Step 2: Chop the chives finely. Fresh chives are easy to find in the refrigerated section of the grocery, and if it’s the right season it’s even better to grow them at home! See How to Grow Herbs.
  • Step 3: Mix with seasonings, adding a bit of Greek yogurt or milk to soften if desired. If the cream cheese is very thick, add 1 tablespoon Greek or plain yogurt or ½ tablespoon milk as you’re mixing it. It should come together into a soft and tasty spread!
Whipped cream cheese

Variation: Whipped Chive Cream Cheese

If you like, you can make whipped cream cheese first for this recipe! Whipped cream cheese has an airy, light texture that’s even more spreadable than the standard. All you have to do? Mix the cheese with ½ tablespoon milk in a food processor or stand mixer, stopping and scraping as necessary. You can also simply use a whisk if you prefer! Go to Whipped Cream Cheese.

Ways to Use Chive Cream Cheese

This chive cream cheese is fantastic as a bagel schmear: but there are so many more ways to use it! Here are a few ideas to get you started:

  • Bagels, or as part of a bagel brunch spread with cream cheese flavors like Herb, Whipped, Strawberry, Veggie or Cinnamon
  • As a sandwich spread, like a Smoked Salmon Sandwich or Fried Egg Sandwich
  • As a dip for pretzels, crackers or chips (this is especially good with whipped cream cheese) or carrots, celery, broccoli, bell pepper, or kohlrabi sticks
  • On toast: Spread it on thick-cut sourdough bread or whole grain toast topped with sliced cucumbers or radishes.
Chive cream cheese

Storage Instructions

Store this chive cream cheese in the refrigerator for up to 1 week. Give it a stir before serving.

I don’t recommend freezing cream cheese, though you can do it: it just has more of a crumbly texture when frozen. See my guide to How to Freeze Cream Cheese.

Dietary Notes

This chive cream cheese recipe is vegetarian and gluten-free.

Print

Chive Cream Cheese

Pin Recipe
Print Recipe

5 Stars 4 Stars 3 Stars 2 Stars 1 Star

4.3 from 3 reviews

This homemade chive cream cheese is ready in just 5 minutes and so much tastier than anything you’ll find at the store! Mix up a batch to schmear on bagels or sandwiches, or as a dip for crackers and veggies.

  • Author: Sonja Overhiser
  • Prep Time: 5 minutes
  • Cook Time: 0 minutes
  • Total Time: 5 minutes
  • Yield: 1 cup (8 2 tablespoon servings) 1x
  • Category: Spread
  • Method: No Cook
  • Cuisine: Spread
  • Diet: Vegetarian

Ingredients

  • 1 8 ounce package cream cheese, softened
  • 3 tablespoons finely chopped fresh chives
  • ¼ teaspoon onion powder
  • ¼ teaspoon garlic powder
  • 1 tablespoon Greek yogurt or ½ tablespoon milk, to soften (optional)

Instructions

  1. Make sure the cream cheese is softened. Leave it out at room temperature for 1 hour, or place it on a plate in the microwave, cook 5 seconds, flip over the block of cheese and cook another 5 seconds. (If it’s not room temperature at this point, cook another few seconds, but air on the conservative side.)
  2. Chop the chives. Mix everything together in a bowl, adding a little Greek yogurt, milk or sour cream 1 tablespoon at a time if you’d like a fluffier, more spreadable texture (we used 1 tablespoon Greek yogurt). Store refrigerated for up to 1 week.
  3. Whipped alternative: Make whipped cream cheese by adding ½ tablespoon milk and whipping the cream cheese in a food processor or stand mixer. Then add the chopped herbs and pulse until combined.

Did you love this recipe?

Get our free newsletter with all of our best recipes!

More Recipes with Chives

During the summer, we always have a big pot of chives growing in our garden! They’re very easy to grow and much cheaper than buying them at the store. Here are a few more recipes to try:

  • Try these 10 Chives Recipes to Try
  • Go for simple Eggs with Chives
  • Mix up Roasted Baby Potatoes with Chive Oil
  • Add them into Ranch Dip with Chives
  • Make Savory Waffles with Chives & Cheddar


from A Couple Cooks https://ift.tt/wRbcmSg

This massaged kale salad is my go-to salad recipe: lemony greens, crunchy veggies, and a zingy Dijon mustard dressing. It’s ready in 15 minutes and meal-prep friendly!

Massaged Kale Salad

I’m the type of person who’s of the opinion that you can’t have too many kale salads (do you agree?). I’ve found a new variation on my classic kale salad that I think might be able to eat every day, especially topped with protein as a main dish meal!

This massaged kale salad is so delicious: you quickly massage the kale leaves so they are tender and sweet, then top with all the crunchy veggies, a 3-ingredient Dijon dressing, and my favorite topping ever: crispy chickpeas! They’re so much tastier than croutons and full of protein and fiber, too. Alex and I could not stop eating this after we took the photo.

Why You’ll Love This Recipe

  • Ready in 15 minutes with zero cooking (as long as you make the chickpeas ahead)
  • Good for meal prep: Massaged kale holds up well over time
  • So delicious: The combination of flavors and textures converts even a kale skeptic!
  • Versatile: Add chicken thighs or salmon bites and it’s a meal!

Ingredients You’ll Need

Here’s a quick look at the key players and why each one matters:

  • Kale: My favorite is Lacinato kale, aka Tuscan or dinosaur kale. It’s milder and more tender than curly kale. However, I’m actually always surprised by how much milder curly kale tastes after massaging it: so it works here, too.
  • Cherry tomatoes and English cucumber: You can add any veggies you like, but I like the combo of sweet cherry tomatoes and crunchy cucumber.
  • Pickled red onions: If you haven’t made a batch of pickled red onions yet, this is a reason to do it! They keep for weeks in the fridge and bring a zingy flavor to salads.
  • Crispy chickpeas (or croutons): My crispy roasted chickpeas are great as a snack — but I also love them as “croutons” for a salad. You can also use homemade croutons or any type of crunchy adder.
  • Dressing: All you need is Dijon mustard, white wine vinegar, and olive oil. This is one of my most easy salad dressings — Alex had the idea to keep it with 3 ingredients and it worked so well!
  • Fresh dill: I made this salad without the dill once and I won’t ever again (ha!). It adds an herby intrigue that makes people ask why it’s so delicious (try it and you’ll see).

How to Make A Massaged Kale Salad

Step 1: Massage the Kale

This is the most important part! Massaging the kale actually breaks down the cell walls, making the leaves more tender and easier to chew. It also makes them taste more mild, with an almost sweet flavor instead of spicy.

To massage kale, place the chopped kale leaves in a bowl and sprinkle them with salt. Use your hands to rub and squeeze the leaves for about one minute. The kale will get slightly darker in color and shrink down.

Step 2: Make the Dressing

In a bowl, mix the Dijon mustard, white wine vinegar, and olive oil until it is fully combined and has a creamy texture.

Step 3: Toss Everything Together

Add the vegetables, fresh dill, and toss with the dressing. Right before serving, add the crispy chickpeas. (They’ll soften during storage!)

Massaged kale salad with crispy chickpeas

Make It a Meal: Serving Suggestions

This salad recipe is the perfect side dish, but I also love it made into a main dish with a protein adder. Here are a few ideas!

  • Add protein: Top with grilled chicken thighs, pan seared chicken breast, sauteed shrimp, or baked salmon. For vegetarian, add these canned chickpeas or top with a soft boiled egg.
  • Pita and hummus: Serve with a scoop of classic hummus and warm pita for lunch.
  • Salad mash-up: Add a trio of salads like my Mediterranean chickpea salad, dense bean salad, and dill pickle potato salad (made ahead).
  • With soup: Serve alongside a bowl of my easy lentil soup or spinach tortellini soup.

Storage Tips

This is one of the better salads for meal prep because dressed massaged kale holds up better than lettuce leaves, which get soggy after being stored. The dressing actually marinates the leaves and they stay good for 3 to 4 days.

Keep the crispy chickpeas in an airtight container at room temperature for storage; they’ll get soggy if you store them with the salad.

Dietary Notes

This massaged kale salad is vegetarian, vegan, plant-based, dairy free, and Mediterranean diet friendly.

Print

My Go-To Massaged Kale Salad (Fast!)

Massaged Kale Salad
Pin Recipe
Print Recipe

5 Stars 4 Stars 3 Stars 2 Stars 1 Star

No reviews

This massaged kale salad is my go-to salad recipe: lemony greens, crunchy veggies, and a zingy Dijon mustard dressing. It’s ready in 15 minutes and meal-prep friendly!

  • Author: Sonja Overhiser
  • Prep Time: 15 minutes
  • Cook Time: 0 minutes
  • Total Time: 15 minutes
  • Yield: 4 1x
  • Category: Salad
  • Method: No Cook
  • Cuisine: American, Mediterranean
  • Diet: Dairy-Free, Gluten-Free, Mediterranean Diet, Vegan, Vegetarian

Ingredients

  • 2 bunches kale, stemmed and chopped (about 12 ounces)
  • Kosher salt or flaky sea salt
  • 2 cups cherry tomatoes, halved
  • 1 English cucumber, chopped
  • 1 recipe Crispy Chickpeas or Air Fryer Chickpeas
  • ½ cup Pickled Red Onions or thinly sliced red onion
  • 1 tablespoon Dijon mustard
  • 1 tablespoon white wine vinegar
  • ¼ cup extra virgin olive oil
  • 1 handful fresh dill

Instructions

  1. Place the kale in a large bowl and sprinkle generously with salt. Using clean hands, massage the kale for about 1 minute, squeezing and rubbing the leaves until they darken in color and turn tender.
  2. In a small bowl, add the Dijon mustard, white wine vinegar, and a pinch of salt. While whisking, drizzle in the olive oil until creamy.
  3. Add the cherry tomatoes, cucumber, pickled red onions, and Dijon mustard dressing to the bowl. Toss until everything is evenly coated. Taste and add another pinch of salt. Top with torn fresh dill. 
  4. Add the crispy chickpeas just before serving so they stay crunchy. Dressed leftovers store 3 to 4 days refrigerated; store the chickpeas separately and add them just before eating for best results. 

Notes

For the chickpeas, my Crispy Roasted Chickpeas are great made in advance and store well. My Air Fryer Chickpeas are very fast and best if you want to eat them day of. 

Did you love this recipe?

Get our free newsletter with all of our best recipes!

More Salad Recipes To Try

  • Best Kale Salad
  • Kale Quinoa Salad
  • Kale Caesar Salad
  • Kale Slaw
  • Chopped Salad
  • Mediterranean Salad
  • Easy White Bean Salad
  • 60 Salad Recipes Everyone Will Love


from A Couple Cooks https://ift.tt/RG9g0cJ

This Pineapple Mint Slushie is the refreshing 3-ingredient summer drink you’ll be making on repeat this season! It’s got no added sugar, and it’s kid-friendly or great as a mocktail for adults. (I’m obsessed.)

Pineapple Mint Slushie

Here’s my genius solution to summer treat without extra sugar: this delicious Pineapple Mint Slushie! What I love about this one: it’s so seriously refreshing, fun to make with kids, and it’s so simple to whip up. Since it has only 3 ingredients, I don’t mind lugging out my blender. It’s a great way to use a ton of summer mint, if you have any growing!

This drink is so versatile: it’s great for kids or as a mocktail for adults! If you’re going for mocktail, you could call it a Frozen Pineapple Mojito Mocktail if you wanted (it’s all in the branding, right?).

Ingredients You’ll Need

My daughter loves whipping up this recipe; the other day she begged us to do it to cool down after a hot playtime outside. It was perfect! I’ve made sure to stock up on these ingredients so I always have them on hand:

  • Frozen pineapple: Make sure to use quality pineapple (I’ve found some brands that are not as sweet). The frozen fruit gives this drink its icy texture.
  • Coconut water: This is the magic ingredient and required! It adds natural sweetness and a hint of tropical flavor. It’s easy to find at most grocery stores.
  • Fresh mint leaves: Fresh mint makes this drink taste so refreshing. It’s a great way to use a big handful from the garden! (I’m growing a lot right now.)

How to Make a Pineapple Mint Slushie

This slushie is so simple, but here are a few tips for the process:

  1. Blend the base. In a blender, purée the coconut water and mint leaves first.
  2. Add the pineapple in batches. Add half the pineapple and blend, then add the remaining and blend again. This makes sure it doesn’t get over processed.
  3. Adjust the thickness and serve. For a thicker slushie, add another ½ cup of frozen pineapple and blend until incorporated. I’ve actually found this works with any amount of pineapple and is still really delicious!
Pineapple mint slushie in glass

Variations and Serving Suggestions

  • Make it a mocktail. Call it a Frozen Pineapple Mojito Mocktail and serve it in cute glasses with a mint leaf garnish: perfect for backyard parties. (I also have a Frozen Mojito and Pineapple Mojito if you’d like real alcohol versions!)
  • Add lime juice. A little fresh lime juice intensifies the tropical flavor.
  • Pair it with a snack. This slushie is great with summer appetizers like Texas caviar or Mexican corn dip.

Storage Instructions

This slushie is best enjoyed immediately: it starts to melt and separate in texture almost immediately. The serving size is small so you probably won’t have leftovers but if you do, pour them into a freezer-safe container and freeze, then let it soften slightly and re-blend before serving.

Dietary Notes

This Pineapple Mint Slushie is naturally vegan, dairy-free, gluten-free, and vegetarian, with no added sugar.

Print

Pineapple Mint Slushie (3 Ingredients!)

Pineapple Mint Slushie
Pin Recipe
Print Recipe

5 Stars 4 Stars 3 Stars 2 Stars 1 Star

No reviews

This Pineapple Mint Slushie is the refreshing 3-ingredient summer drink you’ll be making on repeat this season! There’s no added sugar, and it’s kid-friendly or great as a mocktail for adults.

  • Author: Sonja Overhiser
  • Prep Time: 5 minutes
  • Cook Time: 0 minutes
  • Total Time: 5 minutes
  • Yield: 2 1x
  • Category: Drink
  • Method: Blended
  • Cuisine: Drink, Mocktail
  • Diet: Dairy-Free, Gluten-Free, Vegan, Vegetarian

Ingredients

  • 1 ½ to 2 cups frozen pineapple
  • 1 cup coconut water
  • 1 large handful mint leaves

Instructions

  1. Blend the base: In a blender, puree the coconut water and mint leaves for about 10 seconds, until the mint is finely chopped.
  2. Add the pineapple in batches: Add ¾ cup of the frozen pineapple and blend until smooth. Add the remaining ¾ cup pineapple and blend until the mixture reaches a slushy texture.
  3. Adjust the thickness and serve: If you’d like a thicker slushie, add another ½ cup of frozen pineapple and blend again until incorporated. Pour into glasses and serve immediately.

Did you love this recipe?

Get our free newsletter with all of our best recipes!

More Drink Recipes To Try

  • Pineapple Margarita
  • Frozen Piña Colada
  • Watermelon Slushie
  • Strawberry Slushie
  • Easy Mint Water Recipe
  • Strawberry Pineapple Smoothie


from A Couple Cooks https://ift.tt/UyArO4d

My homemade strawberry daiquiri recipe makes luscious flavor in just 5 minutes! Made with frozen strawberries and white rum, it’s a frozen cocktail that puts store-bought mixes to shame.

Strawberry daiquiri recipe: daiquiri in glass with straw

Ever tried to make a strawberry daiquiri recipe at home? There’s no need to buy store-bought daiquiri mix. A homemade strawberry daiquiri with real frozen strawberries tastes infinitely better than a mix from the store!

As a cocktail expert with over 300 cocktail recipes, I teamed up with my husband Alex to crack the code on the perfect strawberry daiquiri. After lots of recipe testing, we finally nailed it: it has perfectly balanced sweetness and is bursting with real strawberry flavor. All you need are a few ingredients, a blender, and 5 minutes to whip up this classic drink!

5 Star Reader Review

⭐⭐⭐⭐⭐ “Divine daiquiri! I made it just as directed and it is fresh with well blended flavors. I will use this recipe for all future daiquiris.” -Pat

⭐⭐⭐⭐⭐ “This was amazing, I used fresh strawberries and added ice and used agave nectar instead of simple syrup. I can’t wait to make it again! Thank you!” -Lizzie

Why You’ll Love This Strawberry Daiquiri Recipe

I created this strawberry daiquiri recipe to have pure berry flavor. It’s just sweet enough, with just the right finish of white rum. If ever there was a perfect drink for sipping on the patio, this is it! Here’s why I love it:

  • The flavor is pure, using real berries! Who knows what’s in those store-bought daiquiri mixes. This daiquiri is made of real frozen berries and lime, giving it a lush flavor.
  • It’s perfectly sweetened. Some strawberry daiquiris are overly sweet, but not this one. It’s sweetened just enough so you can enjoy the pure berry flavor without a sugar crash. Pure maple syrup is a natural sweetener that we love: it gently sweetens and adds flavor nuance.
Strawberry daiquiri recipe in glass with straw and strawberry garnish.

Tips for Making a Frozen Daiquiri

A few things to keep in mind when you’re making this strawberry daiquiri recipe:

  • Use good quality rum. The better the quality of rum, the tastier the drink. Look for a bottle in the mid-price range, around $15 to $20 for a 750 ml bottle.
  • Use best quality frozen strawberries. We tried this with a few different types of frozen berries, and it tastes much better with the best quality brand.
  • Freeze or chill your rum (optional). When we made this strawberry daiquiri recipe, we chilled our rum in a cocktail shaker to get it really cold. You also can throw the rum in the freezer the night before to keep the drink very cold.

The Daiquiri Formula

This strawberry daiquiri and the frozen daiquiri are variations on the daiquiri, a cocktail made simply with rum, lime and sugar and served straight up in a cocktail glass. It’s a classic sour cocktail invented in the early 1900’s.

The frozen daiquiris popular today came along later as variations on the theme! Another spin to try is the sophisticated Hemingway daiquiri, starring grapefruit juice and Maraschino liqueur.

Virgin strawberry daiquiri in glass.

Variation: Try A Virgin Daiquiri

The virgin strawberry daiquiri is a popular mocktail variation on the classic. Our virgin daiquiri uses similar ingredients, but skips the rum and uses tonic water or lemon lime soda. It makes a bubbly, sweet and frosty drink that we think is nearly as good as the original.

Ways To Serve It (And Batch Drink Tips)

Here’s how I like to serve my strawberry daiquiri:

  • Glasses: Serve in a hurricane glass for full tropical vibes, or mason jars for backyard BBQs.
  • Garnish ideas: Add a fresh strawberry as a garnish, or go fancy with a strawberry fan and a lime wheel. A mint sprig adds an extra, and you can always add a cocktail umbrella as a fun touch!
  • Making batches for a party: Multiply the recipe, blending in batches as necessary. Store in the freezer. Before the party, re-blend (adding a bit of lime juice as necessary to get it to blend.

Let us know if you try out this strawberry daiquiri recipe, and if it helps for exhausted parent evenings (!). Or serve it at a bridal shower, girl’s night, cookout, pool party, or anytime you need a fruity drink.

Frequently Asked Questions

What rum is best for a strawberry daiquiri?

A light rum is your best bet! Opt for white rum or silver rum for a clean and refreshing flavor that won’t overpower the strawberries.

Can I use frozen strawberries in a daiquiri?

Frozen strawberries are best to achieve that frosty daiquiri texture; we don’t recommend using frozen berries here.

My daiquiri is too sweet or too sour! How can I adjust it?

If it’s too sour, add a bit more simple syrup and blend. Taste and continue to add sweetener until the flavor is balanced. If it’s too sweet, add a splash more fresh lime juice to balance the sweetness and add a refreshing tartness.

What’s a fun twist on the classic strawberry daiquiri?

Replace half the frozen berries with another frozen fruit like mango, pineapple, or peach, for a unique flavor combination.

Print

Strawberry Daiquiri

Strawberry daiquiri
Pin Recipe
Print Recipe

5 Stars 4 Stars 3 Stars 2 Stars 1 Star

5 from 8 reviews

This homemade strawberry daiquiri recipe makes luscious flavor in just 5 minutes! Made with frozen strawberries and white rum, it’s the perfectly balanced frozen cocktail that puts store-bought mixes to shame.

  • Author: Sonja Overhiser
  • Prep Time: 10 minutes
  • Cook Time: 0 minutes
  • Total Time: 10 minutes
  • Yield: 4 1x
  • Category: Drink
  • Method: Blended
  • Cuisine: American

Ingredients

  • 1 pound frozen strawberries
  • 6 tablespoons simple syrup (or pure maple syrup)
  • ¼ cup lime juice
  • 1 cup best quality white or light rum
  • 1 cup ice
  • ⅛ teaspoon kosher salt

Instructions

  1. Place all ingredients in a blender and blend until smooth. Taste and add additional syrup to balance if desired (different brands of frozen berries vary in flavor). Pour into 4 glasses and enjoy. 

Notes

Virgin variation: Blend 12 ounces (2 cups) frozen strawberries, ¼ cup simple syrup, 3 tablespoons lime juice, 1 cup tonic water or lemon lime soda, ½ to ¾ cup water, and 1 cup ice. If desired, serve with another splash of tonic water or soda.

Fruity variations: Try replacing half the strawberries with another frozen fruit like pineapple, mango, or peaches for a few fun variations. Balance the flavor with syrup to taste. 

Did you love this recipe?

Get our free newsletter with all of our best recipes!

Other daiquiri recipes you’ll love

There are lots more daiquiri recipes to add to your repertoire! Here are a few more to try:

  • The frozen daiquiri is tangy, sweet, and fruity: perfect for parties.
  • Try tropical fruity spins like the banana daiquiri, pineapple daiquiri, or mango daiquiri.
  • The classic daiquiri is one of the most classic sour cocktails! Or try the Hemingway daiquiri, where grapefruit juice and maraschino liqueur compliment lime and rum perfectly.
Frozen Daiquiri
01

Frozen Daiquiri

Banana Daiquiri
02

Banana Daiquiri

Mango daiquiri
03

Frozen Mango Daiquiri

Pineapple daiquiri
04

Pineapple Daiquiri


from A Couple Cooks https://ift.tt/ifWwDNm
Newer Posts Older Posts Home

POPULAR POSTS

  • Easy Shrimp Stir Fry Recipe
  • How to Cut Fennel
  • 20 Healthy Soup Recipes Everyone Will Love
  • 21 Popular Bourbon Cocktails
  • Marinated Olives
  • Sheet Pan Pizza
  • Easy Vegetarian Fajitas
  • 15 Hot Drinks to Take the Chill Off
  • Easy Crunchy Broccoli Slaw
  • Seriously Easy Gingerbread Cake
Powered by Blogger

Recipe, Healthy meal

  • A Couple Cooks
  • A Couple Cooks
  • Pakistanfoodinusa

About Me

Traditional Pakistani Food in USA
View my complete profile

Gibraltar Coffee

By Traditional Pakistani Food in USA Published at June 17, 2026
Image

About Blog


Food stylist & photographer. Loves nature and healthy food, and good coffee. Don’t hesitate to come for say a small “hello!”

A

Popular Posts

Easy Shrimp Stir Fry Recipe

Image

How to Cut Fennel

Image

20 Healthy Soup Recipes Everyone Will Love

Image