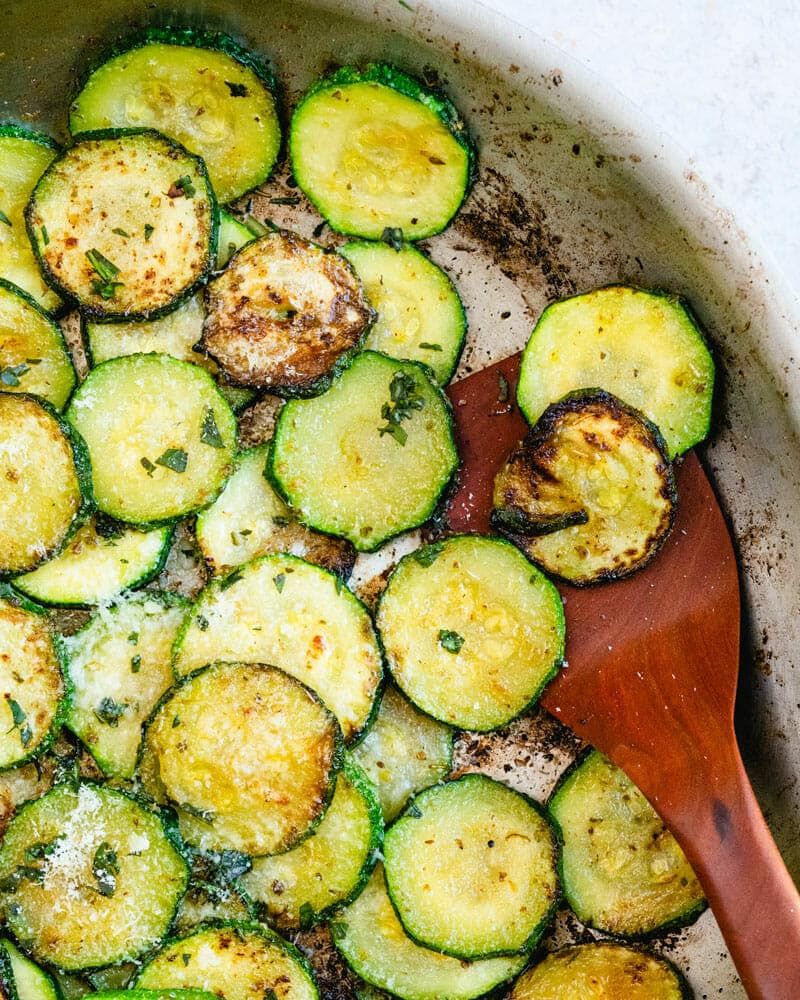
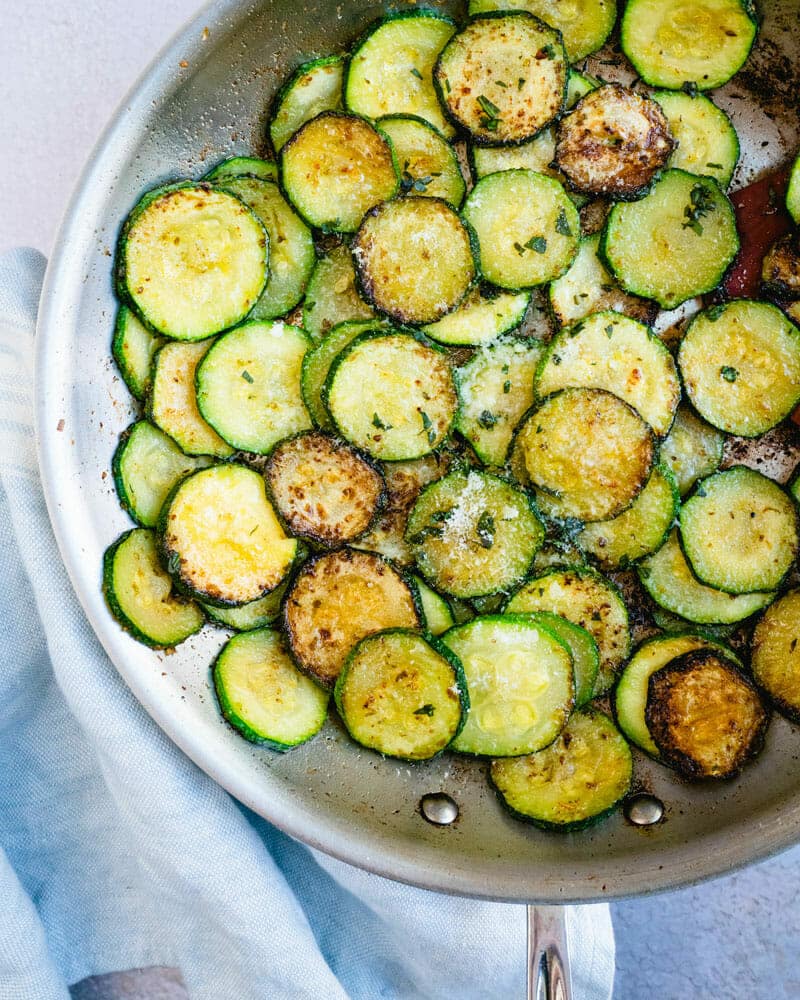
This sauteed zucchini recipe comes out perfectly tender every time! In just 10 minutes you can make this bland veggie into a delicious healthy side dish.
To be honest, zucchini wasn’t my favorite vegetable growing up: I thought it was bland, watery, and frankly, pretty boring. But all that changed when my mom found a delicious sautéed zucchini recipe with Parmesan that the whole family actually ate.
Here I’ve recreated her recipe, with a few small tweaks—and I find myself sneaking bites straight from the pan whenever I make it! In just 10 minutes, you can make the humble zucchini into something actually irresistible: tender, golden, and bursting with savory flavor.
Ingredients You’ll Need
After years of experimenting with different zucchini cooking methods, I’ve found that sautéing is one of the best ways to cook it. (Well, outside of using it in chocolate zucchini bread.) The key is using high heat to quickly cook the zucchini while making a golden-brown exterior that locks in flavor.
This recipe steals a bit of what I remember from my mom’s recipe: specifically oregano and Parmesan. The result? Zucchini that’s tender but not mushy, flavorful but not overwhelming, Here’s what you need for this recipe:
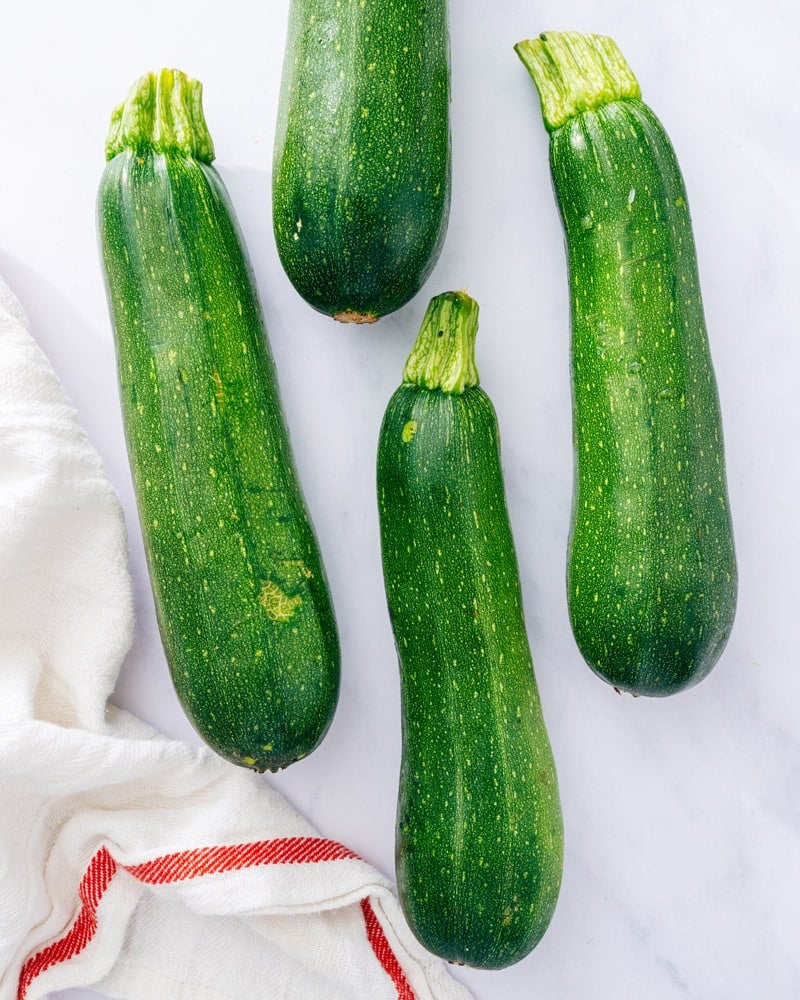
Zucchini: Use small to medium to get the best-looking rounds, but you can also use large if it’s all you have. (If you have one of those massive summer zucchini, cut the slices into half circles.)
Olive oil or butter: Make it vegan with oil, or use butter for intense savory flavor.
Garlic powder and onion powder: You could also use a diced onion and fresh garlic if you prefer, but using dried keeps the recipe short and sweet.
Oregano: This is my secret weapon! I use dried oregano for consistent flavor, but fresh works too.
Parmesan cheese: While optional, this adds an incredible savory depth that makes the dish feel more substantial. I use freshly grated for the best flavor.
5 Star Reader Revew
“This turned out great! Zero leftovers!” -Amy
How to Sauté Zucchini Without It Getting Soggy
Making sauteed zucchini is easy, and takes only 10 minutes in a hot pan. You do have to babysit the pan for the entire time, because you’ll want to make sure the layers of rounds cook evenly. Here’s what to know:
Use your largest skillet. Even in your largest skillet, the zucchini will have to be stacked in a few layers when cooking.
Continue to move zucchini to the bottom of the pan as you cook. The zucchini at the bottom of the pan cooks the quickest and will brown quickly. Because there are layers of zucchini, continue to flip and move rounds to the bottom of pan so they can brown evenly.
Cover the pan for the first 2 minutes only. Covering the pan helps to steam the entire pan and cook the zucchini on the top layer at the same time as the bottom layer. You’ll just do this for a few minutes at first, then do a traditional sauté for the remaining time.
Don’t overcook. Pull the pan off the heat when the zucchini is just tender with browned spots. Zucchini goes from perfect to mushy quickly, so err on the earlier side.
Ways To Serve Sauteed Zucchini
Once you’ve sauteed it up, add that Parmesan cheese and a little chopped basil if you like. It makes a stunning side dish that goes with just about anything: especially in the summer! Here are a few ideas:
With pasta: Serve as a side for creamy cavatappi or toss directly into pasta with olive oil and extra Parmesan. It’s also great mixed into pesto pasta for added veggies, and it inspired this zucchini pasta recipe.
Leftover sautéed zucchini keeps in the refrigerator for up to 3 days in an airtight container. I reheat it gently in a skillet over medium heat for 2-3 minutes, stirring frequently. The microwave works in a pinch, but the skillet method helps maintain the best texture.
While the zucchini won’t be quite as crisp as when freshly made, it’s still delicious and works wonderfully mixed into scrambled eggs or vegetarian frittatas. I don’t recommend freezing sauteed zucchini because it becomes mushy after thawing.
Dietary Notes
This sauteed zucchini recipe is vegetarian and dairy-free. For vegan, plant-based, and dairy-free, omit the Parmesan cheese.
Frequently Asked Questions
How do you sauté zucchini without it getting soggy?
Use high heat, your largest skillet, and keep the slices moving so they brown instead of steam. Salt them lightly at the end instead of the beginning, and pull the pan off the heat as soon as the rounds are tender.
Is it better to sauté zucchini in butter or oil?
Both work well. Olive oil gives a cleaner flavor and keeps the recipe vegan, but butter adds rich, savory depth.
Should you peel zucchini before sautéing?
No, you should always leave the skin on. It’s thin, tender, and holds the rounds together while they cook, plus it carries much of the nutrients.
What seasoning is good on sautéed zucchini?
Garlic powder, onion powder, and dried oregano are my go-to’s, finished with salt, pepper, and Parmesan. Italian seasoning, fresh basil, red pepper flakes, or a squeeze of lemon are also great.
This sauteed zucchini recipe comes out perfectly tender every time! In just 10 minutes you can make this bland veggie into a delicious healthy side dish.
In your largest skillet, heat the olive oil or butter over medium high heat. Add the zucchini slices, then stir in the garlic powder, oregano, and salt, flipping and stirring to get all the slices covered.
Cover the skillet and cook for 1 minute, then uncover and stir. Cover again for 1 minute and uncover and stir, moving slices to the bottom layer as necessary so that they can get browned.
Keep the pan uncovered and cook about 6 to 8 more minutes until most of the zucchini are tender and browned, continuing to flip the zucchini and move them to the bottom layer so they cook evenly.
Serve immediately, topped with Parmesan cheese and fresh basil if desired.
Other zucchini recipes you’ll love
If you love this sautéed zucchini as much as I do, here are more of my favorite ways to use up summer’s zucchini bounty:
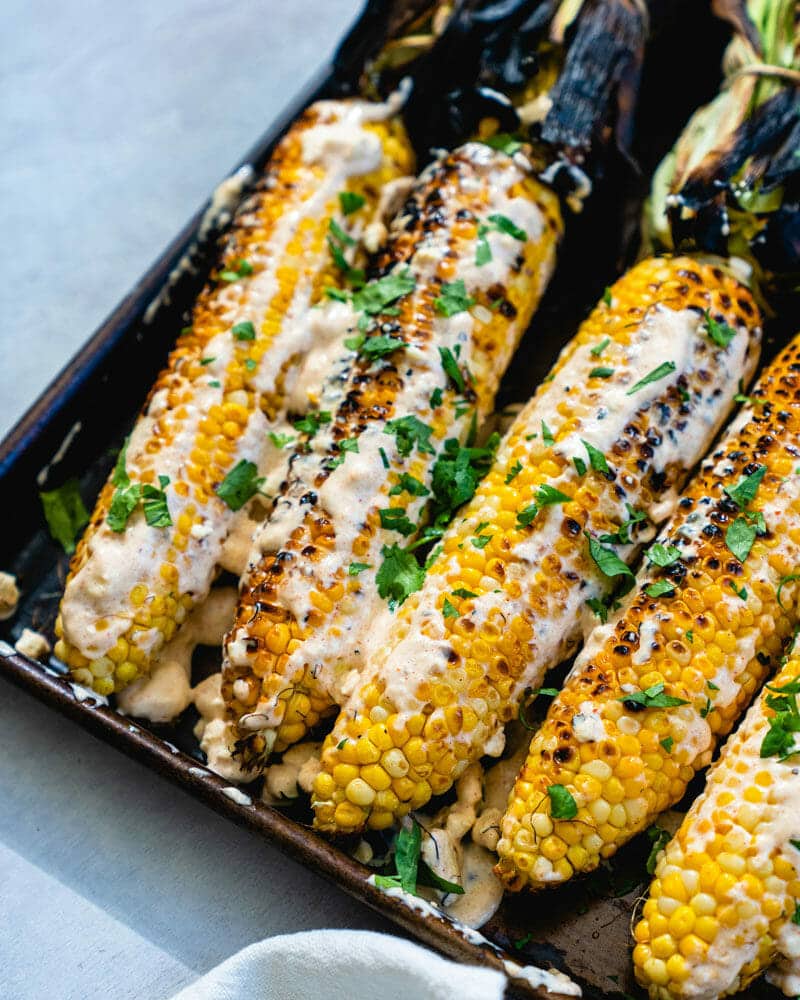
This Mexican street corn recipe (aka elote) is grilled until charred, then slathered in a creamy chili-lime sauce. Tie back the husks for a built-in handle!
What’s the perfect summer side dish? This Mexican street corn recipe, in my opinion. One bite of elote and you’ll be a believer: it’s sweet, smoky, savory, creamy, and tangy: all at once. It’s grilled to charred perfection and slathered in a creamy spiced sauce with cheese crumbles.
Here’s my favorite way to make at home (though of course, it’s best on the street in Mexico!). I’ll show you how to grill corn perfectly and keep the husk as a built-in handle. Serve it with tacos like these favorite grilled shrimp tacos, grilled fish, or a good old burger.
5 Star Reader Review
“I made this recipe 2 weeks ago and everyone loved it. I’m making it again tomorrow for another party! Thanks for the recipe.”-Janine
What Is Elote?
Elote is grilled corn that’s slathered in a sauce of sour cream, mayonnaise, and chili powder, and sprinkled with cheese. It’s a popular snack served by street vendors in Mexico, so it’s often called Mexican street corn. Of course, it’s the very best on the street in Mexico or cities that have a strong Mexican heritage: there’s nothing like it!
What makes elote so irresistible is the contrasts of flavors and textures. You’ve got the sweet corn, charred to smoky perfection on the grill, then the creamy mayo and sour cream sauce. Our sauce has chili powder, garlic powder and cumin, then it’s filled with chunks of feta, cotija, or queso fresco cheese. Serve it with tangy lime and cilantro, and the crunch of the corn against the creamy, messy sauce is so satisfying.
Ingredients for Mexican Street Corn
Here’s what goes into this Mexican street corn recipe, and why:
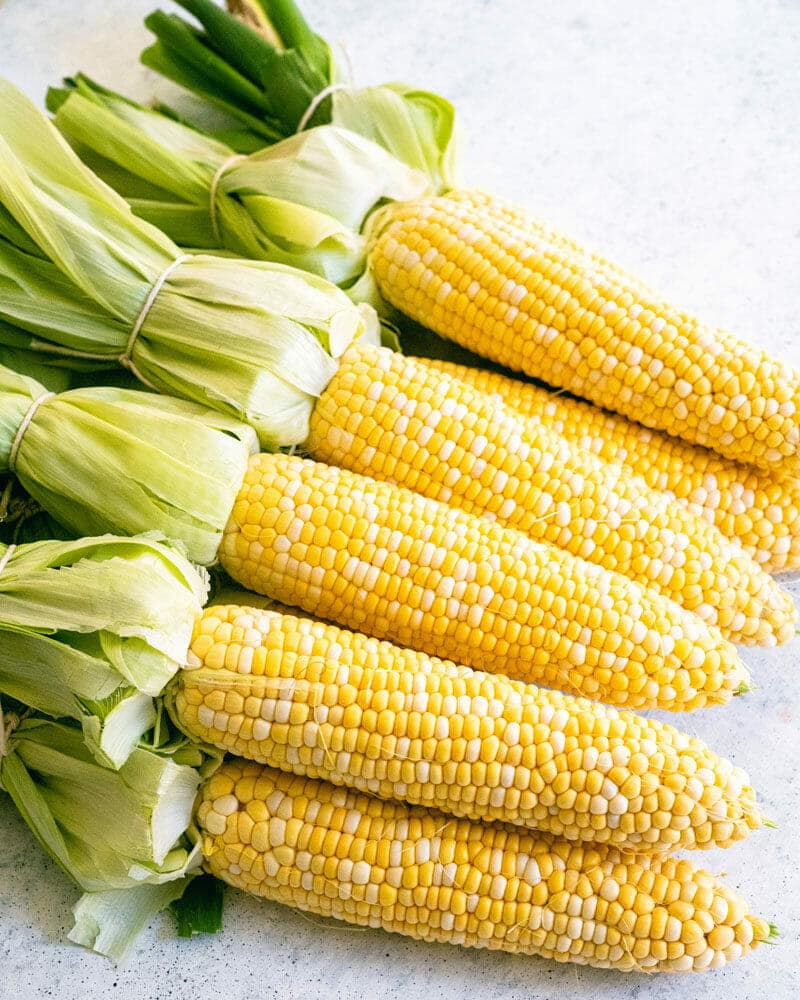
Sweet corn on the cob: In-season corn is worth waiting for, here! I love buying it by the bag at the farmer’s market.
Neutral oil or olive oil: Grapeseed, vegetable, sunflower, or olive oil.
Sour cream or Mexican crema and mayo: Crema brings tang, mayo brings body. More on that below.
Cotija or feta cheese: Cotija is the classic cheese for Mexican street corn: it’s a firm, salty Mexican cheese that crumbles. You should be able to find it in most grocery stores. If not, feta cheese is my go-to Cotija cheese substitute. Queso fresco also works, but it’s so much milder that I prefer feta.
Chili powder, garlic powder, and cumin: These spices add savory flavor.
Lime and cilantro. You’ll add these as a garnish for a hit of freshness.
Mexican Crema vs. Mayo for Elote
Mexican crema is the traditional ingredient for the sauce in Mexican street corn. It’s a thickened cream that’s slightly tangy, and falls between American sour cream and French crème fraîche. You can make Mexican crema at home or find it at most grocery stores.
I use both crema and mayonnaise because each does a different job: crema is tangier and looser, and mayonnaise is what makes the sauce cling to a hot cob instead of sliding off. If you can’t find crema, sour cream works well as a substitute.
How to Grill Corn for Elote
The main skill in how to make elote is grilling corn. There are lots of different methods for how to grill corn, but here’s what I like to do here. Peel back the corn husks and tie them with twine to make a built-in handle for eating the corn. Then place the cobs right on the grill and char to perfection.
Here’s how to grill Mexican street corn, aka elote (for quantities, jump to the recipe):
Preheat a grill to medium high heat.
Peel back the husks of the corn, peeling the outside layers one at a time and keeping them attached, facing downwards away from the cob. Then use kitchen twine or string to tie the leaves together. Rub the corn with oil.
Place the corn directly on the grill gratesand cook for about 12 to 15 minutes, until blackened, turning often.
Make the sauce by mixing up the crema or sour cream, mayo, and spices. When the corn is done use a spoon to spread on the sauce. Use the husk as a handle for easy eating!
Tips for the Husk Handle
It takes a bit of extra time to husk the corn to make the handle, but it’s absolutely worth it! Here are a few tips to know about the process:
Be patient! Instead of pulling off the husk as you would normally, you’ll keep each leaf and pull it back. It takes a little more time, but it’s worth it in the end. It took me about 15 minutes to husk all of the corn and then tie down the husk with kitchen twine.
Start with the outer-most leaf first. It’s important to start with the outer-most leaf and pull down one leaf at a time, gradually working your way around the corn.
Cracks are ok. When you pull down the leaves, you may notice they crack a little at the bottom. That’s completely ok: just keep pulling the remaining leaves — it doesn’t have to be perfect!
Elote in a Bowl: Esquites and Elote Salad
When elote is served off the cob in a cup or bowl, it’s called esquites: it has the same flavors but is eaten with a spoon for less mess. All you do is cut the kernels off after grilling and toss them with the sauce, then serve in small cups with a spoon.
Once you’ve made elote a few times, another great way to serve it is as a salad! This Elote Salad recipe uses corn cut from the cob, seasoned with the same flavors. The creamy sauce is out of this world! It’s great as a summer side dish or a component in a bowl meal.
The sauce can be mixed up to 3 days ahead and refrigerated. You can also tie the husks in the morning and keep the cobs refrigerated until you’re ready to grill.
Leftover dressed corn keeps 2 days in an airtight container. You can eat it as is or slice off the kernels to use in quesadillas or a burrito bowl.
This Mexican street corn recipe (aka elote) is grilled until charred, then slathered in a creamy chili-lime sauce. Tie back the husks for a built-in handle!
Shuck the corn by peeling down the outside layers one at a time and keeping them attached, facing downwards away from the cob. When you’ve finished, use kitchen twine or string to tie the leaves together (see the photos).
Use your hands to rub oil on each corn cob evenly, then place them on a baking sheet.
In a small bowl, mix the sour cream, mayonnaise, feta or queso fresco (crumbling any large chunks into smaller chunks with your fingers), chili powder, garlic powder, cumin, and kosher salt in small bowl.
Place the corn on the grill and cook until it begins to blacken, then turn. Cook about 12 to 15 minutes total, until blackened on all sides.
Place the corn back on the baking sheet and use a spoon to coat it with cheese mixture. Garnish with a squeeze of lime and torn cilantro leaves. Serve immediately, using the tied husks as a handle for easy eating.
This strawberry sangria made the Spanish way, with strawberries, dry rosé, and orange liqueur. Here’s how to build the pitcher and how long to chill it.
If you love berries and you love sangria, then you must drop everything and make this now. Here’s my perfect strawberry sangria! Many American-style sangria recipes are just glorified fruit juice, but this one is Spanish style, full of nuance and character.
Here the berries sing and the dry rosé notes peek through just enough. Serve it with a splash of sparkling water and a skewer of fruit, and it’s pretty perfect, I think! (In fact, it reminds me of my popular frozen rosé recipe!)
Why You’ll Love This Strawberry Sangria
It’s delicious. Sangría is a classic Spanish wine punch. Usually American versions of the stuff are so sweet and fruity, I’d barely call them sangria! But this strawberry sangria tastes like actual strawberries, and it has a deliciously balanced flavor with rosé wine.
It’s also easy. 20 minutes of maceration, one hour in the fridge, and you’re done!
It’s perfect for parties: the pitcher looks beautiful and it makes a large quantity at once.
Ingredients You’ll Need
The classic Spanish version is red sangria, made with red wine and chopped fruit, but Spaniards also drink white sangria, a version made with white wine. This strawberry sangria is a spin that uses a strawberry puree and rosé wine for a creative spin. You’ll need the following ingredients:
Fresh strawberries: Make sure they are ripe and juicy; I would not substitute frozen.
Granulated sugar: If you love a sweet sangria, you can double the sugar.
Dry rosé wine. Or if you like a sweeter drink, you can use a sweeter rose.
Orange liqueur. Use triple sec, Cointreau, or Grand Marnier: this adds intrigue to the flavor.
Orange and lemon. Fresh citrus also adds flavor notes.
Fresh mint steeped in the pitcher adds a final herby note.
The Best Wine for Strawberry Sangria: Rosé vs. White Wine
Rosé wine is my top pick, both because of the color and because a dry rosé already has strawberry notes. Some inexpensive great dry rosé wines are Grenache, Cinsault, and Spanish Garnacha rosados.
White wine also works and is what many strawberry sangria recipes call for. I’d use a dry white like Albariño, Pinot Grigio, or Sauvignon Blanc. The drink turns a soft blush instead of pink.
As a note, if you like more of a sweet style Sangria, you can also choose a sweeter wine of either type.
How to Make Strawberry Sangria
After living in Spain for a few months, I inherited a passion for Spanish foods done right! So this sangria method is Spanish-style, inspired by our favorite chef, Jose Andres. Strawberry flavored sangria is not traditionally Spanish, so we simply used the signature methods to create this unique spin. Here are the main steps (or jump right to the recipe):
Macerate the strawberries, then puree: Place sugar on the sliced berries and let them stand at room temperature: this technique is called maceration (you may have done it for strawberry shortcake). Blend the berries in a blender until smooth, then strain them through a fine mesh sieve to remove the strawberry seeds.
Add liquids: Add the puree, wine and triple sec or Grand Marnier to a pitcher, and throw in some orange and lemon slices and some fresh sliced strawberries.
Refrigerate for at least 1 hour. This allows the flavors to meld and develop! After 1 hour, you’re good to go: but you can refrigerate for up to 4 hours if you want to make it in advance.
Grand Marnier vs. Cointreau vs. Triple Sec
What’s Grand Marnier and do you have to buy a whole new bottle for this strawberry sangria? Here’s a little breakdown on this top shelf orange liqueur and a few substitutes:
Grand Marnier: Grand Marnier is a French liqueur that blends Cognac, bitter orange and sugar. It’s the highest end of the orange liqueurs, but only by a few dollars per bottle.
Cointreau: Cointreau has an orange perfume flavor and is used in lots of cocktails, most famously the classic margarita. It’s great in this sangria!
Triple Sec: Triple sec is the lowest end orange liqueur. The flavor is not nearly as developed as the other two, but it works!
Brandy: You can also use brandy instead, since it’s traditionally used in sangria as well. It works if you have a bottle on hand!
Make Ahead Tips
You can make this strawberry sangria in advance, but don’t go beyond 4 hours in advance. Why? The fruit starts to become soggy and the flavors fade. So, don’t plan to make this drink too far in advance!
You can cut up the fruit and even make the strawberry puree beforehand. But don’t start the actual instructions until you’re no more than 4 hours away from serving time.
Reserve 6 strawberries and set aside. Slice the remaining strawberries and place them in a blender. Sprinkle them with the sugar and stir.
Let the strawberries stand for 20 minutes at room temperature. Then add ½ cup of the wine to the blender and blend until strawberries are fully pureed. Pour the mixture through a fine mesh strainer / sieve into a large pitcher and use a spatula to press the strawberry puree through. Discard the seeds.
Add the remaining wine and triple sec, Cointreau or Grand Marnier to the pitcher. Then add the fresh mint, orange and lemon rounds. Slice the 6 reserved strawberries and add them to pitcher.
Stir and refrigerate the pitcher for at least 1 hour, or up to 4 hours. (Don’t go beyond 4 hours or the fruit texture starts to degrade.)
To serve, pour the sangria into ice-filled glasses and top with a splash of soda water (if desired). Add fruit to each glass, preferably on long skewers for easy snacking.
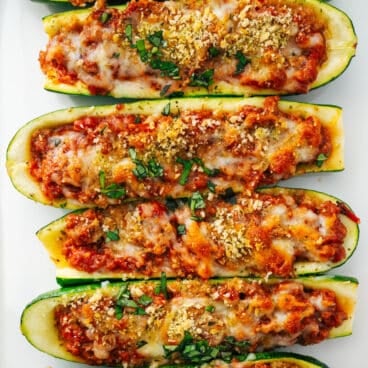
Stuffed zucchini boats are packed with a flavor-packed filling and melty cheese. Here’s how to bake them golden and tender (never soggy!).
I’ll be honest: I’m not huge fan of zucchini outside of baked goods, but this stuffed zucchini boats recipe made me a convert! You just hollow out zucchini into shells, then stuff it with sausage, tomatoes, garlic, mozzarella and Parmesan cheese, crispy breadcrumbs, and bake until golden brown.
It never fails that someone I serve it to says wow! These are packed with savory flavor and make a zucchini lover out of anyone. You can use either plant-based sausage or regular, depending on your diet.
5 Star Reader Reviews
“This recipe for zucchini boats is the best I’ve ever had. 5 stars.” -Pamela
“Wow! So delicious! This is the most flavorful zucchini dish I’ve ever eaten. The zucchini doesn’t get soggy. The breadcrumbs are crispy and the cheese makes it all taste amazing.” -Valerie
Why You’ll Love This Recipe
Here’s why I hope you’ll love this recipe:
It’s a delicious way to turn zucchini into dinner. Everyone around the table will love it, and you don’t have to add 2 cups of sugar to make it taste good.
Lighter than most stuffed zucchini recipes. Many recipes use 1 cup or more mozzarella, which is really just a cheese bake with a vegetable underneath. I use ½ cup mozzarella and ¼ cup Parmesan, so it’s really about the veggies here.
Faster than the lasagna. If you love Zucchini Lasagna but want it easier and quicker, try this one!
Ingredient Notes for Zucchini Boats
Here are some notes on the ingredients you’ll need:
Zucchini: Medium to medium-small. Save the huge garden zucchini for Zucchini Bread.
Sausage: Plant-based sausage or crumbles, Italian or chicken sausage, or 2 cups of my homemade Vegan Ground Beef Crumbles. See more below!
Fire roasted tomatoes: It’s important to have crushed fire roasted tomatoes for the best flavor here.
Garlic, dried oregano, fennel seeds, kosher salt, and black pepper: The fennel seed really adds depth and intrigue to the flavor.
Parmesan and whole milk mozzarella: Parmesan adds savory depth and mozzarella adds that melty topping.
Italian seasoned panko makes a crunch topping, and fresh basil or parsley makes a bright garnish.
Plant-Based or Regular: Choosing Your Sausage
The plant-based sausage and crumbles on the market these days are higher quality than in the past. I used to avoid eating it because felt too processed, but now I eat it occasionally. It’s made of pea protein and has a texture and flavor that’s remarkably similar to meat.
Since I also eat chicken on the Mediterranean diet, I realized I can make this with chicken sausage, too. Here are a few notes on the sausage component of this recipe:
Use any plant-based crumbles or sausage. I like the brands Impossible and Beyond. Sausage is harder to find so you can use any type of crumbles or ground beef. We used Impossible Sausage.
Try homemade Vegan Ground Beef. This homemade mixture of mushrooms, walnuts and savory spices remarkably tastes like meat.
Or, go for regular Italian or chicken sausage. If you’re a meat eater, regular sausage works well: or chicken sausage works too! Make sure to drain any extra fat before adding the sauce ingredients.
How to Keep Zucchini Boats From Getting Soggy
Here’s what I do to keep these boats from getting too soggy:
Bake them hot. Use a temperature of 425°F, not 350°F.
Scoop them thoroughly. Leave a shell about ¼ inch thick. If there’s extra pulp, it releases water into the boat.
Bake uncovered, and don’t pre-bake the shells. Foil traps steam; pre-baking makes them too mushy.
Rest a few minutesbefore serving. This helps the texture to set.
Tips For the Best Zucchini Boats
Use medium to medium-small zucchini. You don’t want those massive garden zucchini here: they’re much too large.
Only cut off the stem end. Don’t cut off both ends or you don’t get the boat shape! I accidentally when on autopilot when preparing this recipe and chopped off both ends. (It still works, it just doesn’t look as nice and filling may drip out then end while baking.)
Use fire roasted tomatoes. Fire roasted tomatoes add the best flavor here: they taste sweet and smoky right out of the can. If you can’t find them, I’ve listed a substitute in the recipe.
Whole milk mozzarella cheese makes a difference. It melts much better than part skim and has a richer flavor. It also melts better when reheating.
Make Ahead and Storage Tips
This zucchini boats recipe takes about 45 minutes to make in total, which can make it tricky for a weeknight meal. Here are a few ideas for advanced prep:
Make the entire recipe in advance. Make the entire recipe in advance and refrigerate. The day of serving, top with breadcrumbs and bake at 400 degrees for about 20 minutes until warmed through and the cheese is melted.
Make the filling and hollow out the boats in advance: You can make the entire filling and hollow out the boats 1 day in advance and refrigerate. Then just bake following the instructions below.
Dietary Notes
This zucchini boats recipe is gluten-free (sans breadcrumbs) and vegetarian. Here are some swaps:
Gluten free: Omit the breadcrumbs or use gluten-free breadcrumbs or panko. (It tastes just as good without the crunchy topping!)
Vegetarian: Use plant based sausage, crumbles, or 2 cups Vegan Ground Beef.
6 tablespoons grated or shredded Parmesan cheese, divided
½ cup whole milk mozzarella cheese
2 tablespoons Italian seasoned panko (or plain panko; omit or use gluten-free breadcrumbs for gluten-free)
1 tablespoon fresh basil or parsley, chopped
Instructions
Preheat the oven to 425°F.
Cut off the stem ends of the zucchini. Cut them each in half lengthwise and scoop out the insides with a spoon: you’ll want a thin edge around the outside of the boat. (Discard the pulp, or use it in smoothies or for another purpose.) Place the boats on a baking sheet and rub each with a bit of olive oil. Then sprinkle all 8 boats with a heaping ¼ teaspoon salt, ½ teaspoon oregano and fresh ground black pepper, divided between the boats.
Place the sausage in a medium skillet and cook according to the package instructions, 2 to 3 minutes for plant-based and 6 to 7 for regular sausage (for regular sausage, drain any excess fat after cooking). Add the garlic to the pan with the sausage and cook 30 seconds, then add the tomatoes, fennel seed, ½ teaspoon dried oregano, ½ teaspoon kosher salt, and ¼ cup Parmesan cheese. Heat for 1 minute until warmed through.
Scoop the filling into the zucchini boats. Top with the mozzarella cheese and the remaining 2 tablespoons Parmesan cheese. Then sprinkle with the panko.
Bake for 20 minutes until the cheese is melted and golden brown. Let stand for 2 minutes before serving. Leftovers store up to 3 days refrigerated.
Notes
*For plant-based crumbles or sausage, we like Impossible or Beyond (we used Impossible sausage here). For a homemade version, try Vegan Ground Beef.
**Fire roasted tomatoes add the best flavor here: they taste sweet and smoky right out of the can. If you can’t find them, substitute best quality tomatoes with 1 teaspoon sugar and ½ teaspoon smoked paprika. Or, use 1 ½ cups best quality marinara sauce.



 Pin Recipe