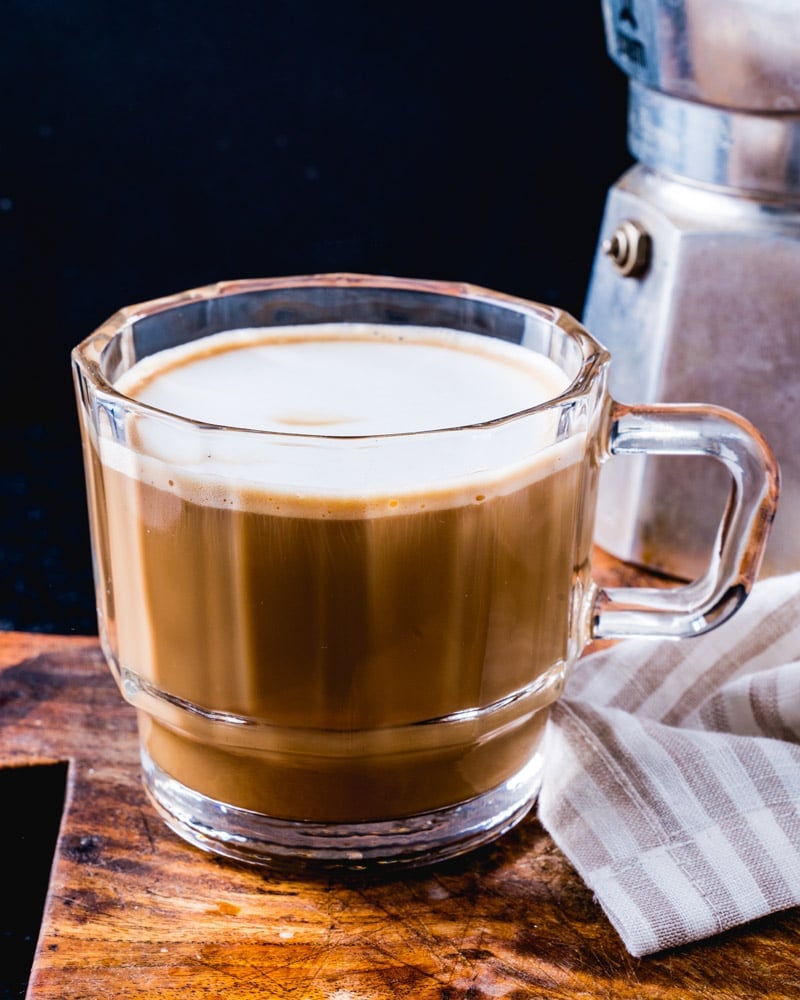
Cafe con leche is a Spanish coffee drink of strong coffee and steamed milk in equal parts. Here’s how to make it at home in 5 minutes.
Love a good cup of café con leche? This Spanish drink is popular in Spain and Latin America, and the blend of bittersweet coffee and rich milk is true perfection.
When I was a university student in Madrid, I used to order these on the regular. The intensely strong coffee was always served in a glass and aggressively sweetened. This recipe is just like the cafe con leche I remember, and it’s incredibly easy to to make at home!
What Is Cafe con Leche?
Cafe con leche (“coffee with milk” in Spanish) is a coffee drink made of strong coffee or espresso and steamed milk. The drink originated in Spain and is popular in Latin America, and uses equal parts coffee and milk. It’s similar to the French cafe au lait, but it’s usually served sweetened.
Ingredients You’ll Need
Here’s what you’ll need to make cafe con leche:
Strong coffee or espresso: Spanish coffee is usually darker than standard American drip, so I use dark roast beans here for the most authentic flavor. I like Moka pot coffee, which makes it closest to what I remember. Espresso works well too, as does French press espresso.
Whole milk. It’s the ideal richness for pairing with the bittersweet coffee. Of course, American milk tastes a little different than Spanish milk, in a way I can’t quite describe. Want to make dairy free cafe con leche? Oat milk is your best bet. It’s the dairy-free milk that froths the best. It won’t taste quite the same, but it’s still delicious.
Sugar. This is traditional; see below for more about how to sweeten cafe con leche.
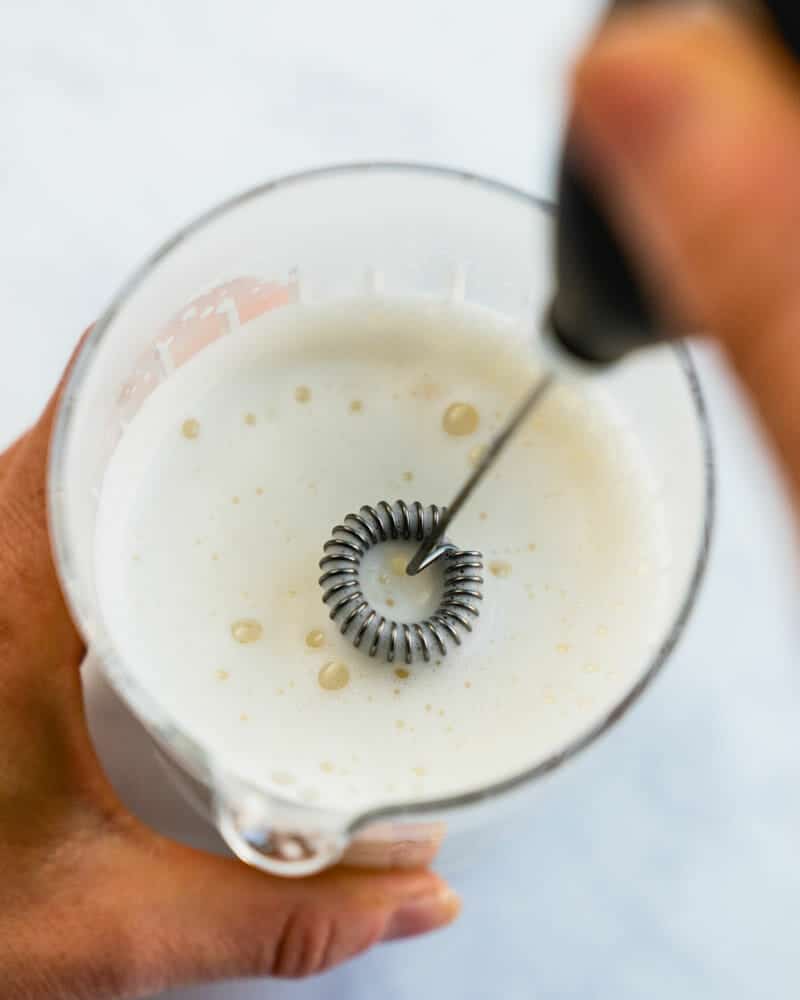
Heat and froth the milk. Steam ½ cup (4 oz) whole milk using an espresso machine, using the instructions for stretching the milk to 20 to 25% in height: see How to Steam Milk. Or, froth the milk with a hand-held frother, French press, or whisk. The best tool is a frother if you have it, but a French press also works great. A whisk makes very large bubbles in the foam, but it works for cafe con leche: go to How to Froth Milk.
Sweeten and combine. Stir the sugar into the hot coffee first so it dissolves completely, then pour in the milk and serve right away.
The standard cafe con leche ratio is 1:1: equal parts coffee and milk. That ratio keeps the coffee flavor strong with the milk to soften the finish. Bars and cafes in Spain pour it differently, so you can adjust the ratio to your liking.
How to Sweeten Cafe con Leche
You can sweeten cafe con leche to taste, depending on your preference! The cafe con leche I got in Spain was always pretty sweet, to balance the strength of the coffee. But go with your gut! Here’s a rule of thumb:
2 teaspoons sugar has the most traditional flavor; it’s pretty sweet and a nice balance with the bitter coffee
1 teaspoon sugar is subtly sweet and still provides a nice balanced flavor
Feel free to sweeten based on your tastes! If you want to use a natural sweetener, try honey, maple syrup or agave.
What to Serve With Cafe con Leche
In Spain this is breakfast food, not an afternoon indulgence. A few pairings I return to:
This sweet potato chili recipe is a family favorite! It’s a delicious healthy dinner recipe that’s hearty enough that you won’t miss the meat.
There’s really nothing better than a great chili recipe when the weather get a chill, and here I’ve got my new favorite: sweet potato chili! The sweet potatoes bring body and a mellow sweetness that pairs perfectly with the chili powder.
I’ve made a lot of vegetarian and vegan chili recipes, and this one always has people coming back for more! Leftovers are delicious and it’s the perfect make-ahead fall meal.
5 Star Reader Review
“This was absolutely delicious! Sweet, smoky and bold with just the right amount of heat. Great with a squeeze of lime and fresh cilantro in individual bowls. By far my favorite chili recipe yet!” -Tamara
Why You’ll Love This Recipe
Before you dismiss this as yet another chili recipe, let us convince you on why this vegetarian sweet potato chili should be on your “must make” list:
It’s vegetarian, but you won’t miss the meat. If you’re looking for a chili that’s not loaded with meat, this is it.
It’s healthy, loaded with vegetables like sweet potatoes, a superfood high in nutrients.
It’s seriously tasty, with complexity from chili secrets like cocoa powder and balsamic vinegar.
Ingredients You’ll Need
Most of this comes from the pantry, but a few ingredients do the heavy lifting:
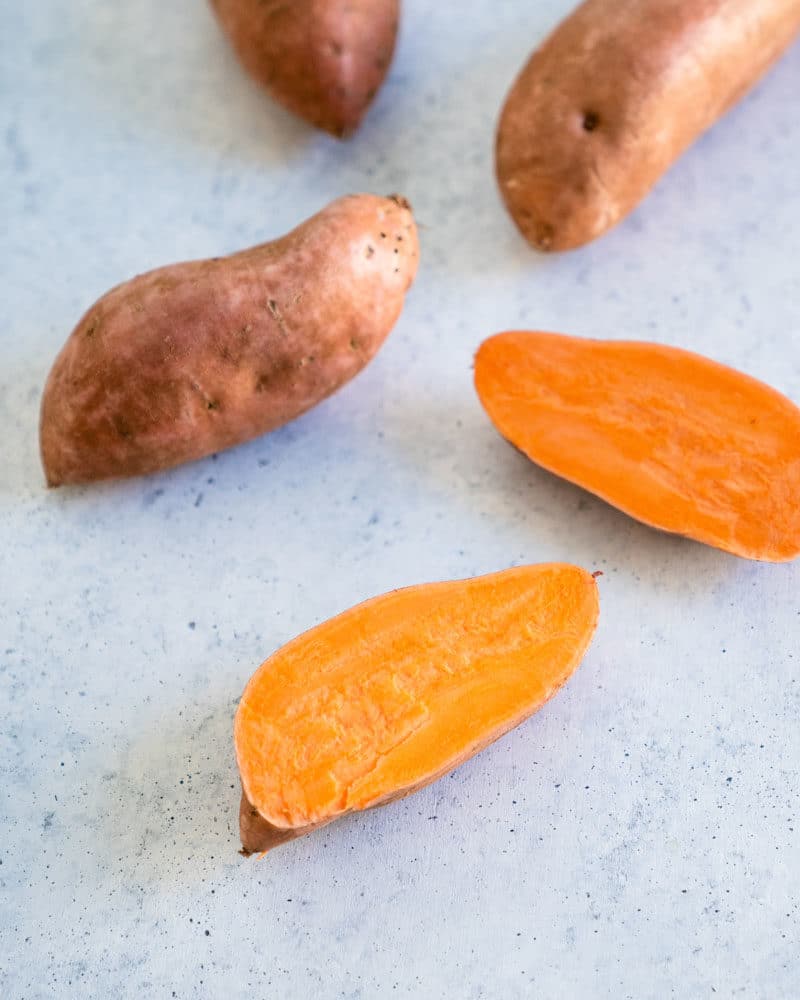
Sweet potatoes: Clean them and then chop into a ½-inch dice. No need to peel them; the skins soften and add a little texture.
Red onion and green bell peppers: Red onion cooks down a little mellower than yellow. Green peppers keep it savory.
Garlic: There’s quite a bit of garlic, but it infuses a savory flavor needed for a plant-based chili.
Diced tomatoes: Make sure to use this liquid: this will be part of the body of the chili.
Beans: You can use pinto, black, or kidney beans: whatever is in your cupboard!
Corn: Fresh, canned or frozen work (I most often use canned).
Chili powder, cumin, and cayenne: The seasoning backbone.
Cocoa powder and balsamic vinegar: These two secret ingredients add depth!
Masa harina: Optional, but it thickens the chili and adds a subtle corn flavor.
Tips For Sweet Potato Chili
Here are a few tips to keep in mind when making it:
It makes a huge pot. This one is perfect for feeding a crowd (we’re of the opinion that chili should only be made in massive quantities). It makes enough for 8 servings.
It’s plant-based (vegan). If you keep the garnishes vegan like with Vegan Sour Cream, this is also a plant-based chili! But you can absolutely top with cheese and sour cream.
Use canned or dried beans. For the beans in this sweet potato chili recipe, you can use any type you’d like: make it a sweet potato black bean chili, or use pinto and chili beans. You also can cook up a pot of your own beans: we cooked our own dried beans using our Dutch oven method. You can also try our Instant Pot black beans method.
Variations And Substitutions
Make it a sweet potato chili with ground beef or ground chicken. Brown one pound of ground beef or turkey with the onions and peppers, drain the fat, then continue as written.
Add smoked paprika. A teaspoon alongside the cumin gives it underlying smoky notes.
Dial the heat down. If kids are eating, start with 2 tablespoons and skip the cayenne entirely.
Use the slow cooker. Sauté the vegetables first, then transfer everything to a slow cooker on low for 6 to 7 hours. Stir in the masa slurry and vinegar during the last 30 minutes.
Chili Topping Ideas
As any chili lover knows, garnishes are key. Alex and I liked the taste right out of the pot, but we loved it with hot sauce, sour cream, shredded cheese, and green onions. Make sure not to skimp on the toppings! Here are my favorite chili toppings:
Dice the onion. Dice the green pepper. Dice the sweet potatoes into a small dice (cubes about 1/2-inch thick). Make sure to cut the sweet potatoes as directed so they cook quickly and to obtain the correct chili consistency. Mince the garlic.
In a large Dutch oven or stockpot (at least 5 quarts), heat the olive oil. Sauté onion, peppers and sweet potatoes on medium-high heat for 8 minutes, stirring frequently. Then turn down the heat to medium low.
Add the garlic, tomatoes and their liquid, beans, corn, vegetable broth, chili powder, cumin, cayenne pepper, cocoa powder, kosher salt, and black pepper. Stir, then cover and cook for 25 minutes, stirring occasionally.
After the 25 minutes, mix the masa harina with ½ cup water and stir it together in a small bowl. Add the mixture to the chili to thicken, and cook 10 minutes more. Stir in the balsamic vinegar.
Season with additional kosher salt and pepper to taste.
Thinly slice the green onions. Divide the chili into individual bowls and garnish with hot sauce, sour cream, green onions, and sour cream. Store leftovers refrigerated or freeze for up to 3 months.
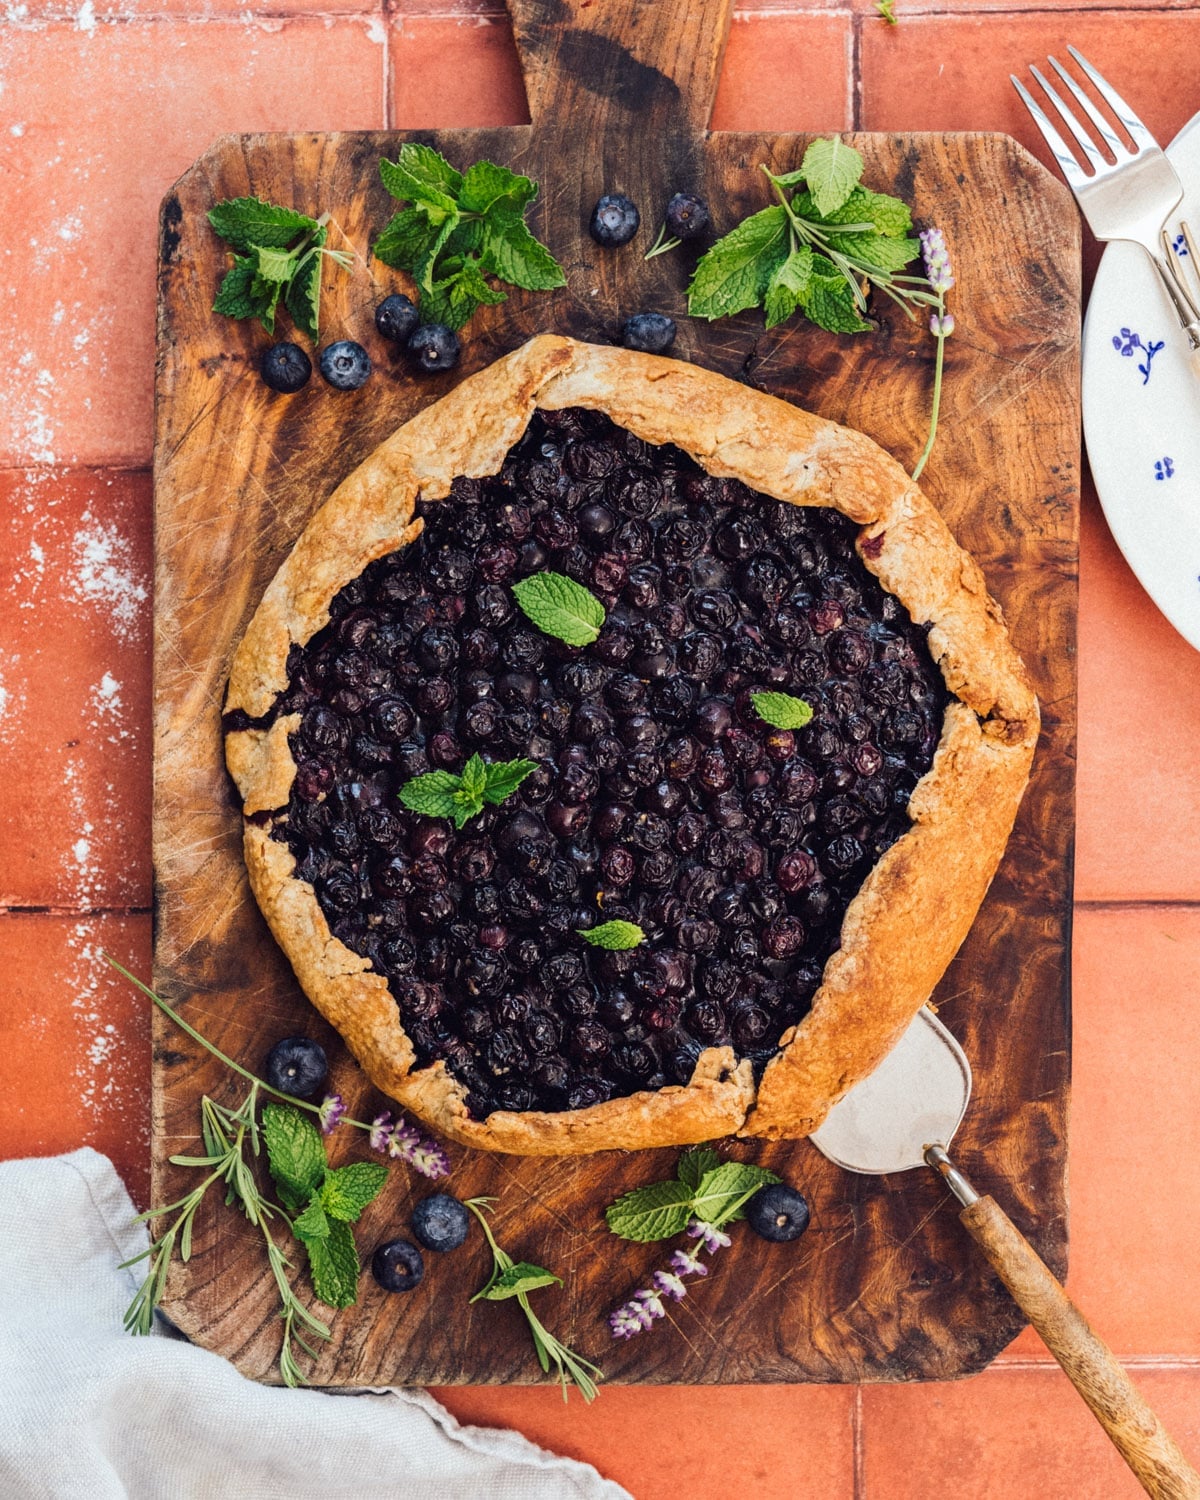
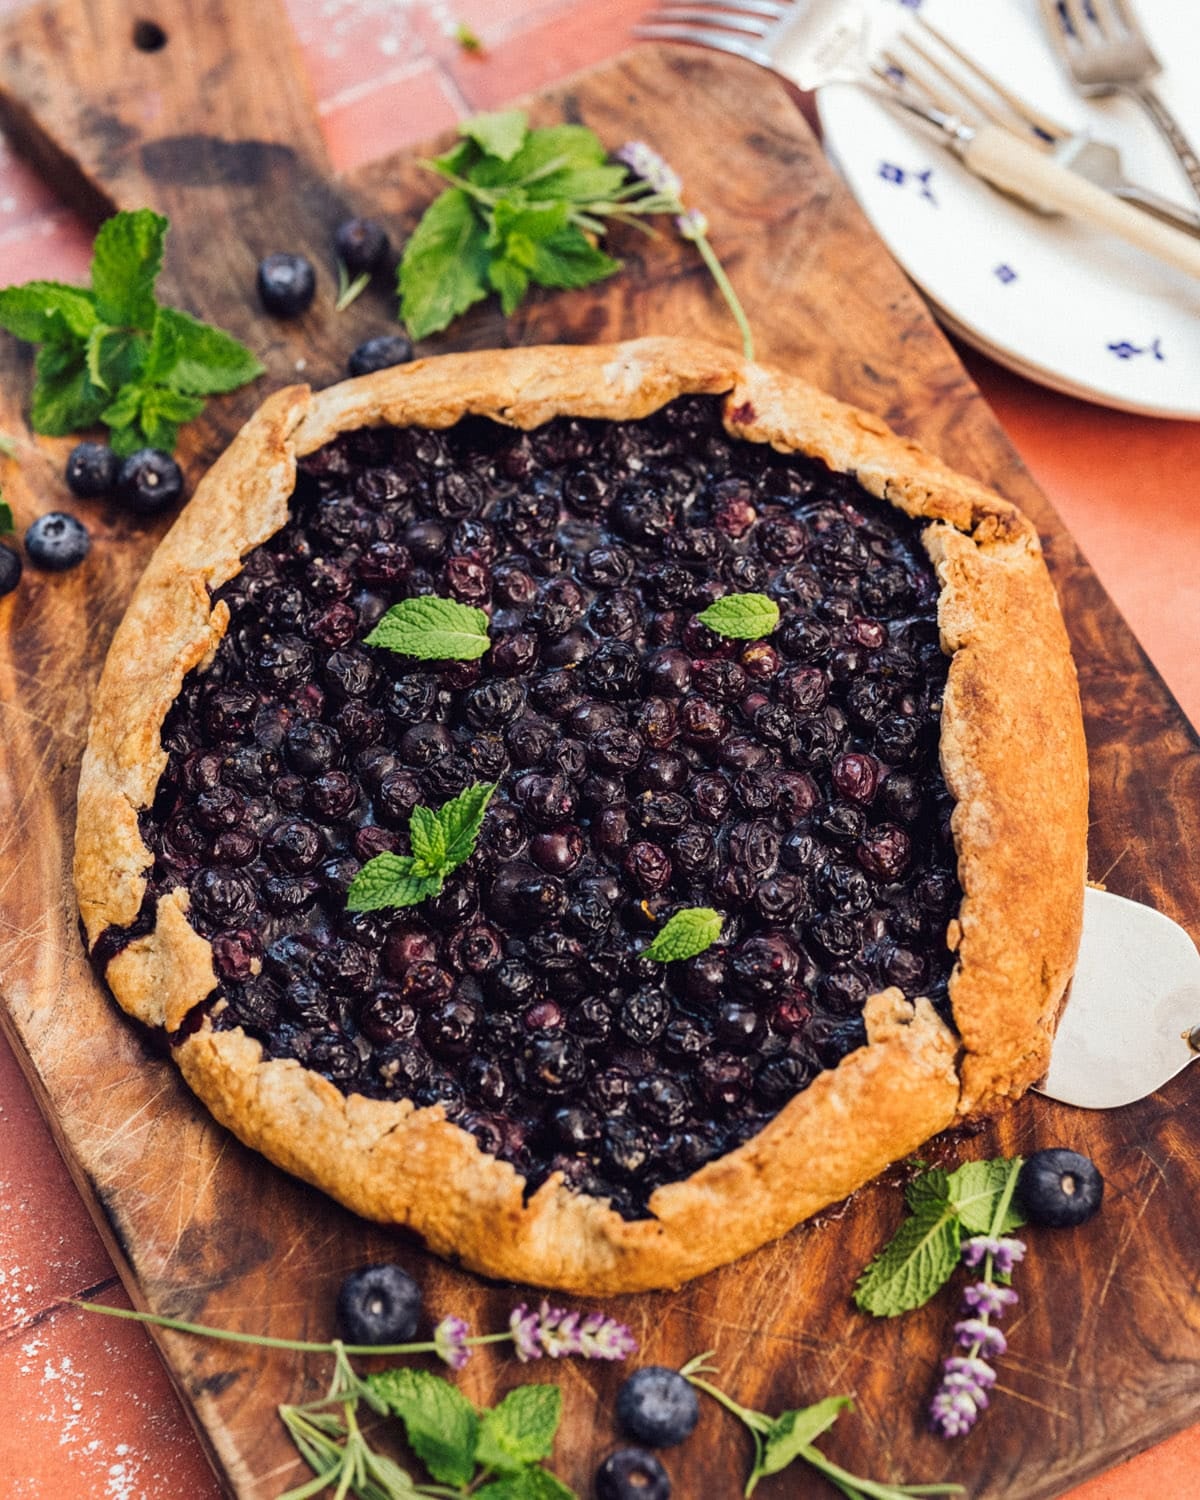
This rustic blueberry tart has a simple olive oil crust and a maple-sweetened filling: no butter, no special tools required! It comes together with pantry staples in 1 hour and looks like it’s from a French bakery.
Every year I get back from blueberry picking in Michigan with the best problem: what blueberry recipe to make? This year I decided to create a baked treat that’s easy, just sweet enough and made with olive oil instead of butter.
This rustic blueberry tart turned out so delicious, everyone in my family is obsessed! The olive oil crust has just the right texture and the jammy filling is flavored with pure maple syrup and lemon zest. It takes only 1 hour to whip up and there’s no special equipment. It’s SO DELICIOUS, you must give it a try!
Why You’ll Love This Blueberry Tart
No butter, no chilling. The olive oil crust is stirred together in a bowl and rolled out immediately. This heart-healthy oil also makes it Mediterranean diet friendly.
It’s less sweet. The crust and filling use 10 tablespoons maple syrup across 8 slices. Most fruit tarts this size use ¾ cup sugar or more.
Free-formtarts are easy, with no special equipment. No tart pan, no crimping, no blind baking required here!
Ingredients You’ll Need
Most everything are pantry staples, except the blueberries and lemon zest. Here’s what you’ll need:
Fresh blueberries: I like using fresh here, though you could technically substitute frozen. The flavor may be slightly less sweet with frozen berries.
Maple syrup: Use pure dark maple syrup: the container usually says “Grade A: Dark Color and Robust Taste.” Syrup that is labeled Light or Amber has less of a pure sweetness.
Lemon zest: This adds just the right brightness to the filling.
Cornstarch: This thickens and sets the filling: substitute arrowroot starch if desired.
Cinnamon: Adds just the right hint of complexity.
All-purpose flour, olive oil, apple cider vinegar, baking powder: Along with maple syrup, these form the olive oil crust.
How To Make This Blueberry Tart
This blueberry tart is a free-form tart, also known as a galette! It’s a traditional French rustic tart where you roll the dough flat, pile the fruit in the middle, and then fold the border up over the edges.
If you’ve never made one, I also have a guide on How to Make a Galette, and I have more traditional Blueberry Galette if you’d rather work with a butter crust. Here are the basic steps (or jump to the recipe below for the full quantities):
Mix the dough in one bowl. Dry ingredients with a fork, wet ingredients whisked separately, then stir together until a dough forms. Knead a few times with your hands.
Roll it straight out(no chilling!). Aim for a rough 12-inch circle on a floured counter. Cracks and uneven edges are fine; you can patch tears with your fingers. Use the rolling pin to transfer it to a parchment-lined sheet pan.
Heat the maple syrup and cornstarch. Whisk the maple syrup, zest, cornstarch, cinnamon, and salt over medium heat until it just bubbles, then pull it off and stir in the berries. This helps to thicken the sauce and make the filling set when baked.
Fold the border. Pour in the blueberries, leaving a 2-inch edge. Then fold over the outside of the crust.
Brush the crust with maple syrup and bake at 400°F for 28 to 32 minutes, until the crust is golden.
Cool completelybefore slicing, about 1 hour.
Maple Syrup Vs Refined Sugar
I’m not against the occasional proper dessert full of butter and sugar. But I love experimenting to make treats built on olive oil and unrefined sweeteners, where the fruit does most of the work.
A spoonful of vanilla yogurt: My husband Alex had this idea, and it’s a fun way to keep this dessert healthy-ish
A drizzle of heavy cream: If you do dairy, just a drizzle of cream is very satisfying and pretty low calorie (kind of like strawberries and cream, the British dessert)
Vanilla ice cream: This is an obvious choice: try my vegan ice cream to keep the whole thing plant-based.
A summer dessert for a dinner party: It travels well and is simple to slice up and serve!
Storage And Make-Ahead Notes
Store leftovers covered in the fridge up to 4 days. Bring to room temperature before serving.
I have not tried it, but you can technically make the dough a day ahead. Let it sit out about 20 minutes before rolling.
Variations To Try
Swap the fruit: Blackberries, raspberries, or thinly sliced peaches all work (see my Peach Galette for the spiral of the peaches).
Add a spice: A pinch of cardamom or fresh grated ginger is a fun flavor adder.
This rustic blueberry tart has a simple olive oil crust and a maple-sweetened filling: no butter, no chilling required! It comes together with pantry staples in 1 hour and looks like it’s from a French bakery.
2 tablespoons pure maple syrup, plus more for brushing (preferably Grade A Dark Robust)
1 tablespoon apple cider vinegar
2 tablespoons water
Instructions
Preheat the oven: Preheat the oven to 400°F. Line a rimmed baking sheet with parchment paper.
Make the crust: In a medium bowl, stir together the flour, salt, baking powder, and cinnamon with a fork. In another bowl, whisk together the olive oil, 2 tablespoons of the maple syrup, apple cider vinegar, and water. Add the wet ingredients to the dry ingredients and stir until a dough forms. Knead the dough two or three times in the bowl to bring it together. Turn the dough out onto a lightly floured counter. With firm pressure, roll the dough and press it into a circle about 12 inches across, leaving the edges rough (if needed, move the dough around and add a bit more flour underneath to keep it from sticking). The dough may not look fully smooth on top and that is okay. Cracks and uneven edges are fine; patch any tears with your fingers. Use the rolling pin to pick up the dough and carefully transfer it to the prepared baking sheet.
Make the filling: In a small saucepan, combine the maple syrup, lemon zest, cornstarch, cinnamon, and salt. Whisk over medium heat until the mixture just starts to bubble, then remove from the heat and stir in the blueberries. Scrape the blueberries onto the center of the crust and spread them in an even layer, leaving at least 2 inches of dough around the outside edge.
Form the tart crust: Fold the outer edges of the dough up and over the filling to form an approximately 2-inch border, overlapping the folds as you go. In a small bowl, mix ½ tablespoon maple syrup with ½ tablespoon water. Brush the crust with the mixture.
Bake: Bake for 28 to 32 minutes, until the crust is golden brown. Remove from the oven and transfer the parchment to a baking rack. Cool to room temperature (about 1 hour) before slicing and serving. Store leftovers up to 4 days refrigerated; bring to room temperature before serving.
Notes
Swap the fruit: Blackberries, raspberries, or thinly sliced peaches work in place of blueberries.
Add a spice twist: A pinch of ground cardamom or fresh grated ginger in the filling plays nicely off the blueberries.
Serving ideas: It’s great with a dollop of vanilla ice cream (try my vegan ice cream), a spoonful of vanilla yogurt, or a drizzle of heavy cream.
from A Couple Cooks https://ift.tt/A4PNROF
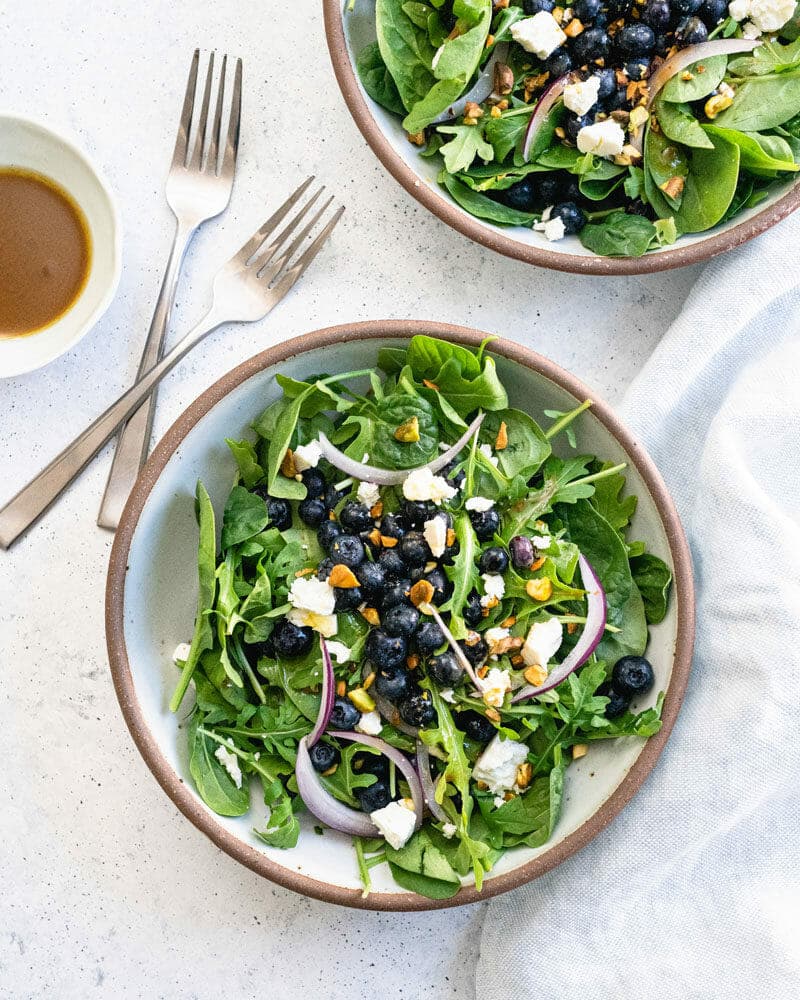
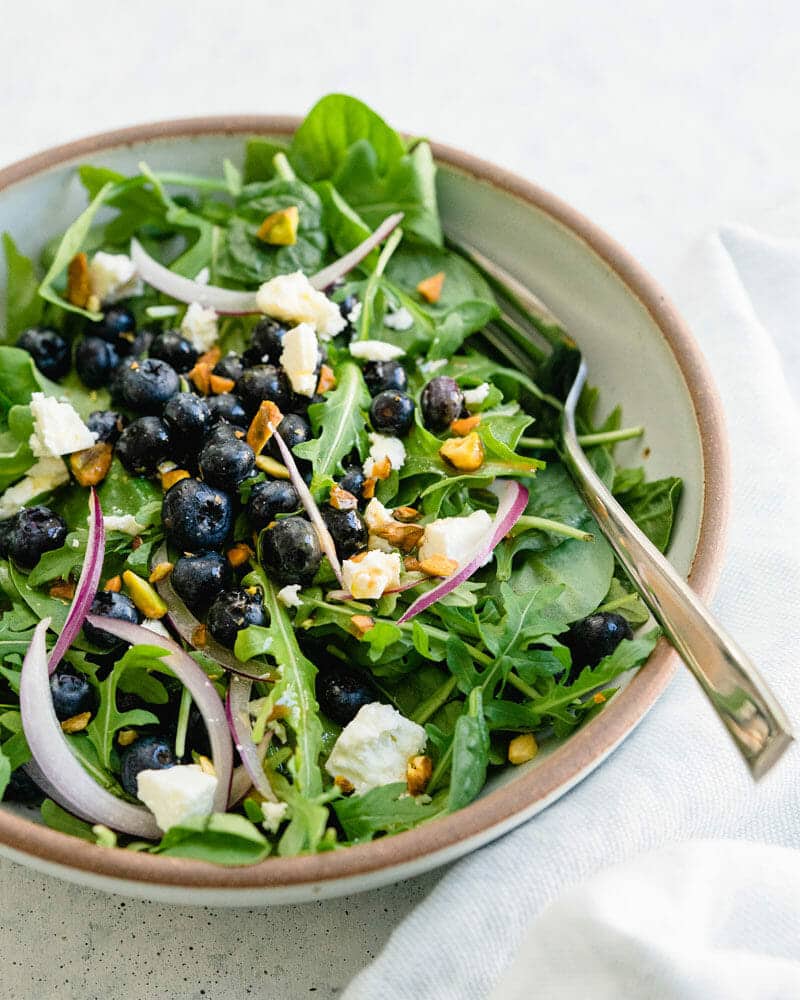
This blueberry salad with spinach, feta, and a balsamic dressing is a total crowd pleaser.
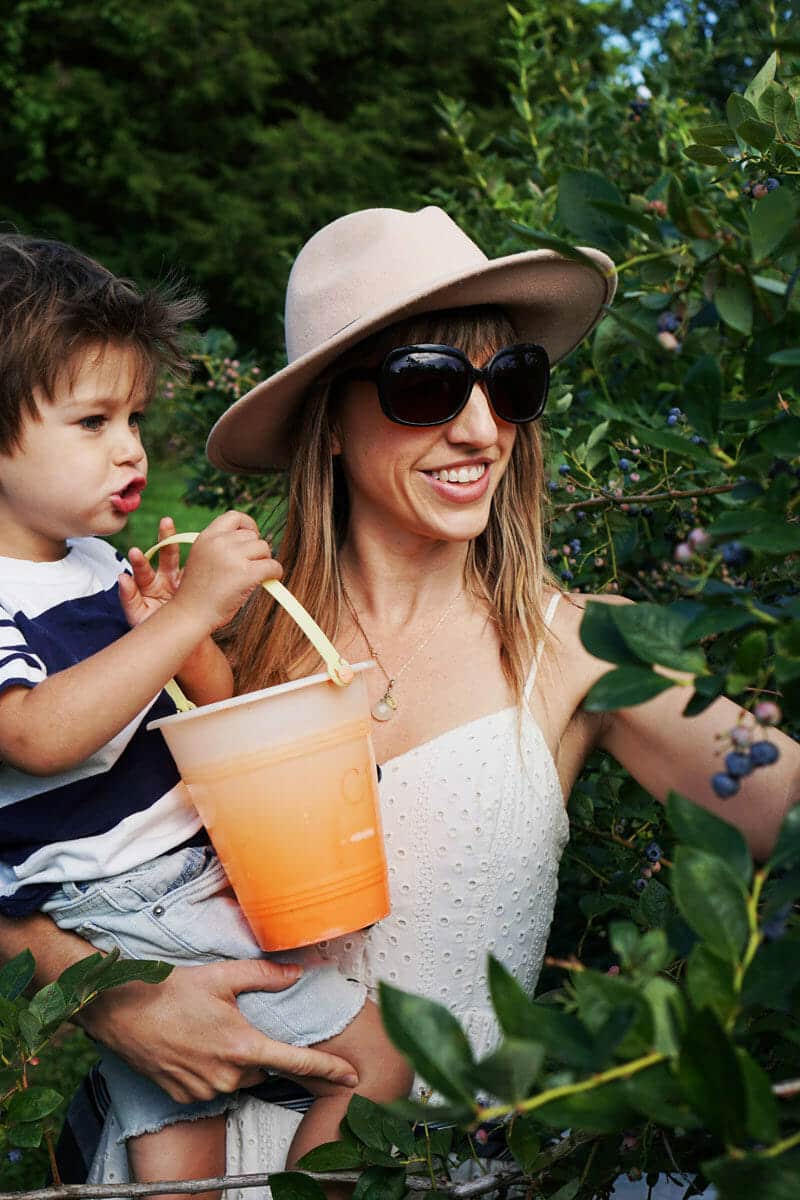
It’s not summer until I’ve picked blueberries in Michigan. After I’ve made all the blueberry pancakes and blueberry waffles, I’m usually craving something fresh. Enter: this blueberry salad.
It’s classic, fresh, and tangy sweet from the creamy balsamic dressing. It works with just about every meal, from chicken to salmon to vegetarian dinners. It’s the perfect salad for your easy weeknight meal repertoire!
Featured Reader Review
“We’re not big salad eaters, but my husband and I both absolutely love this one. So delicious, simple, and quick :)” -Kathrin
Ingredients In This Blueberry Salad
I’m always looking for side dish recipes that are easy to make and versatile, and this spinach blueberry salad is both. It goes with baked salmon or creamy pasta just as well. In fact, there’s not much that it wouldn’t go with! Here’s what’s in this blueberry salad:
Ripe blueberries: Always use fresh berries: even better if you picked them yourself! I like to wash and dry them first.
Mixed baby greensor spinach: I like using a variety of greens if you can, but anything works. I often use a mix of baby spinach and baby arugula.
Pistachios: Chop some pistachios for a crunch, or try glazed pecans or glazed walnuts for something a little fancier.
Feta cheese: I love using feta to add a salty pop, or goat cheese makes a nice pairing.
Balsamic vinaigrette: My go-to classic dressing is made with balsamic vinegar, maple syrup, Dijon mustard, and olive oil.
Tips For A Perfect Balsamic Dressing
The balsamic dressing is what carries this spinach blueberry salad. The flavor is zesty and bright, tangy from the balsamic vinegar and balanced with a touch of maple syrup. Over the years, we’ve found a few tips for making a perfect emulsion (when the oil and vinegar combine into a creamy texture instead of separating):
Use a medium-sized bowl to allow for enough movement of the whisk. Trust me, I’ve done this in small bowls before and it’s almost impossible to get the oil and vinegar to meld!
Whisk the ingredients by hand. Start with the balsamic, Dijon mustard, and maple syrup. The Dijon mustard actually also helps to form and lock in the emulsion (I’ve used this technique in other vinaigrette recipes like Classic Vinaigrette and Italian Dressing).
Add the olive oil as gradually as you can: I typically add it tablespoon by tablespoon and whisk in between until the oil fully incorporates.
Best Cheese For Blueberry Salad
As I mentioned, feta is my favorite for most fruit salads, but this salad works well with just about anything:
Goat cheese is creamier and tangier
Shaved Parmesan is savory instead of tangy
Fresh mozzarella or burrata cheese would make a more decadent salad
Skip it entirely for a vegan version, and add extra nuts for a contrast
Variations With Cucumbers, Almonds, And More
You can also add other ingredients to change up the vibe based on what you have on hand:
Add cucumbers. Thin half-moons of English cucumber are a delicious flavor pairing.
Dressed salad doesn’t store well, so if you can store all ingredients separately. The vinaigrette holds up to two weeks in a sealed jar. Washed greens, onion, feta, and nuts can each be prepped a day ahead. Rinse blueberries right before serving; washing early softens the skins.
Dietary Notes
This blueberry salad recipe is vegetarian and gluten-free. For vegan, plant-based, and dairy-free, omit the feta cheese.
8 cups mixed baby greens (we used baby spinach and arugula)
⅓ cup chopped pistachios
⅓ cup feta cheese crumbles (omit for vegan)
Fresh ground black pepper
Instructions
Make the Best Balsamic Vinaigrette. (*For the nutrition analysis, we’ve calculated 1 tablespoon dressing per serving. We recommend making the entire dressing recipe and saving leftovers in a sealed container in the refrigerator; bring to room temperature prior to serving.)



 Pin Recipe