Boiled butternut squash is the fastest way to cook it: it comes out with fork-tender cubes in about 5 minutes on the stovetop! Here’s my method, and the best ways to season it.
Want a fast way to cook butternut squash? Roasted butternut squash is one of the tastiest ways to cook this popular vegetable, but it can take up to 45 minutes with preheat time. As a cookbook author, I always dread doing it (though it is delicious). So I’ve found the fastest way to cook squash: boiled!
This boiled butternut squash recipe takes just 5 minutes to cook: combine that with chopping and boiling the water and it’s just about 20 minutes total. Eat it as a tasty healthy side dish, or use it in recipes like enchiladas, risotto, or lasagna.
Boiled Versus Roasted Butternut Squash
Which method is better, boiled versus roasted butternut squash? It really depends on how you’re using it. Here are some pros and cons:
Roasted squash: I love roasted butternut squash for its beautiful caramelized flavor and browned edges. It brings out a sweetness and texture that boiling can’t replicate! However, it does take about 45 minutes once you chop and roast the squash. It’s best for when you’re eating the squash as a side or as a featured ingredient, like in Butternut Squash Risotto.
Boiled squash: Boiled squash results in very tender cubes. It takes about 20 minutes total. If you’re making Butternut Squash Soup (boiled as part of the process), a puree, mash or even Butternut Squash Lasagna, boiling butternut squash works great.
How To Make Boiled Butternut Squash
Butternut squash boils in just 5 to 6 minutes. That’s loads faster than the cook time for roasting, which is 30 to 35 minutes. The squash comes out sweet and tender, though you don’t get the lovely caramelized exterior that roasting provides. But it’s worth it if you’re using the squash in another dish; we love boiling squash for when we make lasagna. Here’s what to do:
Peel and chop the squash. Tips on that are below!
Boil 5 to 6 minutes. Bring a pot of water to a boil. Add the squash and boil for 5 to 6 minutes, until fork tender. Taste test a piece to see if it’s done.
Drain and season. Drain the squash, then season it with olive oil, salt, pepper, and the additional seasonings of your choice.
How to Peel and Cut Butternut Squash
Butternut squash is notoriously difficult to peel and chop. Here’s the method we use, which makes it much easier to tackle it’s irregular shape. Watch the video first, then follow these steps:
Chop off the neck first. Using a large chef’s knife, cut off the top of the butternut squash. Cut off the neck right where the neck meets the base.
Peel: Use a vegetable peeler to peel off the skin of the neck and the base. A serrated vegetable peeler works better than a normal peeler, which tends to slip.
Remove the seeds: Slice the base in half, and use a spoon to scoop out the seeds.
Chop the neck: Cut a flat edge on the side of the neck, to use as a base. Cut the neck into roughly 1/4″ slices. Cut the slices into strips, then turn the strips and chop them crosswise to create cubes.
Chop the base: Slice off the end of the base and slice it into roughly 1/4″ slices. Then chop the slices crosswise to create cubes.
Ways to Season Boiled Butternut Squash
This boiled butternut squash tastes great with a drizzle of olive oil and salt and pepper. We like adding a hint of garlic powder, which elevates the flavors. Because we used this boiled squash for our Butternut Squash Lasagna, we kept it very simple. But if you’re serving it as a side dish, you may want to add one or more of these flavors to elevate it:
Parmesan cheese
Finely chopped sage or thyme
Butter
Garlic
Maple syrup
Chopped pecans
Cumin and chili powder
Recipes That Start With Boiled Butternut Squash
You can also use boiled butternut squash as a component in recipes. Because it’s such a fast way to cook squash, it’s ideal when used in these butternut squash recipes:
This boiled butternut squash recipe is vegetarian, vegan, plant-based, dairy-free, and gluten-free.
Frequently Asked Questions
Can you boil butternut squash with the skin on?
Well, only if you’re boiling halves. The boiled skin stays tough and needs to be removed either way. It’s easiest to peel and cut into cubes first, then boil it.
How long do you boil butternut squash?
About 5 to 6 minutes for half-inch cubes, or 8 to 10 minutes for 1-inch chunks.
Is it better to roast or boil butternut squash?
Personally I like to roast it if you’re using squash as a star ingredient and you want caramelized edges. You can boil it when it’s an ingredient you’re using in something else, like a lasagna or soup.
Can you boil frozen butternut squash?
You can and you can throw it in the pot straight from frozen. Watch the cook time and pull when it is fork tender. Keep in mind, frozen butternut squash often doesn’t have as good of flavor and fresh and will be mushier when boiled.
Why do my hands feel sticky after cutting butternut squash?
I researched and found that raw butternut releases a sort of sap when you cut it. It’s not toxic and easily washes off with soap and water.
Boiled butternut squash is the fastest way to cook it: it comes out with fork-tender cubes in about 5 minutes on the stovetop! Here’s my method, and the best ways to season it.
Bring a medium pot of water to a boil. Add the squash and cook for about 5 to 6 minutes until fork tender (test a piece to see if it is done).
Drain, then place in a medium bowl. Mix with the olive oil, kosher salt, garlic powder and fresh ground black pepper. Add additional seasonings as desired.
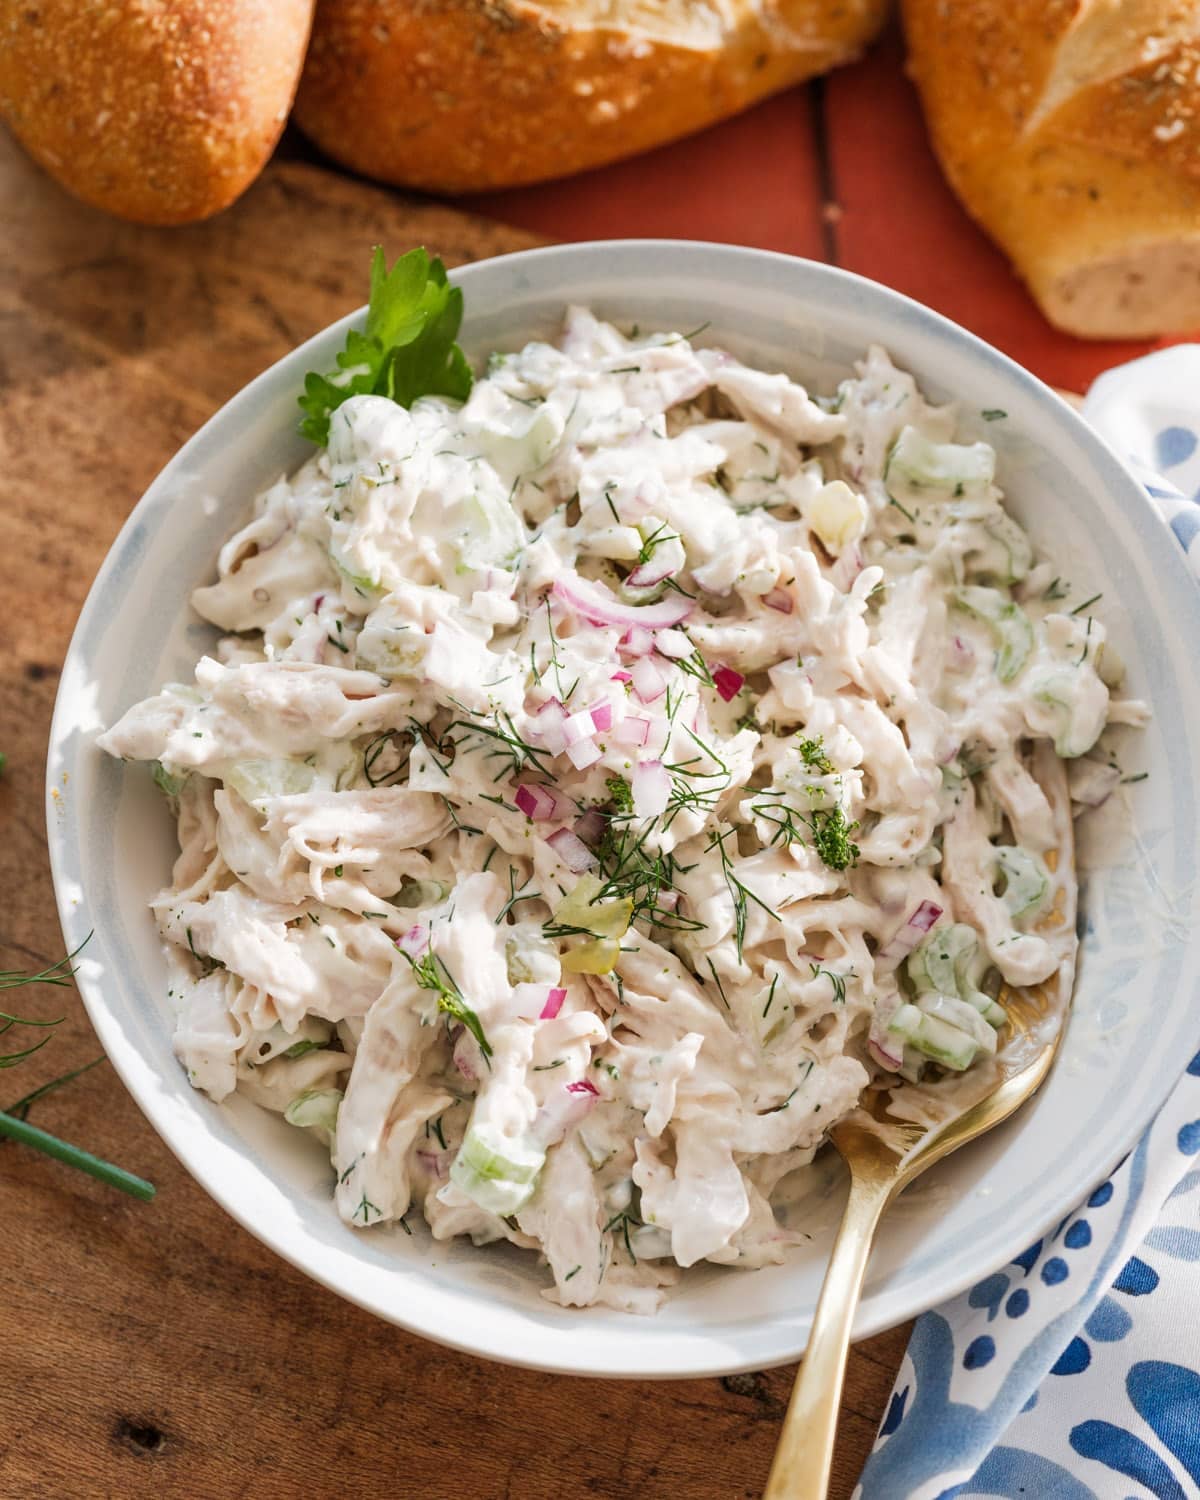
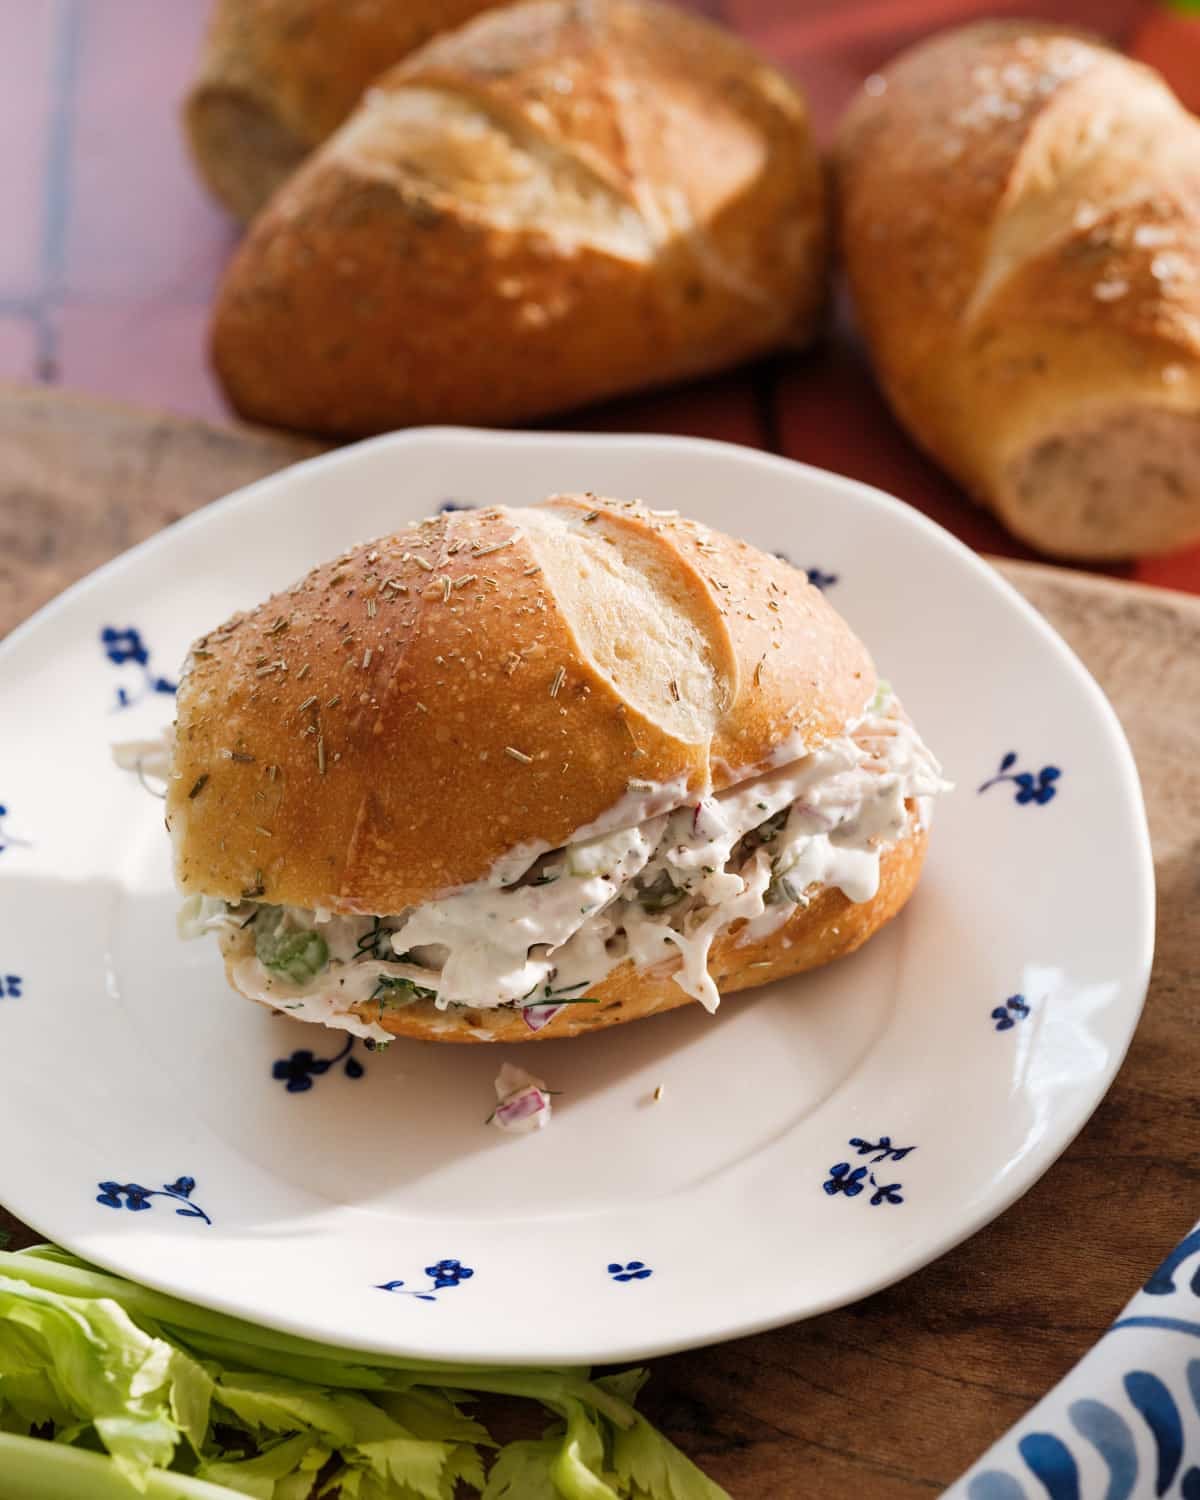
This healthy chicken saladrecipe is creamy without the heaviness using both Greek yogurt and mayo. It’s ready in 25 minutes and full of fresh dill, celery, and pickles!
There’s something about chicken salad that is satisfying to me every time, and it’s a meal I never get tired of. With my expertise in the Mediterranean diet, I recently decided to create a healthy chicken salad recipe: a little less mayo, but still big flavor!
To me, a healthy chicken salad has a little Greek yogurt for creaminess, balanced with less mayo than the standard version of this recipe. It’s also got fresh herbs to carry the flavor, and makes a fun healthy dinner idea served over greens in a bowl with fresh veggies!
Why This Healthy Chicken Salad Works
I’ve made a lot of versions of chicken salad over the years: this tarragon chicken salad is one of my favorites. But here’s why I love this one:
It’s super creamy but lighter. The yogurt lightens the dressing so you can use less mayo than the standard.
It’s high protein. This recipe packs in the lean protein.
It takes 25 minutes, and it’s even quicker with pre-cooked and shredded chicken.
How To Poach Chicken For Chicken Salad
Poaching chicken is cooking it in water, and that’s what I like to do to make shredded chicken quickly on the stovetop. I’ve got a few more time saving tips below, but here’s how to cook chicken and shred it:
Butterfly the breasts first by slicing them in half horizontally.
Heat a pan of 6 cups water and 2 teaspoon salt. This helps to season while cooking.
Cook the chicken for 7 to 10 minutes, until it has an internal temperature of 165°F. Rest the breasts for 5 minutes before shredding with your fingers or two forks.
Here’s what you’ll need for this healthy chicken salad, besides the chicken:
Fresh dill: This is what brings in the herbaceous flavor; use it if at all possible.
Dill pickles: You’ll use chopped dill pickles, and you can add a splash of pickle brine if you like to add more dill flavor.
Celery: This is important for the best crunch in your chicken salad.
Red onion: Red onion adds a nice savory note and additional crunch.
Oregano: This adds another bit of herby intrigue.
Optional adder: 15-ounce can chickpeas, dried, rinsed, and smashed with a fork in the bowl before adding the other ingredients. This helps to stretch the chicken salad to more servings add fiber. It’s my favorite way to customize a healthy chicken salad! You’ll likely need to add at least ¼ teaspoon kosher salt to make the flavors pop.
Ways To Serve Healthy Chicken Salad
Outside of my favorite fiber and protein adder (chickpeas!), here are some ways to serve this chicken salad:
As a bowl over greens: Add a scoop over romaine or butter lettuce, then add some crunchy veggies on the side like tomatoes, cucumbers, or shredded carrots
Stuffed into an avocado half, for a gluten-free version.
Storage And Meal Prep
This healthy chicken salad lasts for 3 to 4 days refrigerated with freshly cooked chicken. For make-ahead, you can poach and shred the chicken first and store it until you’re read to make the salad; the shredded chicken lasts 3 to 4 days, but remember to factor that into the shelf life of the salad.
Dietary Notes
This healthy chicken salad is gluten-free and high protein. For dairy-free, you can substitute vegan mayo for the Greek yogurt and mayo.
This healthy chicken salad is creamy without the heaviness using both Greek yogurt and mayo. It’s ready in 25 minutes and full of fresh dill, celery, and pickles!
Optional adder: 15-ounce can chickpeas (see Notes)
Instructions
Make the shredded chicken (skip for pre-cooked chicken): If the chicken breasts are not already butterflied, place your hand flat over the top of each breast and use a sharp knife to carefully slice it horizontally. Unfold the breast like a book, then cut along the fold to separate the two halves. Add 6 cups water to a pot and stir in 2 teaspoons kosher salt. Bring to a boil, then add the chicken. Boil until the internal temperature reaches 165°F and the center is no longer pink, about 7 to 10 minutes. Remove the chicken to a plate and allow it to rest for 5 minutes. Once it is cool enough to touch, use your fingers to tear the chicken into shreds.
Stir together the dressing: In a medium bowl, whisk together the Greek yogurt, mayonnaise, Dijon mustard, white wine vinegar, dill, oregano, kosher salt, and several grinds of freshly ground black pepper.
Make the salad: Add the shredded chicken, celery, red onion, and pickles to the bowl with the dressing. Stir until everything is evenly coated. Taste and add more kosher salt and black pepper as desired. Serve immediately, or refrigerate until ready to eat. Leftovers last for 3 to 4 days refrigerated.
Notes
15-ounce can chickpeas, dried, rinsed, and smashed with a fork in the bowl before adding the other ingredients. You’ll likely need to add at least ¼ teaspoon kosher salt to make the flavors pop. This helps to stretch the chicken salad to more servings add fiber. It’s my favorite way to customize a healthy chicken salad!
from A Couple Cooks https://ift.tt/tcHZEO2
Here’s how to make a classic hot toddy with whiskey, rum, or brandy, plus honey and lemon. This cozy drink comes together in 5 minutes!
There’s not much better to lift one’s spirits on a gray day than a steaming hot beverage. Here’s one that’s been around for centuries: the classic Hot Toddy! This historic drink used to be prescribed as a cure for the common cold, and with one sip you’ll know why.
A burst of warm bourbon, rum or brandy melds seamlessly into the lemon and honey. Even just the light steam on your face as you take in the aroma makes this drink worth making. Here’s how to make a hot toddy!
5 Star Reader Review
“I haven’t made it in a few years, so had to revisit the base recipe, and yours is great! Honey, squeeze of lemon and the whole spices mentioned, and perfect for this cold day by the fire. Thanks for the recipe!” -J
What Is a Hot Toddy?
The hot toddy is a mixed drink made of liquor, hot water, and honey, often made with lemon, spices, or tea. Its name goes back to British colonial India, similar to a local term for a drink made from fermented palm sap. By the late 1700s, English dictionaries defined “toddy” as a drink made with spirits, hot water, and sugar.
The drink became popular in England and Scotland using Scotch whisky. It then spread to America, where rum and brandy were the available spirits and used in the hot toddy. By the mid-1800s, Americans were prescribing the hot toddy as the cure for the common cold!
Ingredients You’ll Need
Many hot toddy recipes use tea as the base, but the simplest and tastiest form of this drink uses hot water. Here are the ingredients you’ll need for this hot toddy recipe:
Whiskey, rum or brandy: Each spirit adds its own character to this drink. I like bourbon or brandy best.
Honey: This brings in the nuanced sweetness.
Lemon: The fresh citrus brings in a brightness to each sip.
Hot water: All you’ll need here is hot water to let the flavors bloom.
How To Make a Hot Toddy
These days, you don’t have to have a cold to drink a hot toddy. But once you take the first sip, you’ll appreciate why it was rumored to have restorative qualities. The way that hot water opens the flavors of the whiskey, brandy or rum makes it deliciously easy to sip. Here’s what to do:
Mix: In the serving glass, stir together 3 tablespoons whiskey, rum, or brandy with 1 tablespoon honey.
Add hot water: Pour in ½ cup hot water (substitute hot tea if desired).
Add lemon: Squeeze in a lemon wedge.
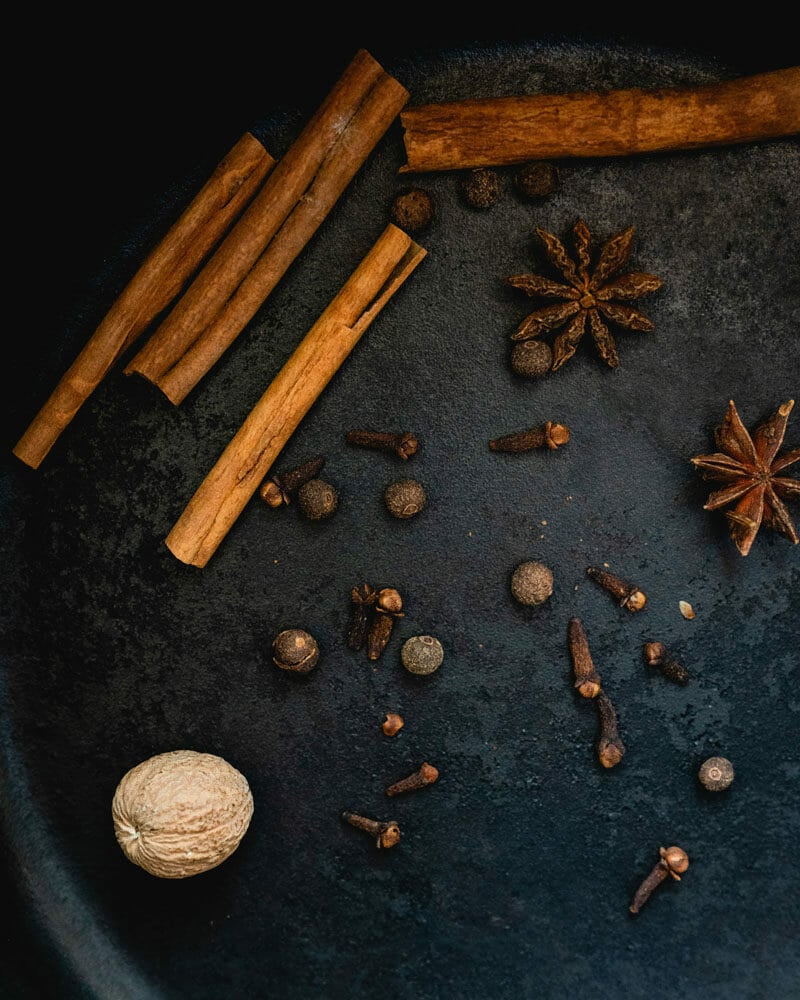
Garnish: Add whole spices like cloves, cinnamon stick, and star anise. These are optional, but they add a nice aromatic touch.
Best Whiskey, Rum, or Brandy for Hot Toddies
The hot toddy is endlessly customizable, depending on what type of liquor you use. You can use any type of whiskey, rum or brandy to change the flavor slightly.
Whiskey: Use bourbon for sweet oak and vanilla notes, Scotch for a peaty sharpness, rye for a spicy finish, or Irish whiskey for a mellow sweetness. I personally like bourbon here and usually use something mid-priced like Bulleit Bourbon or Elijah Craig Small Batch. See my guide to types of whiskey or go to Bourbon Hot Toddy.
Rum: Try white rum, aged rum or dark rum instead of whiskey for a sweeter flavor. Aged and dark rum add even more nuance in flavor. Go to Rum Hot Toddy.
Brandy: Brandy adds notes of dried fruit and citrus, with oaky notes on the finish. Go to Brandy Hot Toddy.
Hot Toddy With Tea or Ginger
Making a hot toddy with tea is a common variation for this drink! However, we prefer it with hot water. Here’s what to know about making a tea hot toddy:
You may need to add more sweetener. The flavor of the drink becomes more bitter with tea, so you may need to add a little more sweetener to balance the flavor. For that reason, we prefer using hot water.
What types of tea work best? Black tea or herbal tea work well flavor-wise. Our favorite tea is Celestial Seasonings Bengal Spice, which brings a warm-spiced flavor. Here’s how to make tea.
With ginger: Add two or three rounds of fresh ginger to the mug and let them steep a few minutes before drinking.
More Flavor Variations
There are many more ways to vary this hot toddy recipe outside of the type of liquor! Here are a few creative flavor variations:
Don’t have cayenne, or realized you’re all out while you’re making a recipe? Here’s the best substitute for cayenne pepper in recipes.
Making a recipe that calls for cayenne and don’t have it? There are few options that are perfectly suited as a substitution.
Cayenne is a spice that’s made of ground cayenne peppers, a moderately hot red chili pepper (though some cayenne pepper blends contain other peppers). Just a pinch adds just the right amount of heat to meat or fish, curries, stews, and more.
You’re most likely to encounter the ground cayenne powder in recipes. Don’t have it handy? Here are a few ground cayenne pepper substitutes.
Best Ground Cayenne Pepper Substitute
1. Red pepper flakes
The best cayenne pepper substitute? Red pepper flakes. They have a chunkier texture than ground cayenne pepper, but they add quite a bit of heat. If you’re looking for the same level of spice as the cayenne, you may need to add a bit more. Start with a 1:1 substitution.
2. Hot paprika
Another good cayenne pepper substitute? Hot paprika. Chances are if you don’t have cayenne you might not have hot paprika around. But the spicy version of paprika works well as substitute. Don’t use standard sweet paprika here: it doesn’t have heat. Use an equal part of hot paprika, then adjust to taste.
3. Hot sauce
Cayenne pepper doesn’t add a lot of flavor: it mainly adds heat. So hot sauce can replace some of the heat that cayenne brings! Just keep in mind that some hot sauces have a very distinctive flavor. We wouldn’t suggest adding Frank’s Red Hot to a Moroccan-style stew that calls for cayenne. So keep in mind that the type of hot sauce should match the cuisine.
4. Hot paprika
If you happen to have it on hand, hot paprika also works as a stand in for cayenne pepper! It’s a little less spicy, so you can use double the amount of hot paprika as the recipe calls for cayenne.
Grilled cheese in the oven is the easiest way to make a batch of sandwiches at once, with no skillet babysitting required. Bake them up on a sheet pan until melty and golden brown!
Here’s a hack for how to cook up many grilled cheese sandwiches at once: my method for grilled cheese in the oven! It’s never fun to babysit a skillet while you make grilled cheese to order: especially if you’re entertaining a bunch of people.
Want to serve tomato soup and grilled cheese for a crowd? Fire up your oven! Baked grilled cheese comes out melty and golden brown. To me, it also feels more like a fun “meal” than the standard method. Here’s how it’s done!
5 Star Reader Review
“Works great! Highly adaptable for types of cheeses and additions. So much better then using a skillet. I will use this method from now on even if making one or two sandwiches. They reheat well in the oven too!” -Francis
How to Make Grilled Cheese in the Oven
This grilled cheese in the oven method lets you make as many grilled cheese sandwiches at once. In fact, you can cook as many sandwiches as fit in your oven. The exact amount depends on the bread size and your oven. (Our oven is a non-standard size, and we can fit about 8 sandwiches at once.) Here’s the basic idea:
Preheat the oven to 425 degrees Fahrenheit. High heat toasts the bread until it’s golden brown.
Assemble the sandwiches on a sheet pan. Buttered sides go out, then place shredded cheese inside. Shredded cheese makes the best melty sandwiches (vs slices)!
Bake 6 minutes on one side, then 6 minutes on the other. Check to see how browned the bread is.
Cook a few more minutes if not yet golden brown. Is the bread browned yet? If not, toast about 1 minute per side until browned.
The Best Cheeses for Melting
Here I’ve used a combination of sharp cheddar and mozzarella. Cheddar brings in a savory flavor and mozzarella adds the nice cheese pull. Some people use American cheese for even meltier cheese, but I don’t usually buy this ingredient.
If you want to step it up, something like fontina and smoked gouda are really delicious; see my Gourmet Grilled Cheese.
Ways to Change Up the Flavor
You can use the grilled cheese in oven recipe below for a basic grilled cheese. But feel free to substitute your favorite fancy sandwich idea in place of the basic. In fact, the baked grilled cheese method is perfect for making a grilled cheese idea as a quick dinner. Here are some ideas we love:
Gourmet Grilled Cheese: This Gourmet Grilled Cheese features smoked gouda cheese and fig jam for an upscale spin.
What’s your favorite ingredient to add to grilled cheese to take it up a few notches? Let us know in the comments below.
What to Serve With Baked Sheet Pan Grilled Cheese
Want to make grilled cheese into a healthy meal? Add a salad, fresh veggies or a bowl of soup to contrast the melty, toasted goodness of this baked grilled cheese in the oven. Here are a few side dish ideas:
On keeping warm: You can keep baked sandwiches in a 200°F oven for a few minutes before waiting to eat.
Make ahead: You can make the sandwiches, over the sheet pan and refrigerate a few hours before baking; add a few minutes to the bake time since you’re baking from cold.
Leftovers: Reheat leftover sandwiches in a 350°F oven for about 5 minutes, flipping halfway, until warmed through.
Dietary Notes
This baked grilled cheese in oven recipe is vegetarian. For dairy-free, use olive oil and plant-based cheese shreds. For gluten-free, use gluten-free bread.
Frequently Asked Questions
What temperature do you cook grilled cheese at in the oven?
I use 425°F. It crisps the bread and melts the cheese in just over 10 minutes.
How long does grilled cheese take in the oven?
About 12 minutes: 6 minutes per side at 425°F. Watch the color of the bread.
How do you make a lot of grilled cheese at once?
Use a sheet pan that fits in your oven and bake the sandwiches all on one tray.
Do you need to flip grilled cheese in the oven?
Yes, flip halfway through so both sides get browned.
Can you make grilled cheese in the oven without butter?
Yes, olive oil works well and gives a nice crispy crust.
Grilled cheese in the oven is the easiest way to make a batch of sandwiches at once, with no skillet babysitting required. Bake them up on a sheet pan until melty and golden brown!
Spread butter on two slices of bread. Place one slice on the baking sheet, butter side down. Top with the shredded cheddar and mozzarella cheeses. Add another slice of bread on top, butter side up. Repeat for the other sandwiches (you can cook as many at a time as fit on sheet pans in your oven).
Bake 6 minutes, then flip and cook another 6 minutes. If not yet browned, alternate sides for 1 minute at a time until browned.


 Pin Recipe