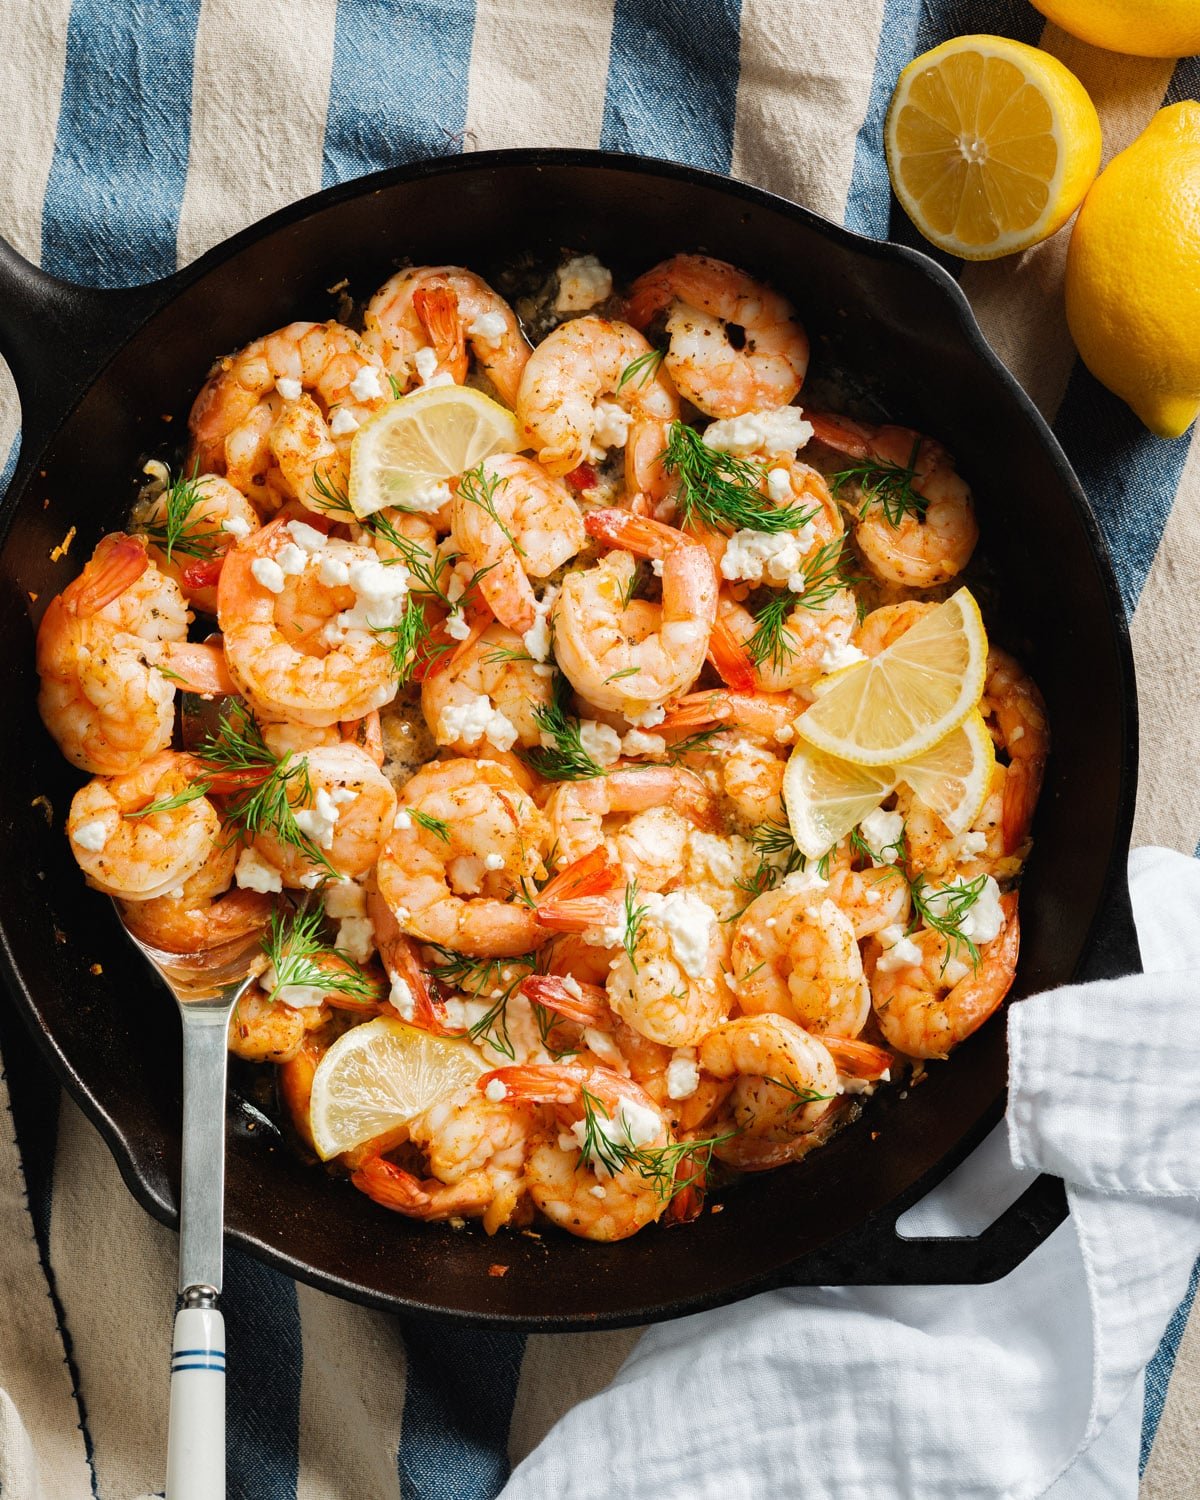
This easy Mediterranean shrimprecipe comes together in minutes in one skillet with garlic, feta, lemon and fresh dill. It’s a flavorful dinner that fits perfectly into a Mediterranean diet lifestyle!
There’s a specific kind of magic that happens when a short list of ingredients makes an actual delicious dinner in under 20 minutes. This is the magic of my new weeknight Mediterranean shrimp recipe!
If you’ve been around for a while, you’ll know that I’m currently writing a Mediterranean diet cookbook (my third!), so this way of eating is often on my mind. This recipe is the perfect Mediterranean diet dinner idea: all you have to do is sauté garlic and shallot, then add the shrimp and feta and let the oven do its thing. Add a squeeze of lemon and fresh dill and it’s a true chef’s kiss!
Ingredients You’ll Need
This recipe keeps the ingredient list focused, and every item earns its place:
Shrimp: I use 1½ pounds, deveined, tail on or off. I usually like using tail on because it looks the best, but tail off is easier to eat.
Garlic and shallot: It’s absolutely worth mincing and sautéing these two aromatic vegetables, and they take only 30 seconds to sauté.
Dried oregano and smoked paprika: These add delicious depth to the recipe (the latter is my secret weapon: see my smoked paprika recipes).
Red pepper flakes: Optional, but just a pinch gives a nice complexity without being spicy.
Feta cheese: The cheese softens slightly in the oven, similar to my baked feta salmon pasta.
Lemon: This adds a bright finish that ties everything together!
Fresh dill: I like adding torn sprigs across the top. I’m obsessed with dill!
How to Make Mediterranean Shrimp
The technique here is a quick stovetop-to-oven method. What’s nice about this method is while I love to make sauteed shrimp, it does require a bit of finesse to make sure they come out perfect and not overcooked. The baked method is also easier to cook a larger amount of shrimp at once! Here’s what to do:
1. Start your aromatics. Preheat the oven to 400°F. Warm a very large cast iron skillet over medium heat, then add the olive oil, minced garlic, and shallot and sauté for 30 seconds.
2. Season the shrimp. Turn off the heat and add the shrimp to the skillet along with the spices and salt. Stir, then scatter the feta crumbles over the top.
3. Bake. Transfer the pan to the oven and bake for 7 to 10 minutes, until the shrimp are pink and opaque. Start checking early: the size of the shrimp makes the exact timing vary.
4. Finish and serve. Carefully remove the skillet from the oven. Garnish with lemon juice, lemon zest and fresh dill and serve immediately.
A Few Tips
Don’t skip patting the shrimp dry. Wet shrimp release steam in the oven and can come out with a rubbery texture.
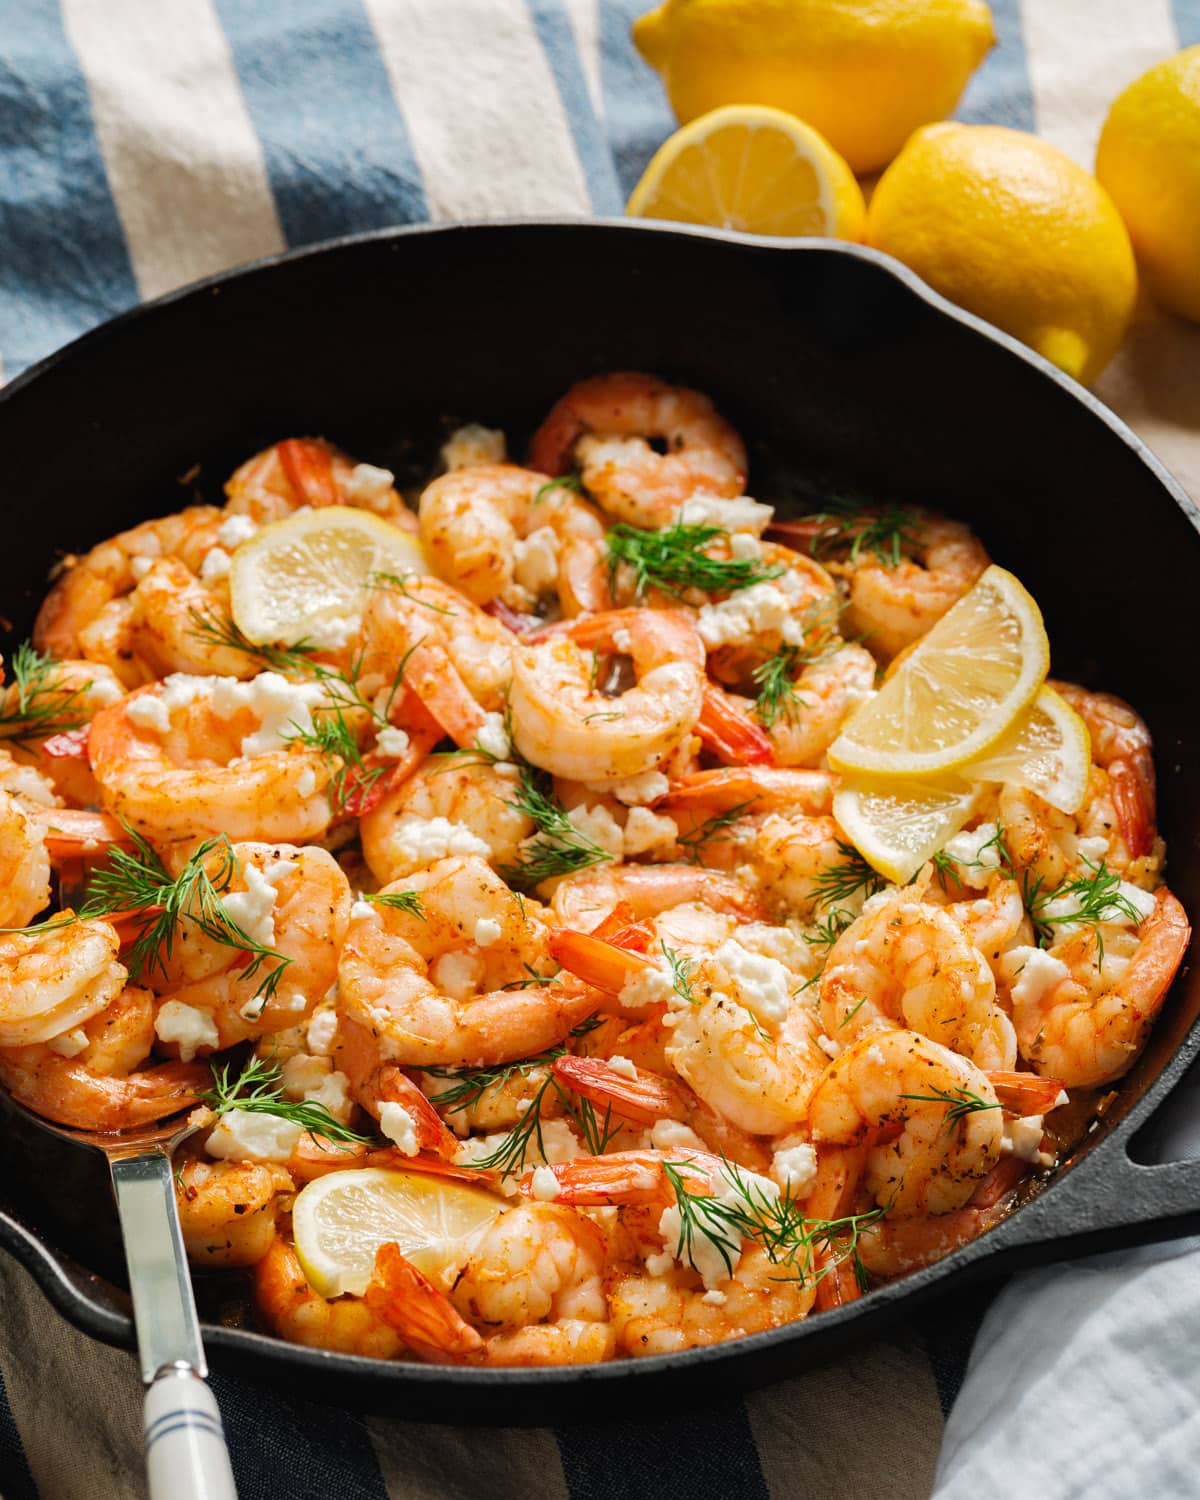
Use a very large oven-proof skillet: cast iron is great if you have it! I have a 12-inch cast iron skillet which is shown in these photos.
Watch the clock. At 400°F, shrimp are fully cooked in 7 to 10 minutes. Start checking early: it should be opaque with a slight curl, If you see a tight curl the shrimp are overcooked!
Fresh dill is non-negotiable. I adds just the right herby hit. If you can’t find fresh dill, finely chopped fresh parsley works (and is cheaper).
What to Serve Alongside
To keep this as an easy weeknight dinner idea, I like adding a super fast side dish like orzo or couscous: but there are lots of options!
This shrimp recipe is best eaten the day it’s made. Honestly, shrimp don’t reheat quite like other proteins: they can get rubbery and be less appealing on day 2. However, leftovers do last up to 2 days refrigerated.
Every time I make this, I eat all the shrimp: so I have yet to have leftovers!
Dietary Notes
This Mediterranean shrimp recipe is pescatarian and gluten-free, and fits the Mediterranean diet. For dairy-free, omit the feta and add a few more pinches salt.
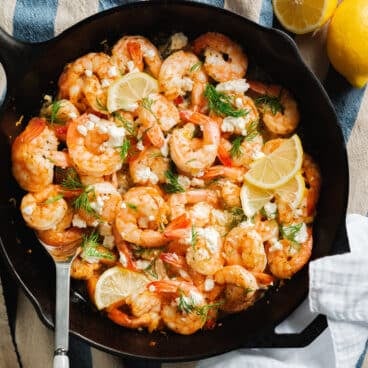
This easy Mediterranean shrimp recipe comes together in minutes in one skillet with garlic, feta, lemon and fresh dill. It’s a flavorful dinner that fits perfectly into a Mediterranean diet lifestyle!
½ lemon, juice and zest, plus lemon wedges for garnish
1 large handful fresh dill
Instructions
Preheat the oven to 400°F (200°C).
Pat the shrimp dry.
Preheat a very large cast iron skillet over medium heat. Add the olive oil, garlic and shallot and saute for 30 seconds, stirring constantly, until fragrant. Turn off the heat, add the shrimp, oregano, smoked paprika, red pepper flakes (if using), and kosher salt and stir. Top with crumbled feta cheese.
Place the pan in the oven and bake until the shrimp are pink and opaque, 7 to 10 minutes.
Carefully remove from the oven, spritz with the juice from ½ lemon, and top with lemon zest and torn fresh dill. Serve immediately (see below for leftover information).
Notes
Leftovers: This shrimp recipe is best eaten the day it’s made. Honestly, shrimp don’t reheat quite like other proteins: they can get rubbery and be less appealing on day 2. However, leftovers do last up to 2 days refrigerated.
Dairy free: This recipe also works without the feta; simply add a few more pinches salt.
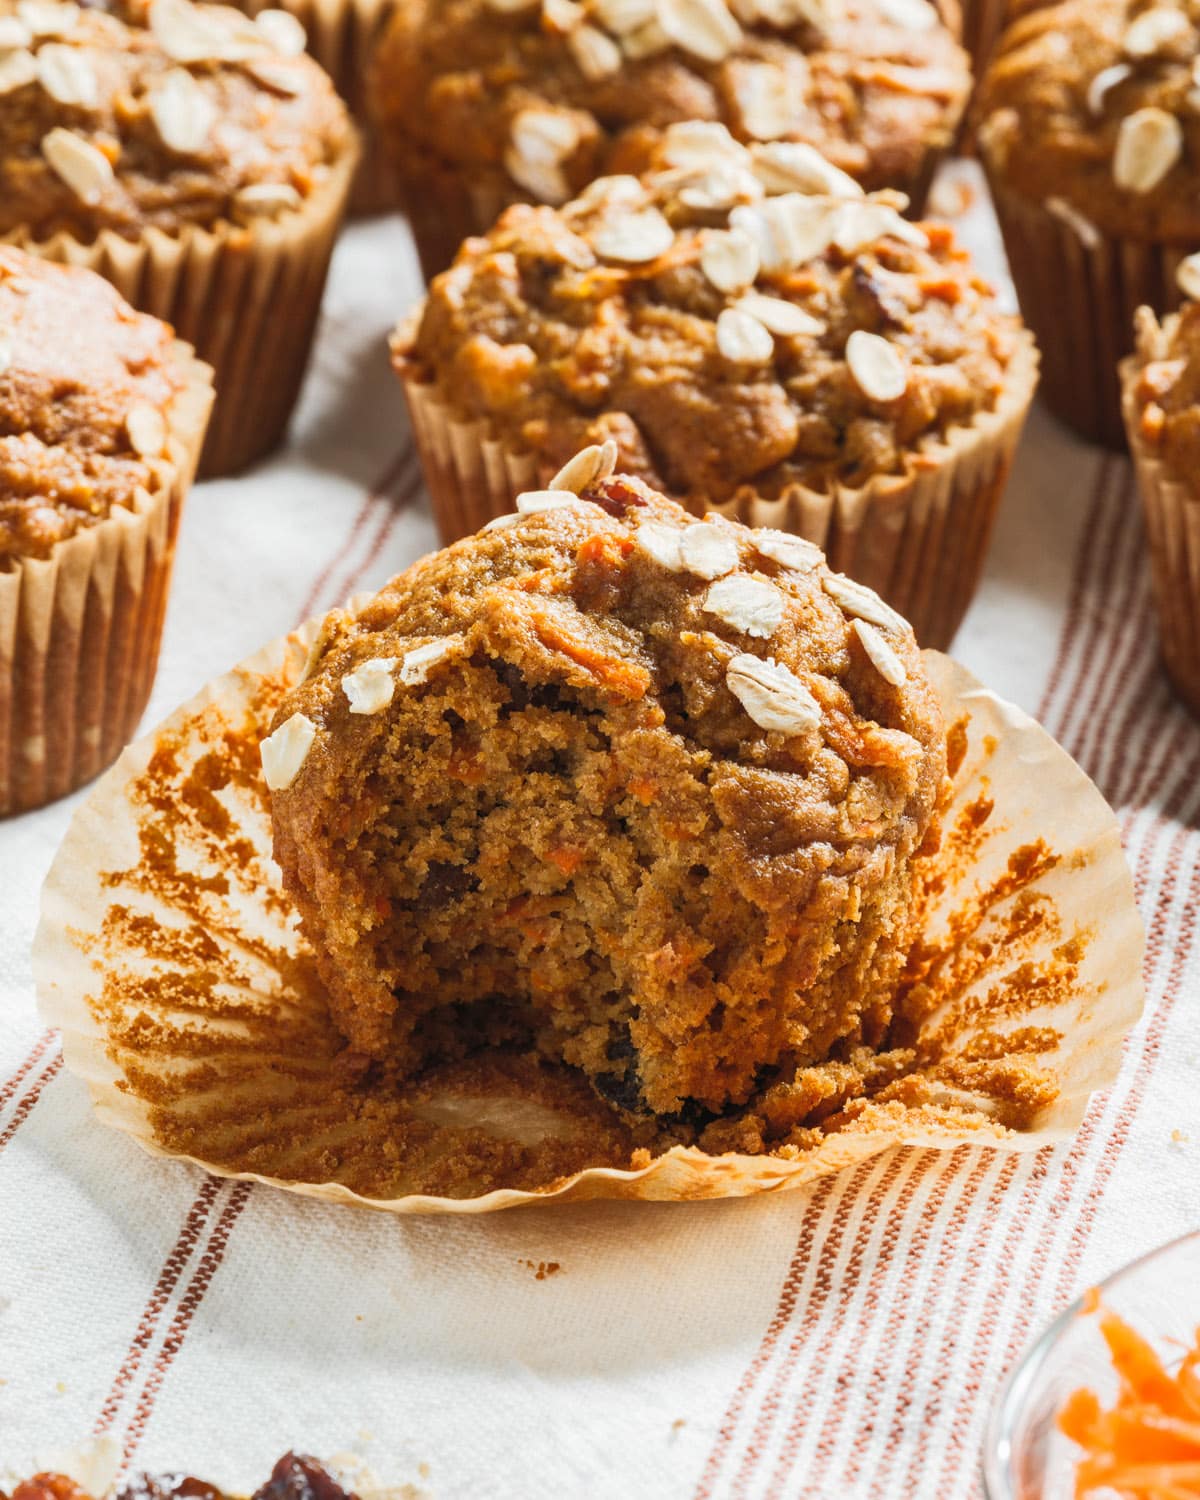
These healthy carrot cake muffins are made in a blender with rolled oats, apple, carrots, and maple syrup: no flour, just cozy wholesome flavor! They’re naturally gluten-free and perfect to meal prep for healthy breakfast and snacks.
A reader recently told me, “I love your healthy oatmeal muffins and I make them every week!” It inspired me to make a new flavor, and it turned out that this one is might be my new favorite: healthy carrot cake muffins!
The warm spices combined with sweet pops from raisins and moisture from the carrots makes them absolutely irresistible! This version of my muffins also uses a real, whole apple, skin and all, which adds natural sweetness, moisture, and body without needing added dairy or banana. Like all my healthy muffins recipes, these carrot muffins have no flour at all: just oats whizzed up in a blender! I cannot wait for you to taste this magic.
Why You’ll Love These Healthy Carrot Cake Muffins
These muffins hit a sweet spot: they taste delicious and every ingredient is doing real nutritional work. There’s no all-purpose flour, no refined sugar, and no dairy, but the texture is moist and the flavor is spiced and satisfying. Here’s why I think you’ll love them:
Blender-easy: They’re made in a blender: no bowls, no sifting, no stand mixer.
Naturally gluten-free and naturally sweet: Oats become oat flour in the blender, and they’re sweetened with only fruit and maple syrup! It’s truly magical.
Cozy delicious flavor: These are so delicious, but you don’t have a sugar crash afterwards like a normal muffin.
Meal-prep friendly: They keep up to 10 days refrigerated and freeze well.
Key Ingredients You’ll Need
Old-fashioned rolled oats: Blending oats on high speed transforms them into a fine oat flour. Don’t substitute other types of oats (though you could substitute quick oats in a pinch).
Fresh apple: One medium apple blended with the oats and eggs adds natural pectin, subtle sweetness, and body. I always use Pink Lady apples for their sweet tart flavor, but Honey Crisp or something similar works too.
Shredded carrots: Use the large holes on a box grater. Carrots get folded in after blending so you can see the texture. (If you’ve made my carrot cake cupcakes or carrot cake cookies, you know how much texture those shreds add.)
Pure maple syrup: I always reach for Grade A: Dark Color and Robust Flavor for the deepest maple taste.
Eggs: These form the binder and structure of the muffin: do not leave them out!
Warming spices (cinnamon, ginger, nutmeg): This trio replicates the flavor profile of carrot cake.
Raisins: These add little pockets of sweetness throughout. Chopped walnuts or pecans also work as mix-ins if you prefer some crunch.
Tips for Perfect Healthy Carrot Cake Muffins
The healthy blender muffin concept is a bit different than a standard muffin, so are a few things make a consistent difference:
Let the batter rest. After blending, let the batter sit for 5 minutes. This lets the oats hydrate and the batter thickens slightly before pouring into the muffin cups.
Grate your carrots while you wait. The 5-minute rest is the perfect window. I use the large holes on a box grater so that you can see the carrot shreds (though you can grate smaller if preferred).
Fill the cups generously. This recipe makes 10 tall muffins (or 12 shorter ones). I fill the cups almost to the rim for that bakery-style dome.
Cool before tasting. The spices intensify as the muffins cool and the texture solidifies. If you taste one warm from the oven, the flavor will seem mild.
Variations and Mix-Ins
Of course, you can change up the mix ins here: especially if you love nuts in your carrot cake! Here are a few ideas:
Add nuts: Fold in ½ cup chopped walnuts or pecans.
Swap the raisins: Dried cranberries or chopped dates work well here.
Make it banana oat: Swap the apple for one ripe banana: it lends a different flavor but the same moist, blended texture (like in my healthy banana muffins).
Add “frosting”: If you’re trying to keep these healthy, you could try my “Greek yogurt cream cheese frosting”– see my Carrot Cake Baked Oatmeal.
Ways to Serve Them
Here are a few ways I like to serve these muffins:
Breakfast: Warmed with a smear of almond butter
Lunchbox: My kids get one every day.
Afternoon snack: Eat as-is, straight from the fridge.
With yogurt: For a more substantial meal, add lightly sweetened Greek yogurt alongside
Store leftovers in an airtight container in the refrigerator for up to 10 days: they actually get better after a day or two as the flavors settle.
For longer storage, you can freeze the cooled muffins in a zip-top bag for up to 3 months. Thaw overnight in the fridge or microwave straight from frozen.
Dietary Notes
These healthy carrot cake muffins are vegetarian and gluten free (with certified gluten free oats).
These healthy carrot cake muffins are made in a blender with rolled oats, apple, carrots, and maple syrup: no flour, just cozy wholesome flavor! They’re naturally gluten-free and perfect to meal prep for healthy breakfast and snacks.
To the blender, add the apples, eggs, oats, olive oil, maple syrup, baking soda, baking powder, vanilla, cinnamon, ginger, nutmeg, and kosher salt. Blend everything on high for a minute or two until a smooth batter forms.
Allow to sit for 5 minutes (I use this time to grate the carrots), then fold in grated carrots and raisins.
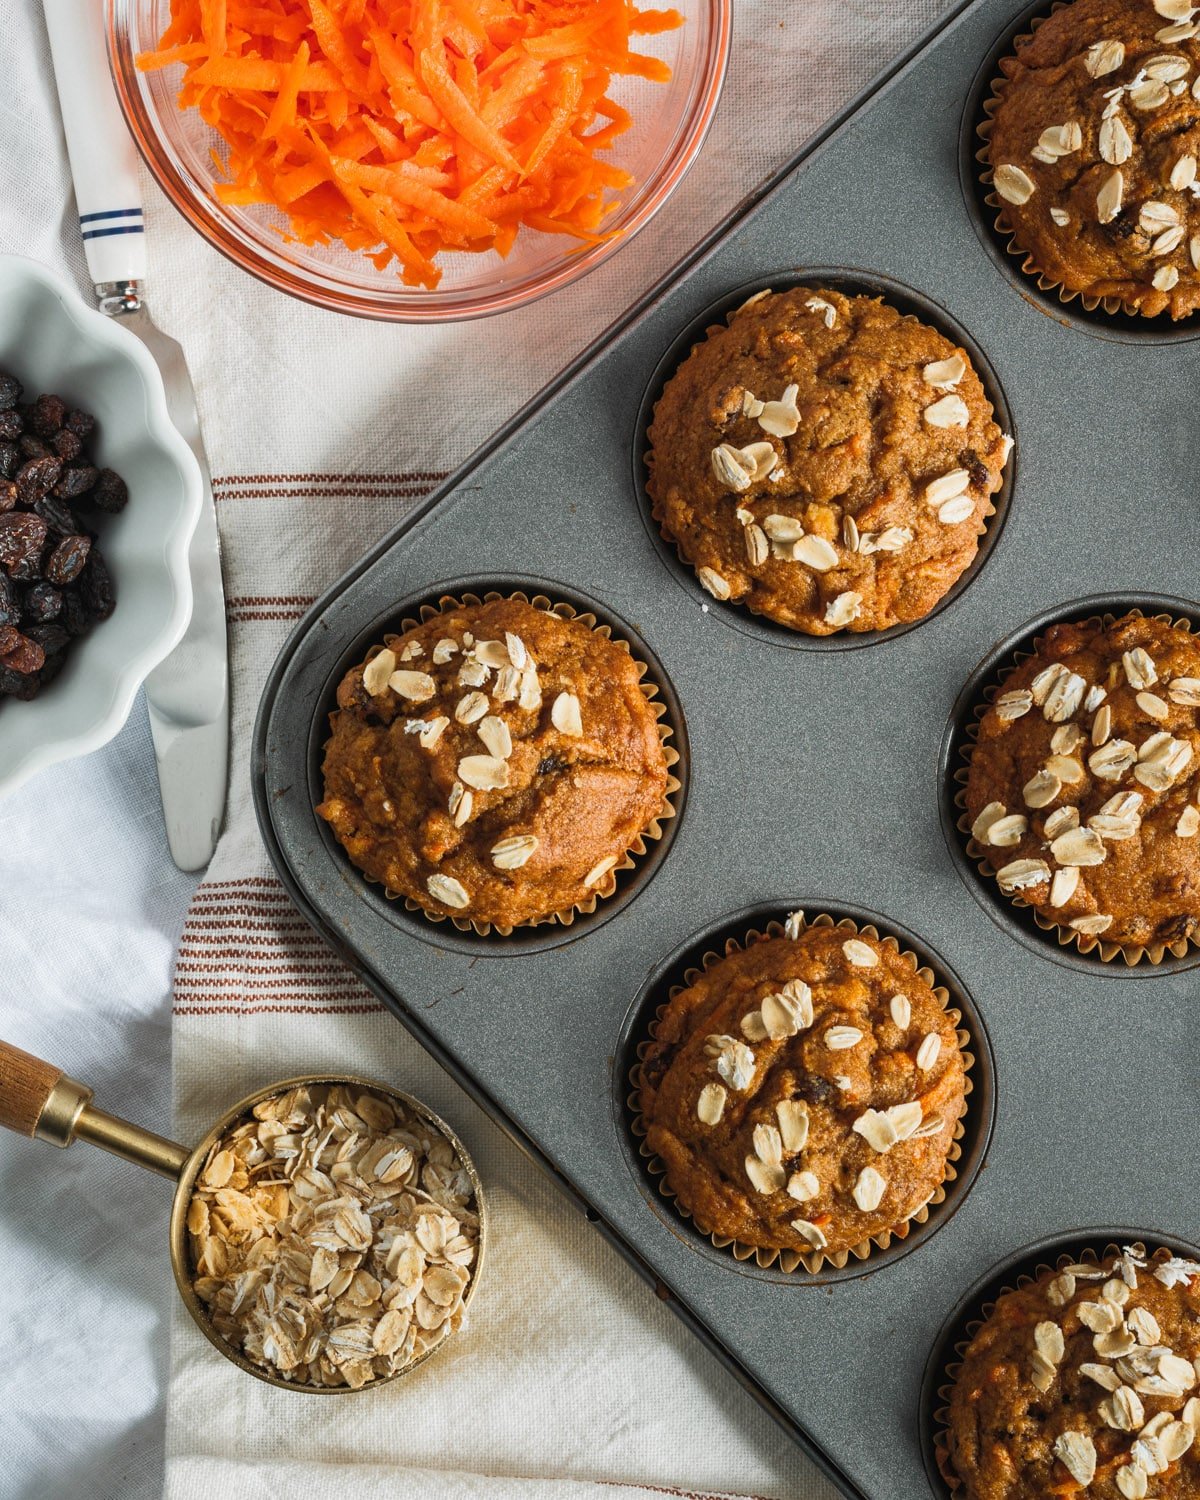
Place 10 muffin cups into a muffin tin and pour the batter divided evenly between the cups (see Notes). Sprinkle tops with a few oats.
Bake for 28 to 30 minutes until a toothpick comes out clean. Remove from the muffin tin and allow them to cool a few minutes before serving. Store refrigerated for up to 10 days or frozen for up to 3 months.
Notes
Muffin size: You can also make 12 shorter muffins, but I like to make them tall. If you make 12 start checking the bake time earlier, around 25 minutes.
Maple syrup: I always use syrup labeled Grade A: Dark Color Robust Taste. I find it adds the most nuanced flavor.
This stuffed salmon recipe is a simple weeknight dinner ready in 30 minutes that’s impressive every single time! Flaky, pan-seared salmon pockets are filled with a creamy, savory spinach artichoke filling.
Looking for a dinner recipe that’s easy and impressive? Try my spinach artichoke stuffed salmon recipe! It’s got a creamy, savory filling flavored like everyone’s favorite dip to contrast to flaky, tender salmon.
Honestly, this might be one of my favorite salmon recipes because it’s so simple and tastes restaurant-style. When I made this for Alex’s mom recently, she immediately asked for the recipe!
What You’ll Need for Stuffed Salmon
Salmon can be stuffed with just about anything, from cheese to crab. My favorite stuffing is based my absolute favorite party dip: this spinach artichoke dip. Slice a thin cut into a thick fillet of salmon, then stuff it with cream cheese, Parmesan, spinach, artichoke, and spices. The way the creamy filling accents the flaky fish makes it impossible not to immediately want another bite. Here’s what you’ll need for this recipe:
Thick salmon fillets: Try to find center-cut, about 2 inches thick, skin on and wild caught if possible
Frozen spinach: Frozen is actually best here, just like the dip.
Cream cheese: Soften it so it mixes smoothly with the other filling ingredients
Canned artichoke hearts: These add deliciously tangy flavor
Parmesan cheese: A little goes a long way for depth in flavor
Garlic powder and dried dill: The seasonings that tie everything together
Lemon zest: Optional but highly recommended; it brightens the whole dish
Butter or ghee: For searing the salmon to a perfect golden crust (substitute olive oil if desired)
Selecting The Best Salmon
The quality of salmon you can find at the store varies greatly. Lower quality salmon can taste very fishy and have a mushy texture, or have a lot of white stuff (called albumin) when it’s cooked. It’s also important to have thick pieces of salmon for this stuffed salmon recipe: otherwise it will be too thin to stuff. Here’s what to know when shopping:
2-inch thick fillets are handy for this recipe; you might find it labeled center cut at the store. Avoid very thin fillets for this recipe: they won’t be thick enough to stuff.
Buy fresh salmon. Salmon that’s fresh from the fish counter usually has the best flavor. Frozen can work, but try to find highest-quality frozen salmon: avoid those big economy-sized bags (we’ve found this type can be thinner and taste very fishy).
Look for wild caught salmon. Fish that is wild caught in your country is usually a sustainable choice. (There are also quality options in well-regulated farms; see Seafood Watch Consumer Guide.)
Tips for Perfect Stuffed Salmon
This stuffed salmon recipe comes together easily, but it does require a bit of technique for the pan frying. One of our top tips: invest in a food thermometer, which will help you cook the salmon to the perfect doneness. Here are a few particulars:
Allow the salmon to come to room temperature before cooking. If the fish is too cold when you start, the fillet can end up cooked on the outside but raw on the inside.
Use a sharp knife to slice a pocket into the salmon fillet. Then stuff the pocket with the spinach artichoke stuffing (you’ll have a little left over, which you can eat off a spoon or use for dipping pita chips!).
Give the fillets a quick sear on high heat on the stovetop. This ensures a nice browned exterior.
Bake until 125 to 130°F at the thickest point, about 6 to 8 minutes. Measuring with a food thermometer is the best way to assess doneness of a piece of salmon.
Pro Tip: A fish spatula is the one tool that makes flipping stuffed salmon so much less stressful. Its wide, thin blade slides cleanly under the fish without disturbing the filling.
Make It A Meal
This stuffed salmon recipe comes together easily: but it’s still helpful to have a few very simple side dishes to serve with it. This way, you can whip them up in the hands-off times and still have a meal together in about 30 minutes. Here are a few easy sides for salmon:
This stuffed salmon recipe is a simple weeknight dinner ready in 30 minutes that’s impressive every single time! Flaky, pan-seared salmon pockets are filled with a creamy, savory spinach artichoke filling.
Preheat the oven to 350°F. Place the salmon on a plate on the counter and allow it to come to room temperature before cooking, about 15 to 20 minutes (this is about the time it takes for the oven to preheat)
Meanwhile, make the filling: Thaw the frozen spinach and squeeze it to remove all extra liquid, then use your fingers to break it into rough crumbles. In a small bowl, stir together the spinach with the cream cheese, artichokes, garlic powder, dried dill, kosher salt , Parmesan cheese and lemon zest.
Pat the salmon dry with a clean towel. Sprinkle it with the kosher salt and a few grinds of fresh ground pepper. Using a sharp knife, slice a pocket across the center of the salmon. Spoon the filling into the salmon pockets, stuffing it as full as possible. (There will be some filling left over, which you can save or discard.)
Heat a large, oven proof skillet over medium high heat and add the butter or ghee. When butter is melted, add the salmon skin side up and cook for 2 to 3 minutes until nicely seared.
Flip the salmon (a fish spatula makes easy work of it). Tilt the pan down slightly and quickly spoon the pan juices over the top of the fish a few times. Transfer to the oven and cook 6 to 8 minutes, depending on the thickness, until just tender and pink at the center (the internal temperature should be between 125 to 130°F in the center).
Remove from the heat. Spritz with juice from a few lemon wedges and serve immediately.
Notes
*2-inch thick fillets are handy for this recipe; you might find it labeled center cut. Avoid very thin fillets for this recipe: they won’t be thick enough to stuff.
Here are the best strawberry cocktails I’ve tested, from frozen daiquiris to zingy margaritas! They’re packed with pure berry flavor using both fresh and frozen berries.
There’s nothing better than the pop of vibrant, fruity flavor from a ripe strawberry. When it’s the season, Alex and I want to make everything with this bright red ripe berry, cocktails included.
Turns out, strawberries have a versatile flavor that goes with just about any liquor: from rum to tequila, vodka, and champagne! As a cocktail expert with over 300 cocktail recipes in our library, I’ve reviewed all my recipes and these are my top favorite strawberry cocktails and alcoholic drinks.
This is the strawberry cocktail I make the most often! The berries give you a slushy drink with a brilliant color and sweet-tart balance of lime and tequila. It comes together in a blender in five minutes, and it doubles (or triples) easily for a crowd. (Check out my classic margarita recipe if you want to compare it to the original.)
The strawberry daiquiri might be the most iconic strawberry cocktail ever invented! My homemade version beats anything you'd get from a mix. Pure berry flavor, just enough rum, a squeeze of lime, and a touch of sweetener. For a non-alcoholic version try my Virgin Strawberry Daiquiri.
What’s better than a mojito? A strawberry mojito! The classic is one of our top greatest cocktails of all time, and I think it's even tastier with fresh berries in the mix! The sweet tart flavor of ripe strawberries only improves this classic.
When I need a pitcher cocktail for a party, this is the one I reach for! It's made Spanish-style with dry rosé, fresh strawberries, and a splash of sparkling water at serving, The flavor is delicately fruity and just sweet enough.
When it comes to classic cocktails, usually the original is the best. But this strawberry mimosa cocktail might be even better! Blending fresh strawberries with the orange juice adds fruity berry notes to the flavor palate. It’s a fun brunch cocktail that makes any occasion more festive.
This strawberry vodka cocktail is my go-to when I want something refreshing that comes together simply. A quick homemade strawberry syrup, lime juice, and a splash of sparkling water make for a drink that's bright, bubbly, and just sweet enough.
The peppery notes of fresh basil against sweet ripe berries is a pairing that makes a classic gin and tonic that much more fun! It's bubbly, light, and just sweet enough: perfect for sipping by the pool or grill.
Try my bubbly and fruity Vodka Spritzer! It’s sweet tart with a subtle berry flavor: tangy, refreshing and sparkling all at once. It makes for the most satisfying party drink that you won’t want to end.
Frosé is a mashup between a frozen cocktail and that quintessential wine (aka Frozen Rosé)! It's just sweet enough, starring the beautiful character of the rosé wine. Blend it with strawberries for a beautiful color and light sweetness. This one's a fan favorite!
Try a pitcher of homemade strawberry lemonade! This drink is bright and beautiful, citrusy with a hit of berry on the finish. This bright pitcher is a favorite of ours as a summery drink. Spike it by the glass by adding vodka or gin to the mix.
Tips for the Best Strawberry Cocktails
Fresh vs. frozen strawberries: I prefer frozen for blended drinks like daiquiris and margaritas; they add chill and texture without watering down the flavor. Fresh berries are better for drinks that are muddled.
Sweetener options: Most of these recipes call for simple syrup, but you can also make homemade strawberry syrup to intensify the flavors even more.
Batch it for a crowd: The margarita, sangria, and spiked lemonade all scale up easily for a party. Instructions are in each recipe.
More Strawberry Drinks to Try
Want more drinks with berries? The strawberry is by far the most popular fruit in smoothie recipes, and there are so many ways to use it in different beverages. Here are a few more strawberry drinks to try:
Strawberries pair beautifully with a variety of liquors! Lighter options like vodka, tequila, and white rum create refreshing drinks. Gin adds herbal notes. Sparkling wine or champagne add a festive touch.
Do I need fresh or frozen strawberries for cocktails?
Both can work! Fresh strawberries offer the best flavor, but frozen strawberries can be a convenient option and are used in drinks like the strawberry daiquiri and strawberry margarita.
Are there any non-alcoholic strawberry cocktails?
Blend fresh or frozen strawberries with sparkling water, club soda, or even coconut water for a refreshing mocktail. Muddling strawberries with fresh herbs like mint or basil creates a unique and flavorful non-alcoholic drink. Or, try our virgin strawberry daiquiri!


 Pro Tip: A fish spatula is the one tool that makes flipping stuffed salmon so much less stressful. Its wide, thin blade slides cleanly under the fish without disturbing the filling.


